
Django installs in one command. Really. But the command alone isn't what trips people up — it's the mess around it: wrong Python version, missing pip, a package installed globally that fights with three other projects on the same machine.
So here's the short version, then the details.
Quick answer: how to install Django
To install Django, first make sure Python and pip are installed, then create a virtual environment and run pip install django. After installation, verify it with django-admin --version. This method works on Ubuntu, Windows, and macOS because it avoids package conflicts and keeps your Django project isolated.
python3 -m venv venv
source venv/bin/activate
pip install django
django-admin --version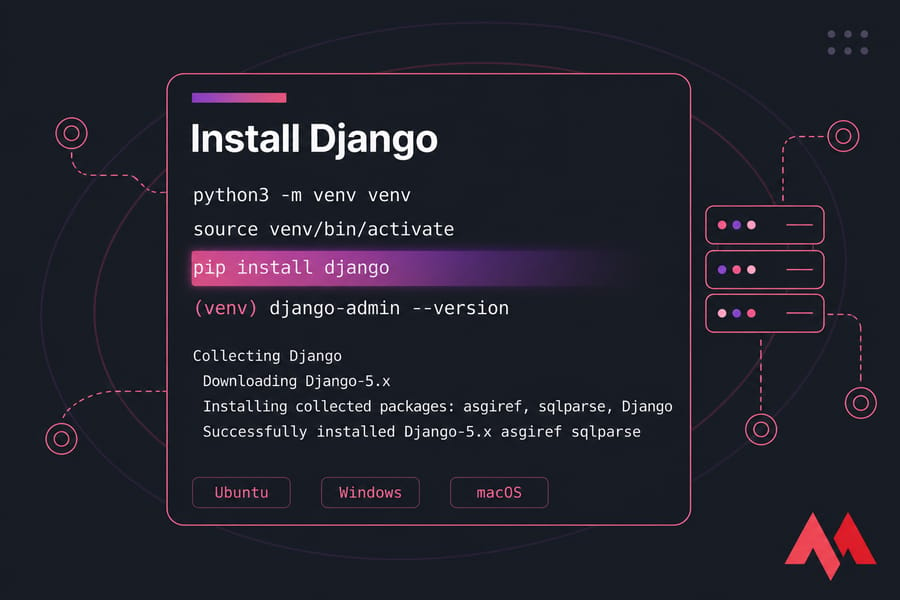
That's the whole Django installation in four lines. Now let's make sure it actually works on your machine — and doesn't blow up later.
What you need before a Django installation
Django is a Python web framework. It's not a standalone program you download from a website. It's a Python package, which means Python has to exist on your system first, and pip (Python's package manager) has to be able to fetch it.
Which Python version does Django need?
Stick to a currently supported Python 3 release. Django 5.x needs Python 3.10 or newer, and the general rule I follow is: use the newest Python that your project's other dependencies support. Python 3.10, 3.11, 3.12, or 3.13 are all safe bets right now.
Python 2 is dead. If you find a tutorial telling you to run pip install django==1.11, close the tab.
How to check if Python and pip are already installed
Open your terminal (or Command Prompt on Windows) and run these:
python3 --version
pip3 --version
On Windows, it's usually:
python --version
pip --version
You should see something like Python 3.12.3 and pip 24.0. If either command errors out, sort that first — here's how to check your Python version properly, and a walkthrough on how to install pip on Windows or Linux if it's missing.
Why a virtual environment is recommended
Here's the thing nobody tells beginners: installing Django globally works fine until it doesn't. Two projects, two different Django versions, one system Python — and now you're debugging import errors at midnight.
A virtual environment (venv) is a self-contained folder with its own Python interpreter and its own packages. Install Django inside it and nothing else on your system is affected. Delete the folder, and the install is gone. Clean.
Pro tip: create one virtual environment per Django project. Not per computer. Per project.
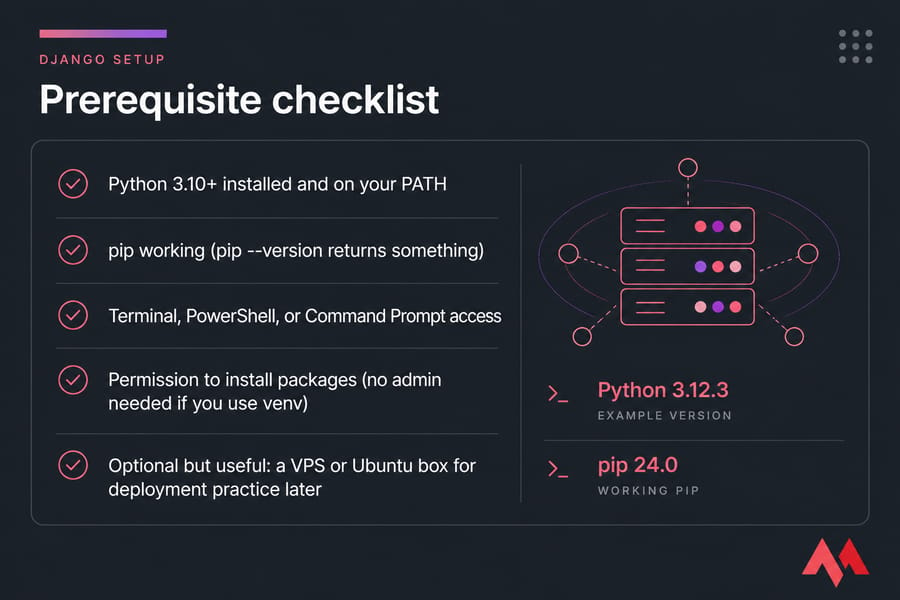
Your prerequisite checklist:
- Python 3.10+ installed and on your PATH
- pip working (
pip --versionreturns something) - Terminal, PowerShell, or Command Prompt access
- Permission to install packages (no admin needed if you use venv)
- Optional but useful: a VPS or Ubuntu box for deployment practice later
Once Python and pip are ready, you can install Django safely inside a virtual environment.
Install Django with pip in a virtual environment
This is the method I'd recommend to roughly 95% of readers. It's the same on every operating system apart from one activation command.
Step 1: Create a virtual environment with python -m venv
Navigate to the folder where you want your project to live, then run:
python3 -m venv venvThis creates a directory called venv containing an isolated Python. The second venv is just the folder name — call it env or .venv if you prefer. On Windows, use py -m venv venv instead.
Step 2: Activate the virtual environment
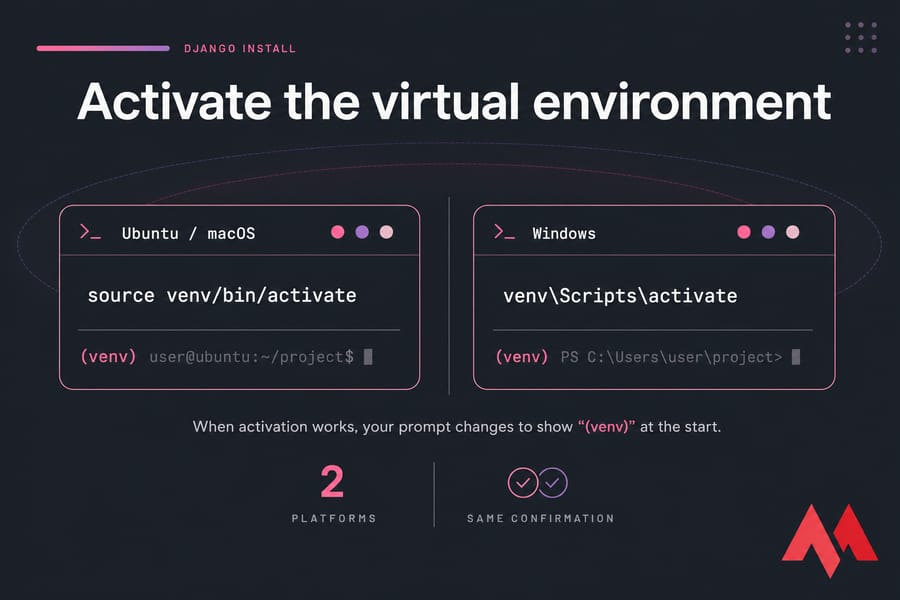
Activation tells your shell to use the venv's Python and pip instead of the system ones. The command differs by platform:
| Task | Ubuntu / macOS | Windows |
|---|---|---|
| Check Python | python3 --version |
py --version |
| Create venv | python3 -m venv venv |
py -m venv venv |
| Activate venv | source venv/bin/activate |
venv\Scripts\activate |
| Install Django | pip install django |
pip install django |
| Verify | django-admin --version |
django-admin --version |
| Deactivate | deactivate |
deactivate |
When activation works, your prompt changes to show (venv) at the start. That prefix is your confirmation. If you don't see it, you're not in the environment — and anything you install goes somewhere else.
Step 3: Run pip install django the right way
Upgrade pip first — it takes two seconds and prevents a surprising number of weird build errors:
python -m pip install --upgrade pipThen install Django:
pip install djangoThat pulls the latest stable release plus its dependencies (asgiref and sqlparse). Expected output ends with a line like Successfully installed Django-5.2.x asgiref-3.x sqlparse-0.5.x.
Need a specific version? Pin it:
pip install "Django==5.1.4"
pip install "Django>=5.0,<6.0"
That second form is what I use on real projects — it allows patch updates but blocks a surprise major version jump. If pip is misbehaving, it's worth taking a minute to check your pip version or run through how to upgrade the pip package.
If you're working on a server, the Ubuntu-specific steps below are the safest route.
How to install Django on Ubuntu
Ubuntu ships with Python 3 but not always with pip or venv. Fix that first.
Update packages and install Python3, pip, and venv
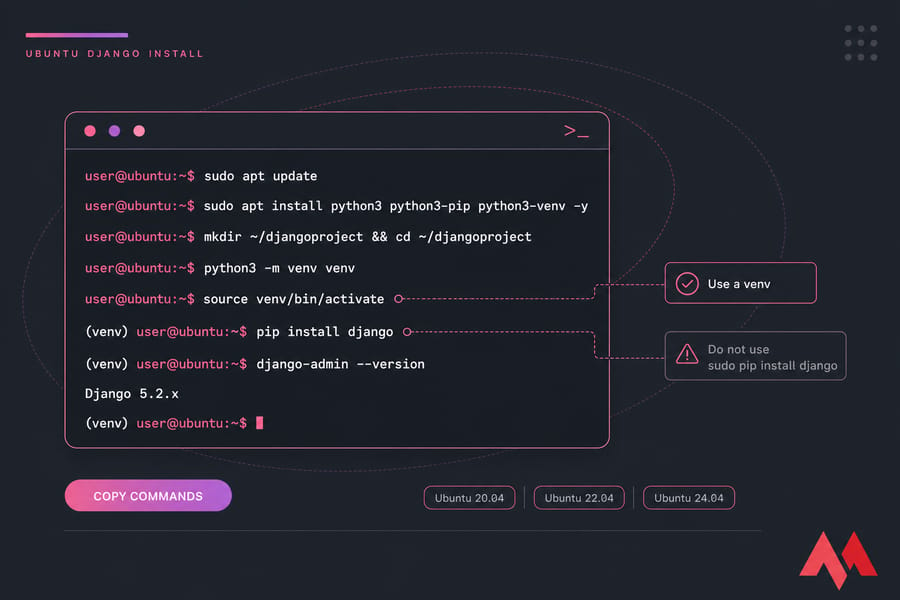
sudo apt update
sudo apt install python3 python3-pip python3-venv -y
sudo apt update refreshes the package index. The second line installs the interpreter, the package manager, and the venv module — that last one is separate on Debian/Ubuntu and catches people out constantly.
This works on Ubuntu 20.04, 22.04, and 24.04 LTS. On 24.04 you'll get Python 3.12 out of the box, which is plenty modern for Django 5. If Python is missing entirely on an older box, here's how to install Python on Ubuntu.
Install Django on Ubuntu with pip3
mkdir ~/djangoproject && cd ~/djangoproject
python3 -m venv venv
source venv/bin/activate
pip install django
Warning: don't run sudo pip install django into your system Python. On Ubuntu 23.04 and newer you'll hit an externally-managed-environment error anyway, which is Ubuntu protecting you from breaking apt-managed packages. Use a venv.
And skip sudo apt install python3-django unless you have a specific reason. The apt repo version lags behind the current release, sometimes by a year or more.
Ubuntu commands to verify the installation
django-admin --version
pip show django
pip show django gives you the version, install location, and dependencies — handy when you're not sure which environment you're actually in.
Testing on a remote box? An Ubuntu VPS gives you a clean, disposable environment for Django experiments — no risk to your laptop's Python. You'll also want Git installed on Ubuntu for pulling your code down.
If Ubuntu isn't your platform, use the Windows or macOS instructions next.
Install Django on Windows step by step
Check Python and pip in Command Prompt or PowerShell
Open Command Prompt or PowerShell (here's how to open Command Prompt if you're not sure) and run:
py --version
py -m pip --version
The py launcher is Windows-specific and more reliable than typing python, because it finds your installed Python even when PATH is a mess. If nothing comes back, you need to install Python on Windows first — and tick "Add Python to PATH" in the installer. Seriously, tick it. Most Windows Django headaches start with that unchecked box.
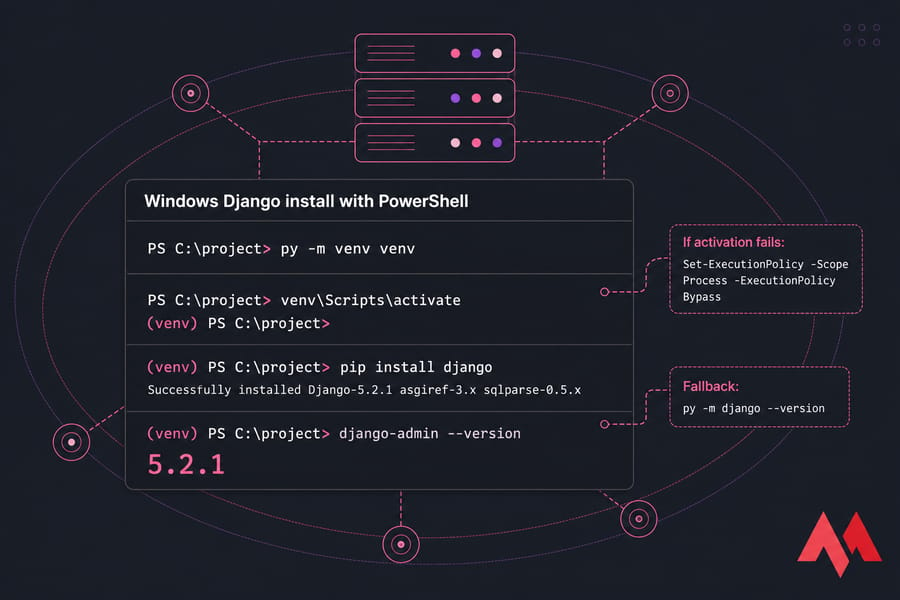
Create and activate a Windows virtual environment
py -m venv venv
venv\Scripts\activate
In PowerShell, activation may fail with a script execution policy error. Fix it for the current session only:
Set-ExecutionPolicy -Scope Process -ExecutionPolicy BypassThen activate again. Once you see (venv) in the prompt, install Django:
pip install django
django-admin --version
Fix "django-admin is not recognized" on Windows
This is the single most common Windows complaint. Nine times out of ten, one of these is true:
- The virtual environment isn't activated — no
(venv)prefix means nodjango-admin - You opened a new terminal window and forgot to re-activate
- Python's Scripts folder isn't on PATH (if you installed globally)
The universal workaround, which bypasses PATH entirely:
py -m django --versionThat calls Django as a module through the Python interpreter directly. If it prints a version number, Django is installed — your PATH just doesn't know where the executable lives.
Mac users can follow the similar Terminal-based process below.
How to install Django on macOS
macOS ships with a system Python, and you should leave it alone. Apple uses it for OS-level tooling, and messing with it causes strange problems that are annoying to unwind.
Open Terminal and check what you've got:
python3 --version
pip3 --version
If Python 3 is old or missing, install a current version via Homebrew (brew install python) or the official installer from python.org. Either is fine.
Then it's the standard four steps:
- Make a project folder:
mkdir ~/djangoapp && cd ~/djangoapp - Create the environment:
python3 -m venv venv - Activate it:
source venv/bin/activate - Install:
pip install django
Verify with django-admin --version. Note that inside an active venv, plain python and pip both point to the venv's copies — you don't need the 3 suffix anymore. That confuses a lot of Mac users, so don't panic when pip suddenly works.
After installation on any OS, the next step is verifying Django and creating a project.
Verify Django installation and check the Django version
Two commands, and you're done second-guessing.
Use django-admin --version
django-admin --versionExpected output is just a version string, nothing else:
5.2.1Use python -m django --version
python -m django --versionSame result, different path to it. This one works even when django-admin isn't on your PATH, which makes it the better diagnostic tool. If this succeeds and the first one fails, your install is fine — it's a PATH or activation issue.
Test with a sample project
The real proof is starting something. If django-admin startproject test1 creates a folder without errors, Django is installed correctly and callable. Delete the folder afterwards if you don't want it.
Key takeaway: if django-admin --version returns a number, your installation is complete. There's nothing else to configure.
Why bother checking the version at all? Because Django's LTS releases matter. Deployment guides, third-party packages, and Stack Overflow answers are all version-sensitive, and knowing whether you're on 4.2 LTS or 5.2 saves you an hour of confusion later.
Create your first Django project after installation
With the venv still active, run:
django-admin startproject mysite
cd mysite
python manage.py runserver
Then open http://127.0.0.1:8000/ in your browser. You should see Django's rocket launch page with "The install worked successfully! Congratulations!" That's the confirmation everyone actually wants.
You'll also see a warning about unapplied migrations in the terminal. Ignore it for now — it's expected on a fresh project, and python manage.py migrate clears it whenever you're ready.
Understand the default project files
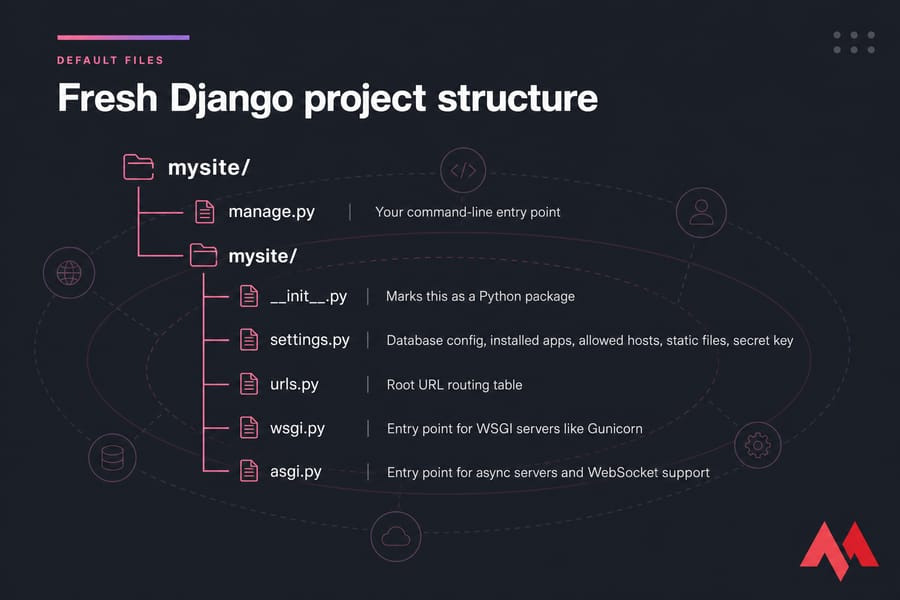
| File | What it does |
|---|---|
manage.py |
Your command-line entry point — runserver, migrate, createsuperuser, all of it |
mysite/settings.py |
Database config, installed apps, allowed hosts, static files, secret key |
mysite/urls.py |
Root URL routing table for the whole project |
mysite/wsgi.py |
Entry point for WSGI servers like Gunicorn in production |
mysite/asgi.py |
Entry point for async servers and WebSocket support |
One thing to lock in now: freeze your dependencies.
pip freeze > requirements.txtThat file lets anyone (including future you, on a server) rebuild the exact same environment with pip install -r requirements.txt. It's the bridge between your laptop and your VPS.
Pro tip: if django-admin gives you trouble, python -m django startproject mysite does exactly the same thing.
If the project runs locally, the next challenge is handling errors and preparing for deployment.
Common Django installation errors and how to fix them
Most people who land on a Django install guide arrive after something already broke. Let's fix it.
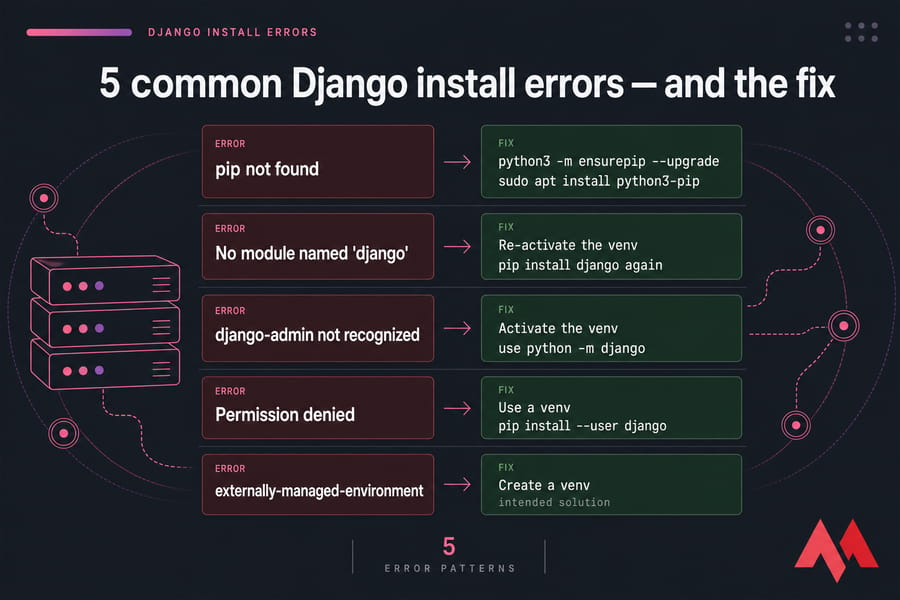
| Error | Likely cause | Fix |
|---|---|---|
pip: command not found |
pip not installed or not on PATH | Run python3 -m ensurepip --upgrade, or sudo apt install python3-pip on Ubuntu |
ModuleNotFoundError: No module named 'django' |
Installed into a different environment than the one you're running | Re-activate the venv, then pip install django again |
django-admin: command not found / not recognized |
venv inactive or Scripts/bin folder not on PATH | Activate the venv, or use python -m django |
Permission denied / Errno 13 |
Trying to write to system directories | Use a venv, or pip install --user django as a fallback |
error: externally-managed-environment |
Modern Debian/Ubuntu blocking system-wide pip installs | Create a venv — this is the intended solution, not --break-system-packages |
SSL: CERTIFICATE_VERIFY_FAILED |
Outdated certificates, common on macOS | Run the "Install Certificates.command" bundled with your Python install |
| Django installs but wrong version shows | Multiple Python installations on the machine | Always use python -m pip install django to bind pip to a known interpreter |
A few extra notes worth having.
The venv deactivation trap. Close your terminal, open a new one, and the venv is gone. Every new session needs source venv/bin/activate (or venv\Scripts\activate) again. This causes more "Django disappeared" reports than anything else.
When in doubt, use the module form. python -m pip install django and python -m django --version both tie the operation to whichever python your shell resolves. That removes an entire category of ambiguity.
For deeper dives, we've covered how to fix the pip command not found error, permission denied errors in Linux, and the unable to locate package error on Ubuntu that sometimes blocks the apt step.
Warning: django-admin not found almost always means your virtual environment isn't active or PATH is wrong. It rarely means the install failed.
Most of these errors happen when Django is installed globally, which is why the next section matters.
Virtual environment vs global Django install
| Factor | Virtual environment | Global install |
|---|---|---|
| Version conflicts | Impossible between projects | Guaranteed eventually |
| Permissions needed | None — user-owned folder | Often sudo/admin |
| Reproducibility | Clean requirements.txt per project |
Mixed with every other package on the box |
| Cleanup | Delete the folder, done | Manual uninstall, easy to leave leftovers |
| Setup effort | Two extra commands | None |
When a global install is acceptable
Honestly? Two situations. A throwaway container or VM that exists for one project and gets destroyed afterwards. And a quick five-minute experiment you'll never touch again. That's it.
Why venv is better for most users
Because projects outlive your intentions. That "quick test" becomes a client site, and now it's pinned to whatever Django version your system had eighteen months ago. Two commands up front prevent that entirely. I've never once regretted creating a virtual environment; I've regretted skipping one plenty of times.
How to uninstall Django safely
pip uninstall djangoRun it inside the environment you want to clean. To remove a venv completely, just delete its folder — rm -rf venv on Linux/macOS, or delete it in File Explorer on Windows. Nothing else on your system is touched.
If you're weighing Django against other options before committing, our guide on choosing the right backend framework is a reasonable detour.
Deploy Django on a VPS after local setup
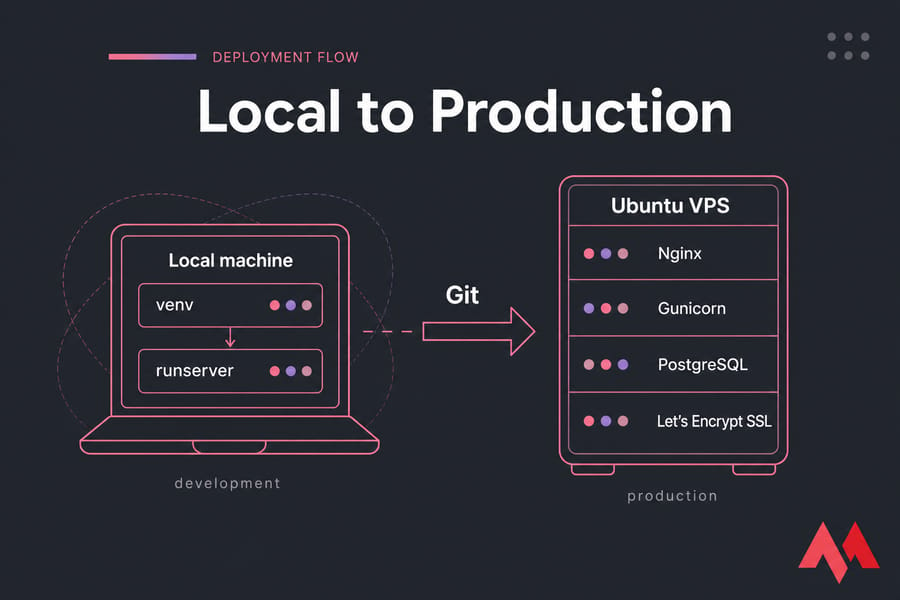
Your local runserver is a development tool. It's single-threaded, it doesn't serve static files efficiently, and Django's own docs say plainly not to use it in production. Real deployment needs a different stack.
Why an Ubuntu VPS is popular for Django projects
Ubuntu is the default assumption in almost every Django deployment tutorial you'll find. Package names match, Python 3 is current, and the community answers are written for it. On a VPS you get root access, which means you install exactly the Python version and system libraries your project needs — no shared-hosting restrictions getting in the way.
What to install next
- Git — pull your code onto the server instead of uploading files by hand
- Python + venv — same isolation practice, just on the server (installing Python on a VPS walks through it)
- Gunicorn — the WSGI application server that actually runs your Django code
- Nginx — reverse proxy and static file server sitting in front of Gunicorn (install Nginx on Ubuntu)
- PostgreSQL — SQLite is fine for development, not for production (install PostgreSQL)
- SSL via Let's Encrypt — free certificates, automatic renewal, no excuse to skip it
Before any of that, you'll need SSH access — here's how to connect to your VPS.
Ready to run Django on a clean Ubuntu VPS?
Once Django works locally, the next step is a stable server environment. MonoVM's Ubuntu VPS hosting gives you root access, NVMe SSD performance, and locations across 25+ regions so you can put your app near your users. Explore Ubuntu VPS plans and spin up a staging box in minutes.
When to choose a managed or developer-friendly VPS
If you're comfortable in a terminal, an unmanaged Linux VPS for developers gives you full control at the lowest cost. If server maintenance isn't how you want to spend your weekends, managed hosting solutions hand the OS updates, security patching, and monitoring to someone else. Either way, MonoVM support can help with the initial setup.
Quick summary
Install Python 3.10+. Create a virtual environment with python -m venv venv. Activate it. Run pip install django. Verify with django-admin --version. Scaffold with django-admin startproject mysite and launch with python manage.py runserver.
Six commands from nothing to a running Django site. When you're ready to put it in front of real users, get a Linux VPS and start building the production stack.

An experienced tech and developer blog writer, specializing in VPS hosting and server technologies. Fueled by a passion for innovation, I break down complex technical concepts into digestible content, simplifying tech for everyone.