A MikroTik VPS is just a virtual private server running RouterOS CHR — the Cloud Hosted Router edition of MikroTik's operating system. Here's the thing people get wrong: CHR isn't a Linux package you install with apt. It's a full RouterOS image built specifically for virtual machines, so the VPS supplies the virtual CPU, memory, storage, and network interfaces while RouterOS runs the show.
What Is a MikroTik with RouterOS CHR?
This MikroTik VPS setup gives you a cloud router that behaves almost exactly like a physical RouterBOARD minus the physical box in a rack somewhere. In my experience, that's precisely why so many admins reach for it
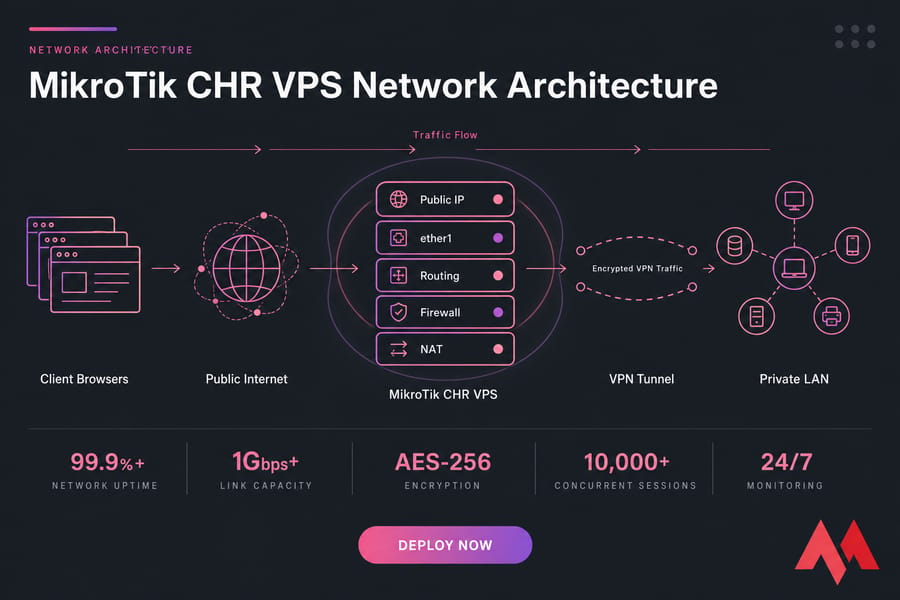
How Cloud Hosted Router works on a VPS
The MikroTik cloud hosted router boots as its own guest operating system on top of the hypervisor. It grabs the virtual NIC (usually ether1), you assign it the public IP, and from there it routes, filters, and tunnels traffic like any other RouterOS device. Common jobs? VPN gateway, firewall, NAT gateway, BGP edge router, and remote-access hub.
RouterOS CHR vs a physical MikroTik router
One detail that bites newcomers: the CHR license caps throughput. Even if your VPS has a 10 Gbps port, a lower license tier will throttle you. Check out the MikroTik CHR license levels guide before you assume port speed equals routing speed.
| Factor | CHR on VPS | Physical MikroTik |
|---|---|---|
| Hardware | Virtual, shared hypervisor | Dedicated RouterBOARD |
| Location | Any datacenter | Wherever you plug it in |
| Scaling | Resize the VM | Buy new hardware |
| Licensing | CHR Free/P1/P10/P-Unlimited | Included with device |
| Interfaces | Virtual NICs | Physical ports |
Before deployment, confirm the VPS can actually run the CHR image.
MikroTik CHR VPS Requirements
Not every VPS can boot RouterOS CHR. This part matters more than most tutorials admit.
Does CHR require KVM virtualization?
Yes — you want full virtualization, and how KVM virtualization works explains why. Container-based plans like OpenVZ share the host kernel, so they generally can't boot an independent CHR image. KVM (or QEMU) gives CHR its own kernel and virtual hardware. That's non-negotiable.
How much CPU, RAM, and storage does RouterOS need?
Technically CHR runs on 256 MB RAM and 128 MB disk. But don't build production on that. For real VPN or firewall work, give it breathing room.
| Use case | vCPU | RAM | Disk |
|---|---|---|---|
| Lab/testing | 1 | 256 MB | 1 GB |
| VPN gateway | 1–2 | 512 MB–1 GB | 2–5 GB |
| Firewall/NAT | 2 | 1 GB | 5 GB |
| BGP edge | 2+ | 1–2 GB | 5 GB |
Which network details must you collect from the provider?
Grab these before you touch anything: the public IPv4 address and CIDR prefix, the default gateway, DNS resolvers, and any MAC/interface binding rules. Some providers use anti-spoofing or fixed MAC addresses. And you'll need serial/VNC/web console access — that's your lifeline if a bad rule kills remote access.
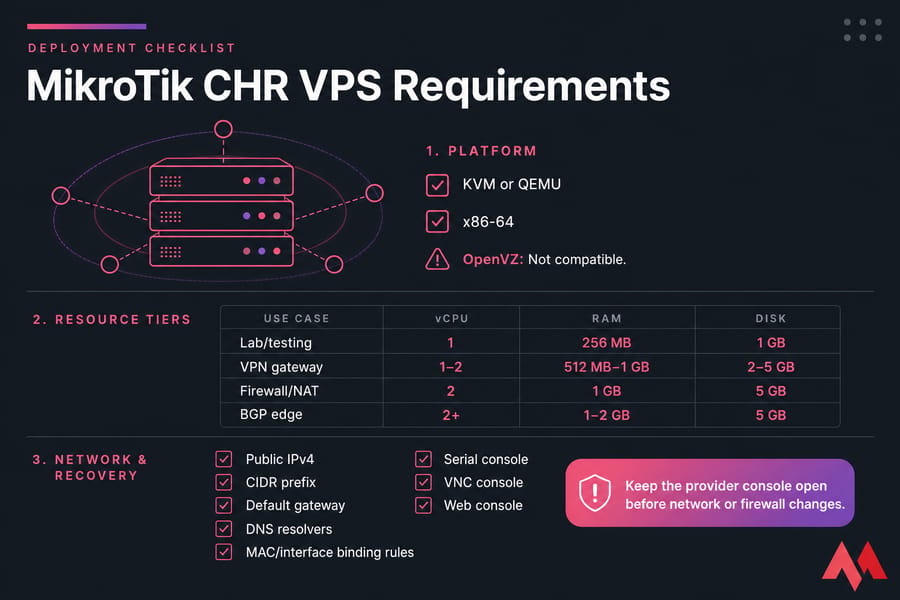
Pro tip: keep the provider console open before changing any network or firewall setting. One wrong route and you're locked out.
If your current provider doesn't support KVM, custom images, or console recovery, a preinstalled MikroTik VPS hosting plan removes the compatibility guesswork entirely. New to VPS access altogether? Here's how to connect to a VPS.
Choose a CHR License and Deployment Method
Two decisions here. Which license, and how you'll deploy the image.
| License | Throughput cap | Best for | Caution |
|---|---|---|---|
| Free | Limited per-interface | Testing, labs | Not for production speed |
| P1 | Higher | Small VPN/firewall | Verify current terms |
| P10 | Higher still | Busy gateways | Needs MikroTik account |
| P-Unlimited | No cap | Heavy routing/BGP | Priciest tier |
Verify current throughput limits and pricing against official MikroTik documentation — those figures shift, so I won't hard-code them here.
Deployment methods compared
| Method | Difficulty | Data risk | Recommended for |
|---|---|---|---|
| Preinstalled CHR | Easy | None | Most people |
| Custom image import | Medium | Low | Provider supports it |
| Hypervisor import | Medium | Low | Proxmox/VMware access |
| Rescue-mode disk write | Advanced | High | Last resort only |
My honest advice? Use preinstalled or custom-image deployment. The destructive disk-write route can wipe your VPS if you point it at the wrong disk. Choose a preinstalled MikroTik VPS if you want to skip image conversion and disk replacement.
Deploy RouterOS CHR on the VPS
These examples target RouterOS v7. Verify commands against the current stable release.
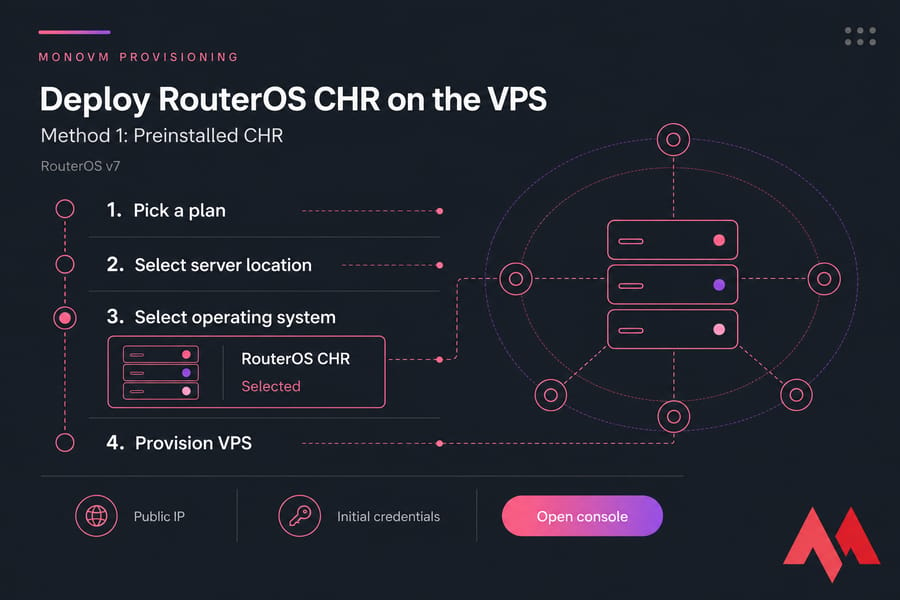
Method 1: Provision a preinstalled MikroTik VPS
- Pick a plan and server location.
- Select RouterOS CHR as the operating system.
- Provision and collect the public IP plus initial credentials.
- Open the console before making any changes.
Readers who don't want to overwrite a VPS disk can provision RouterOS CHR directly on a MikroTik VPS and jump straight to networking below.
Method 2: Import the CHR image through a custom-image panel
- Download the CHR image only from the official MikroTik site — never third-party mirrors.
- Choose RAW or QCOW2 depending on your provider's workflow.
- Attach the image to the VM disk.
- Set boot order and NIC model (usually virtio).
Method 3: Rescue-mode disk write (advanced, destructive)
Warning: this overwrites the system disk. Verify the target before writing. Back up everything first.
Download and unzip the RAW CHR image, then identify your disk:
lsblkDevice names vary — could be /dev/vda, /dev/sda, or an NVMe path. Verify the checksum where MikroTik provides one, then write the image only from the rescue environment. Never copy-paste a dd command aimed at a fixed disk. Sync and reboot when done.
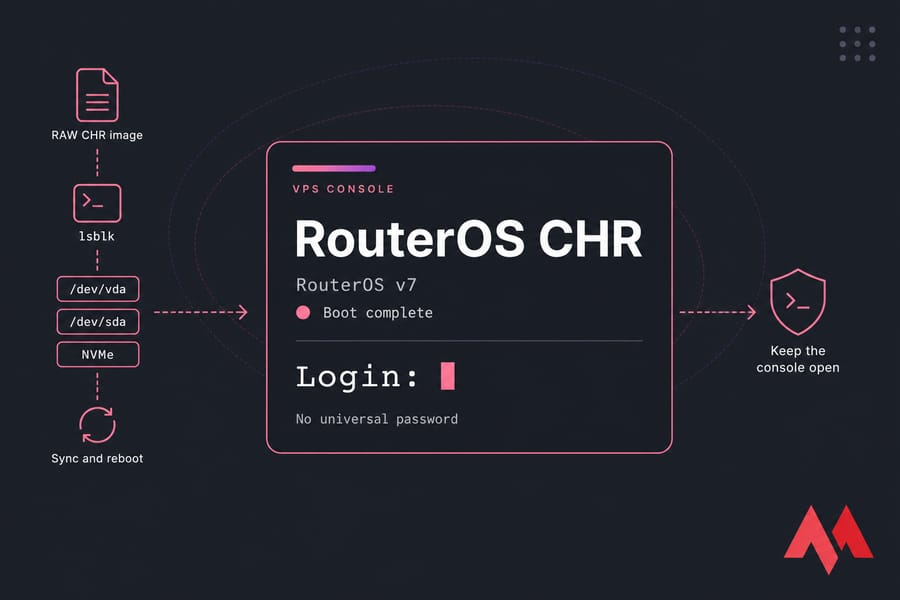
Need more disk later? RouterOS v7 supports resizing the virtual disk after the hypervisor expands it — confirm the current syntax in official docs. Once CHR boots, keep the console open and verify remote management access.
Connect to MikroTik CHR with WinBox or SSH
Here's a mistake I see constantly: people fire up WinBox's neighbor discovery expecting it to find a cloud CHR. It won't. MAC-based discovery doesn't cross the public internet. Connect by public IP.
| Tool | Port | Security requirement |
|---|---|---|
| WinBox | TCP 8291 | Restrict by source IP |
| SSH | TCP 22 | Keys preferred |
| WebFig | HTTPS 443 | Enable only when needed |
In WinBox, drop the public IP into the "Connect To" field with the username and password from your provider or initial setup. For SSH:
ssh admin@PUBLIC_IPDefault credentials vary by image and provider — there's no universal password, so don't trust any tutorial that promises one. Check your restrict or change the WinBox port guide once you're in. Change credentials immediately, and use RouterOS Safe Mode before any risky change.
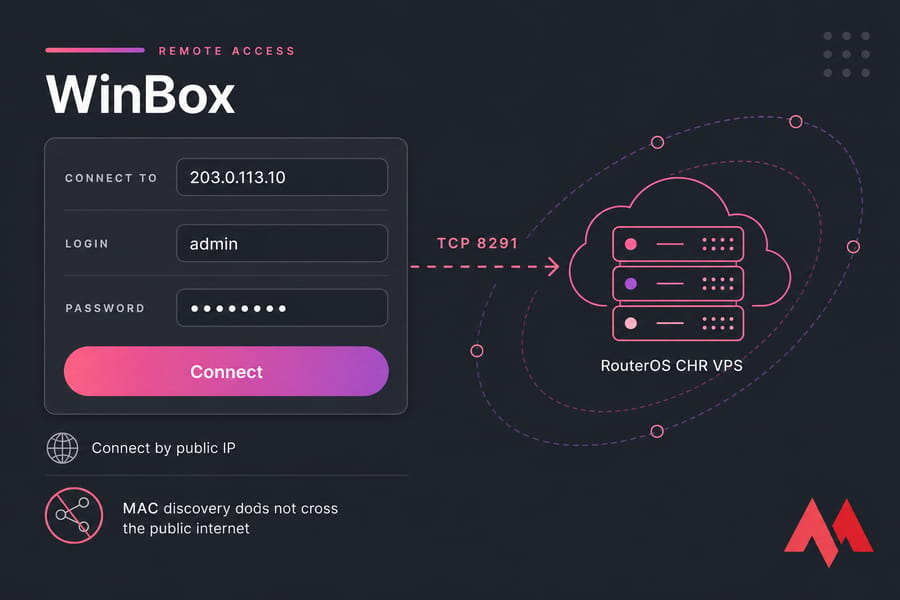
Don't apply firewall restrictions until the public IP and route are confirmed working.
Configure the MikroTik Public IP, Gateway, and DNS
Inspect the current state first:
/interface print
/ip address print
/ip route print
/ip dhcp-client print
DHCP path (only if the provider supports it)
/ip dhcp-client add interface=INTERFACE_NAME disabled=noStatic public IP and default route
Define your placeholders, then run the commands. PUBLIC_IP is your assigned address, PREFIX_LENGTH is the CIDR, GATEWAY_IP is the provider gateway, INTERFACE_NAME is usually ether1.
/ip address add address=PUBLIC_IP/PREFIX_LENGTH interface=INTERFACE_NAME
/ip route add dst-address=0.0.0.0/0 gateway=GATEWAY_IP
Using documentation ranges like 203.0.113.10/24 with gateway 203.0.113.1 as an example. Some providers place the gateway outside your subnet and require an on-link route — follow their routing instructions exactly.
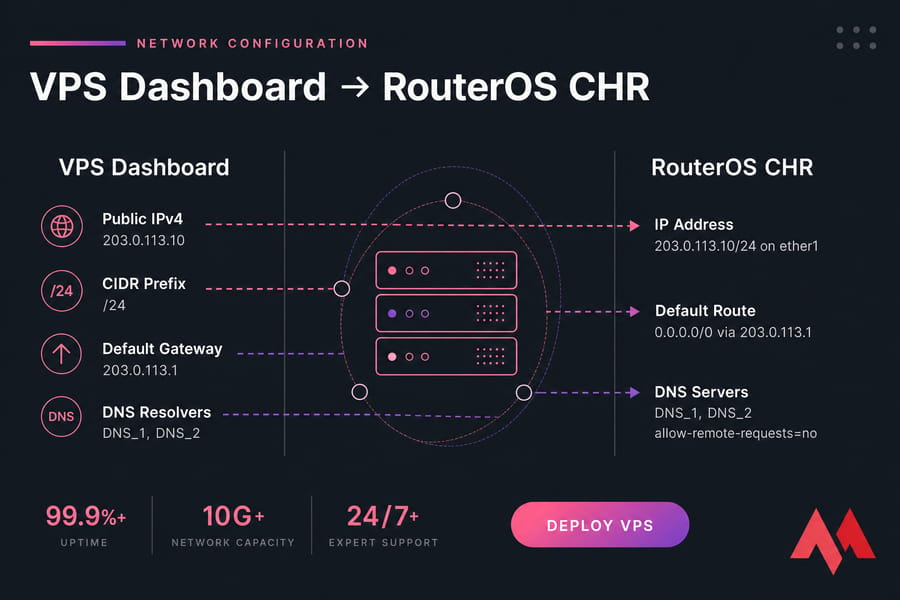
DNS without an open resolver
/ip dns set servers=DNS_1,DNS_2 allow-remote-requests=noKeep allow-remote-requests=no unless CHR intentionally serves trusted clients. An open resolver is an abuse magnet. For deeper detail, see how to configure DNS on MikroTik.
Verify connectivity
/ping GATEWAY_IP
/ping 8.8.8.8
/ping google.com
Gateway responds, external IP responds, then name resolution works — that's your success check. Add IPv6 rules only if the provider assigns it; IPv4 rules do nothing to secure IPv6. After connectivity works, restrict access without closing your active session.
Secure the MikroTik VPS Firewall and Management Access
This is where people lock themselves out. So we do it in a careful order.
Create a new administrator first — and test it
/user add name=ADMIN_NAME password=STRONG_PASSWORD group=fullLog in with the new account in a separate session before you disable the default one. Only then:
/user disable adminRestrict management by source IP
/ip service set winbox address=TRUSTED_ADMIN_IP
/ip service set ssh address=TRUSTED_ADMIN_IP
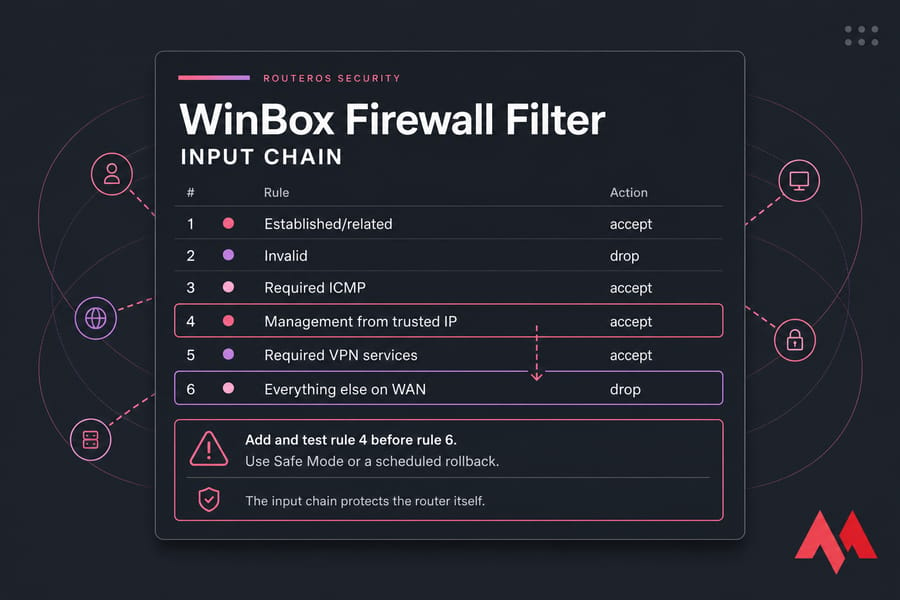
Lockout-safe input-chain rule order
| # | Rule | Action |
|---|---|---|
| 1 | Established/related | accept |
| 2 | Invalid | drop |
| 3 | Required ICMP | accept |
| 4 | Management from trusted IP | accept |
| 5 | Required VPN services | accept |
| 6 | Everything else on WAN | drop |
Warning: add and test the management allow rule (4) before the final drop rule (6). Never the other way around.
/ip firewall filter add chain=input connection-state=established,related action=accept
/ip firewall filter add chain=input connection-state=invalid action=drop
/ip firewall filter add chain=input protocol=icmp action=accept
/ip firewall filter add chain=input src-address=TRUSTED_ADMIN_IP action=accept
/ip firewall filter add chain=input in-interface=INTERFACE_NAME action=drop
The input chain protects the router itself; the forward chain governs traffic passing through it. Different jobs. Use Safe Mode or a scheduled rollback before that last drop rule. Then disable what you don't use:
/ip service disable telnet,ftp,api,api-ssl,wwwChanging a service port alone doesn't secure it — source restriction does. For more, read the full MikroTik firewall rules and best practices and learn to block port scanning on MikroTik.
With management secured, configure only the forwarding services this VPS will actually provide.
Configure NAT, VPN, or Advanced Routing
Quick myth-bust: having a public IP does not mean you need a masquerade rule. NAT matters only when private clients — behind a second interface or a tunnel — need internet egress through the public interface.
/ip firewall nat add chain=srcnat out-interface=INTERFACE_NAME action=masquerade| Role | Tools | Guide |
|---|---|---|
| VPN gateway | WireGuard, OpenVPN, L2TP/IPsec | configure OpenVPN on MikroTik |
| Remote access | L2TP/IPsec | MikroTik L2TP VPN setup |
| Multi-site routing | BGP, tunnels | MikroTik BGP configuration |
| Publish services | dst-nat | RouterOS port forwarding |
Skip obsolete protocols — WireGuard or OpenVPN over ancient PPTP, always. Watch your MTU/MSS on tunneled traffic; mismatches cause weird half-broken connections that are miserable to debug. Choose the detailed configuration guide matching your intended role.
Test and Troubleshoot RouterOS CHR
Test in order: interface → gateway → public IP → DNS → management port. Collect evidence before you reboot anything.
| Symptom | Likely cause | Check |
|---|---|---|
| VPS unreachable | Firewall drop or wrong CIDR | /ip address print |
| No internet | Missing default route | /ip route print |
| Can ping IP, not names | DNS misconfigured | /ip dns print |
| WinBox can't connect | MAC discovery assumption | Use public IP |
| Ports blocked | Provider firewall | Provider security group |
| CHR won't boot | Unsupported virtualization | Confirm KVM |
| Slower than expected | License throughput cap | /system license print |
Always check the provider's firewall separately from RouterOS. Confirm the public IP is bound to the expected MAC. Run diagnostics like /log print, /tool ping, and inspect firewall counters — if counters aren't incrementing on your allow rule, traffic isn't matching it.
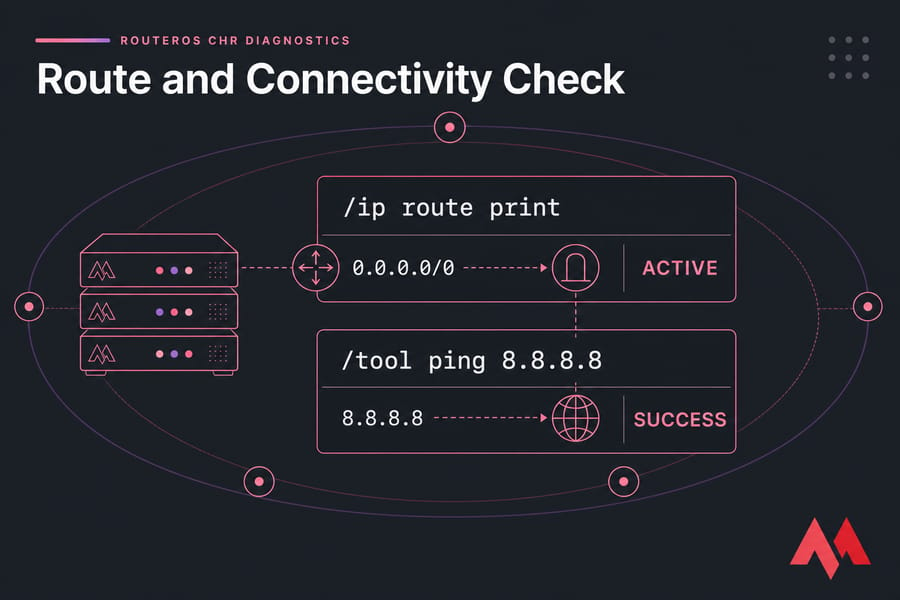
If CHR won't boot because your current VPS can't accept a custom OS image, migrating to a purpose-built MikroTik VPS is faster than fighting a container-based server. Use run traceroute on MikroTik and test MikroTik bandwidth to confirm the fix. Once everything passes, preserve the working state.
Back Up, Update, and Maintain RouterOS CHR
Two backup types, and you want both. A binary backup captures the entire config including sensitive data; a text export is human-readable but not a complete substitute.
/system backup save name=chr-backup encryption=aes-sha256
/export file=chr-config
Copy both files off the CHR disk. A provider snapshot is handy but never your only backup — treat it as a bonus, not the plan. Before upgrading RouterOS, check the stable channel changelog and do it during a maintenance window with console access open.
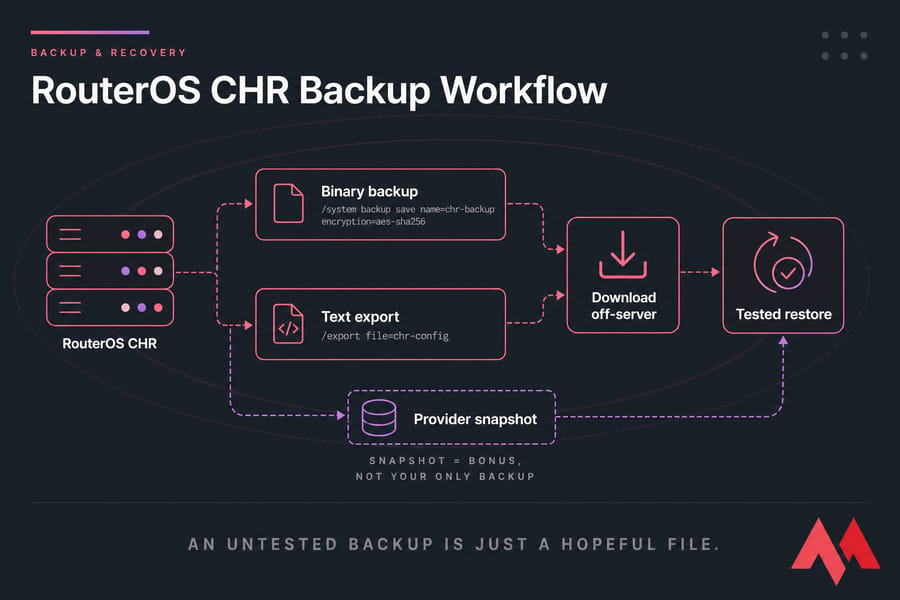
Monthly, glance at CPU, memory, disk, interface traffic, logs, and license status. And actually test a restore — an untested backup is just a hopeful file. See the full back up the MikroTik configuration and update RouterOS safely guides for the details.
Ready to launch your MikroTik cloud router?
Run RouterOS CHR on infrastructure built for virtual routing, VPN, firewall, and BGP workloads — with dedicated resources and public network access. Deploy a MikroTik VPS and continue straight into the networking and security steps above.

An experienced tech and developer blog writer, specializing in VPS hosting and server technologies. Fueled by a passion for innovation, I break down complex technical concepts into digestible content, simplifying tech for everyone.