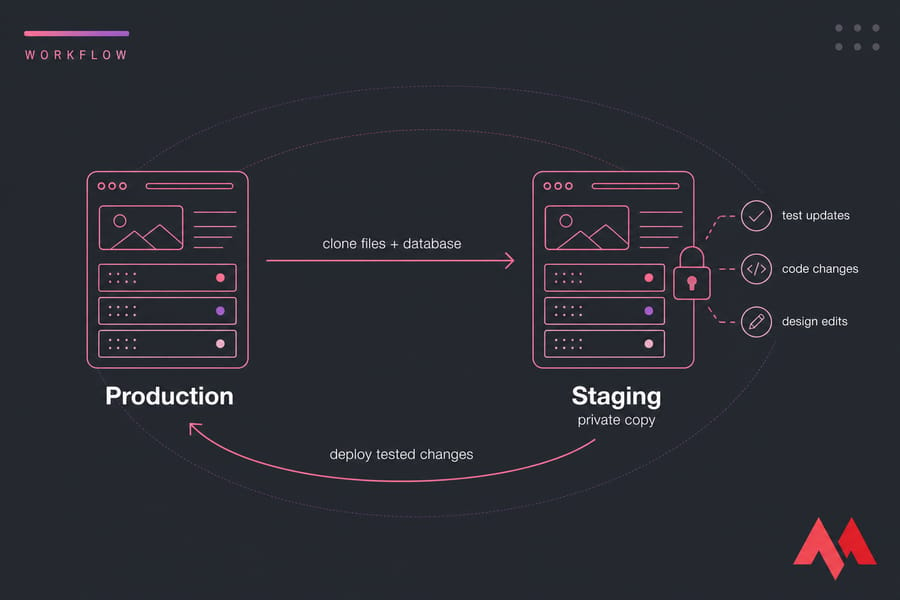
If you've ever updated a plugin and watched your homepage turn into a stack of PHP errors, you already understand why people ask how to set up a staging environment. A staging environment is a private copy of your live website or app where you test updates, code changes, and design edits before publishing them to production. To set one up, you clone your files and database, place them on a subdomain or a separate server, update your configuration, restrict public access, and test everything before deploying.
That's the short version. Now let's get into how you actually build one — on WordPress, in cPanel, or on a VPS — without touching your live site.
What You'll Need Before You Start
- Access to your hosting control panel or VPS (root or sudo if it's a server)
- Your website files and database credentials
- A fresh, verified backup of production — non-negotiable
- The ability to create a subdomain and DNS record
- SSH, SFTP, or a file manager
- Basic comfort editing config files like
wp-config.phpor.env - An SSL certificate for staging (optional, but I'd recommend it)
What Is a Staging Environment for a Website?
A staging environment is a working duplicate of your production site — same code, same database structure, same server stack as closely as you can manage — that nobody except you and your team can reach. You break things there on purpose. Then you fix them, confirm the fix, and only then push it live.
It's not a backup. That distinction trips up a lot of people. A backup is for recovery after something goes wrong; staging is for prevention before anything goes wrong. You need both. If you don't have a solid backup routine yet, sort that out first — here's how to back up a website properly.
A proper staging setup includes:
- Files — themes, plugins, application code, uploads and media
- Database — its own copy, never shared with production
- Configuration — separate credentials, separate URLs, separate API keys
- Server environment — matching PHP version, web server, and caching layer where practical
- Access controls — password protection and no search engine visibility
The closer staging mirrors production, the more your tests actually mean something. A test that passes on PHP 8.3 tells you nothing if production still runs 8.0.
Development vs Staging vs Production Explained
Three environments, three jobs. People blur them constantly, and then wonder why a "tested" release still broke.
| Environment | Purpose | Visible to users? | Data | Risk of change | Typical tools |
|---|---|---|---|---|---|
| Development | Write and experiment with code | No — usually just your laptop | Dummy or trimmed data | Very low | Local server, Docker, Git, code editor |
| Staging | Verify changes in production-like conditions | No — team and QA only | Recent copy of production (sanitised where sensitive) | Low | Subdomain, VPS clone, staging plugin |
| Production | Serve real visitors and customers | Yes — everyone | Live data, real orders | High | Your live host or VPS, monitoring, backups |
Development is where things are messy and half-finished. Staging is the dress rehearsal — the point is realism. Production is the show. Version control sits underneath all three, which is why teams usually pair staging with Git; if you're picking a platform, GitHub vs GitLab covers the trade-offs.
So which one do you test in? Both. Build in development, validate in staging. Solo site owners often skip development entirely and work directly in staging, and honestly, that's fine for a small brochure site or blog.
When You Actually Need a Staging Site
You need one if any of these apply:
- You're updating a CMS core, plugins, or themes on a site that earns money
- You're changing PHP versions or moving to a different web server
- You're doing a redesign or editing templates and CSS
- You run WooCommerce, memberships, bookings, or anything with a checkout
- You depend on forms, CRMs, or third-party API integrations
- Your traffic is high enough that ten minutes of downtime is embarrassing
- More than one person touches the site
Small sites need staging too, by the way. The idea that only enterprise setups justify it is nonsense — a broken contact form on a five-page site still costs you leads.
Best Ways to Create a Staging Site
There are four realistic methods. None of them is universally correct.
| Method | Ease | Cost | Control | Best for | Main limitation |
|---|---|---|---|---|---|
| Staging plugin (WP Staging, Duplicator) | Easiest | Free–$100/yr | Low | Small WordPress sites | Struggles with large or heavily customised sites |
| Control panel one-click staging (cPanel, Plesk) | Easy | Included with hosting | Medium | Managed or panel-based hosting | Not available on every plan |
| Manual subdomain clone | Moderate | Free | Good | Any CMS or PHP app | Shares server resources with production |
| Separate VPS or cloud server | Advanced | From a few dollars/month | Full | Custom apps, agencies, teams | You manage the server |
| Local environment + Git deploy | Moderate | Free | Full | Developers | Local ≠ production; still need staging |
Quick guidance: if you run a straightforward WordPress site, start with a plugin or your host's one-click tool. If you manage your own stack, a subdomain clone on the same box is fine for light testing, but a Linux VPS hosting instance gives you real isolation — you can restart services, swap PHP versions, and break things without any chance of dragging production down with it. Teams running containers usually go for a Docker VPS hosting setup so staging and production spin up from the same Compose file.
For most readers, a subdomain-based staging site or a separate Cloud VPS hosting clone is the sweet spot.
How to Set Up a Staging Environment Step by Step
This is the master workflow. It applies whether you're on shared hosting with cPanel or SSH'd into your own server.
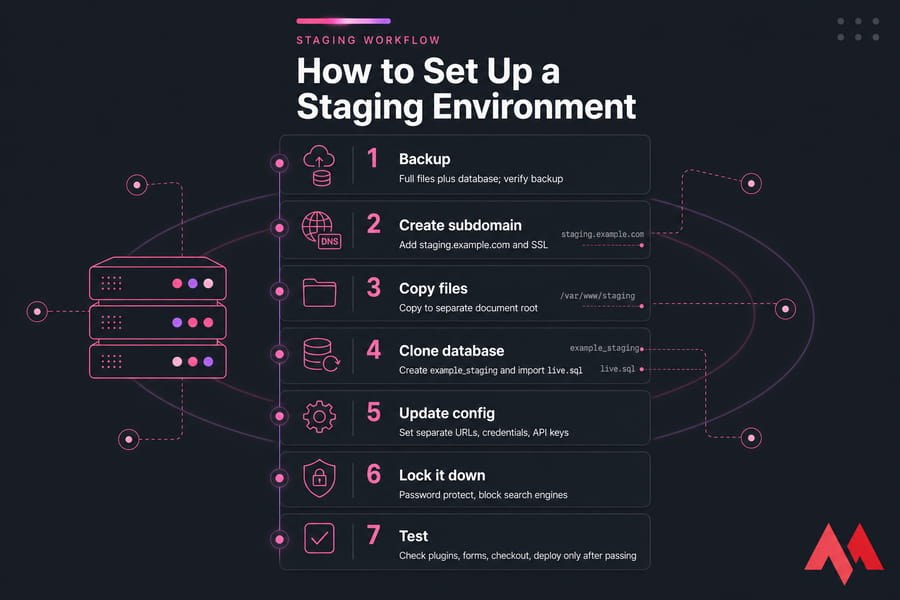
Step 1: Back up production first
Full files plus database, downloaded somewhere off the server. Verify it — an unrestorable backup is just a large file. For server-level snapshots, see back up a server or VPS.
Step 2: Create the subdomain or staging instance
Add staging.example.com in your DNS and web server, pointing to a separate document root like /var/www/staging. On cPanel it's the Subdomains tool. Issue an SSL certificate for it while you're there.
Step 3: Copy the files
Small site? File Manager or SFTP works. On a server, rsync is faster and safer:
rsync -av --exclude 'wp-content/cache/' /var/www/live/ /var/www/staging/If SSH is new to you, start with connect to a VPS and then manage website files via SSH.
Step 4: Clone the database
Create a brand-new database — example_staging — with its own user and password. Then export and import:
mysqldump -u liveuser -p example_live > live.sql
mysql -u staginguser -p example_staging < live.sql
phpMyAdmin does the same thing through a browser if you prefer clicking. Whatever you do, don't point staging at the production database. That single mistake causes more damage than everything else on this page combined.
Step 5: Update config files and environment variables
Change database credentials, site URLs, and any environment-specific values. In WordPress that's wp-config.php plus the siteurl and home rows in wp_options. In a framework app it's your .env file — set APP_ENV=staging, swap in test API keys, and switch mail to a catch-all driver.
Step 6: Lock it down
Before you load a single page publicly, add HTTP basic auth and a noindex header. Details in the security section below.
Step 7: Test the clone before you change anything
Log in. Load a few templates. Submit a form. Check images resolve. Watch your logs — for WordPress, WordPress error logs will tell you instantly if something didn't come across. Only once the clone behaves like production do you start making changes.
How to Create a WordPress Staging Site
Two paths. Pick based on how custom your site is.
Plugin path: install WP Staging, Duplicator, or All-in-One WP Migration, click to create a staging copy, and you'll get something like example.com/staging in a couple of minutes. Fast and beginner-friendly. It gets shaky on multi-gigabyte sites or anything with unusual server config, and free tiers often can't push changes back.
Manual path: subdomain plus copied files plus a fresh database, exactly as described above. More steps, far more control. This is the route I take for client sites and anything with custom code. There's a related walkthrough on how to build a WordPress site without going live that pairs well with this.
Once staging is up, change these settings:
- Settings → Reading → discourage search engines (a start, not a solution)
- Deactivate caching plugins and disconnect the CDN
- Reroute or disable outgoing email (WP Mail SMTP logging, or a mail-catcher plugin)
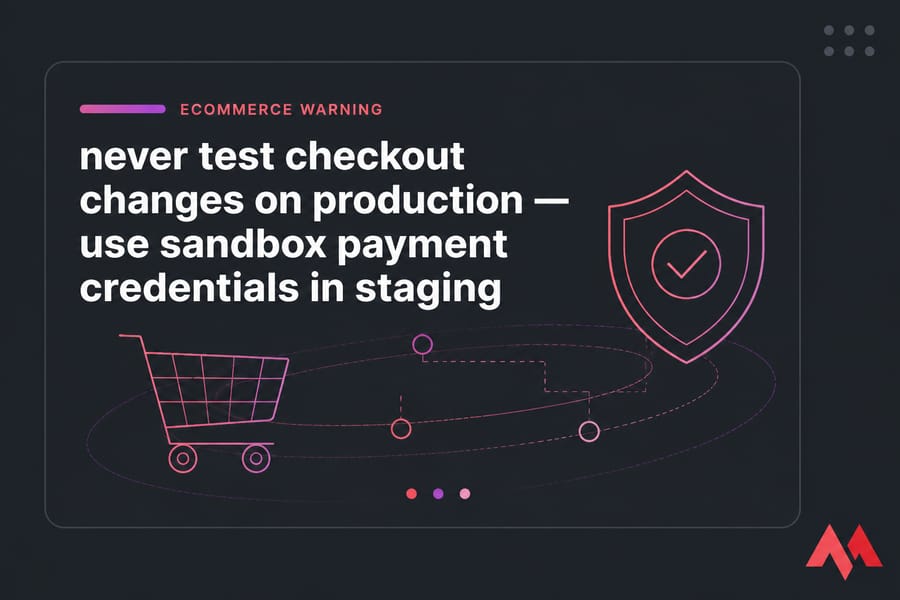
- Switch WooCommerce gateways to sandbox/test mode and disable order emails
- Turn on
WP_DEBUGandWP_DEBUG_LOG
WooCommerce deserves extra care. Live orders keep arriving while you test, so your staging database goes stale within hours. Never sync it back wholesale. Running WordPress on your own box? Install WordPress on VPS covers the base setup, and WordPress VPS hosting gives you the room to keep staging permanently alongside production.
Staging Server Setup on VPS Hosting
Why do developers keep gravitating to a VPS for this? Isolation, root access, and environment parity. You control the PHP version, the Nginx or Apache config, the caching layer, the cron jobs — all of it. Staging on shared hosting can't match a production stack you don't control.
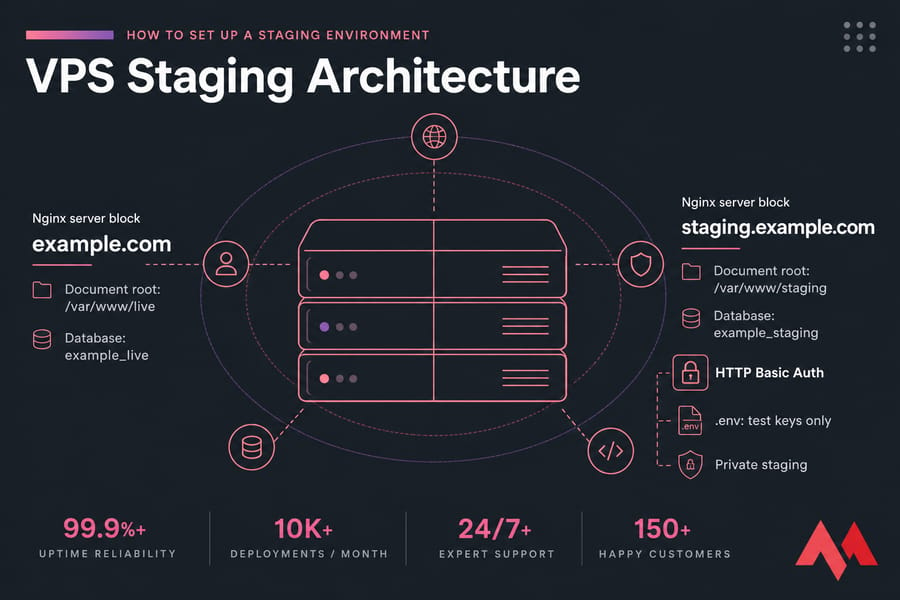
A sensible layout:
staging.example.comas its own server block or virtual host/var/www/stagingas the document root, with its own system userexample_stagingdatabase and a dedicated MySQL user with least-privilege grants- A staging-specific
.envholding test keys only - Basic auth at the web server level and a valid SSL certificate
For deployment, a Git-based flow beats dragging files around. Push to a staging branch, pull on the server, run your build. Docker Compose is even cleaner — identical images in both environments, so "works on staging" actually means something. Kubernetes exists too, but it's overkill unless you're already running it.
Need a Safe VPS for Your Staging Environment?
If your current plan makes staging awkward, a MonoVM VPS gives you isolated resources, root access, and 25+ global locations to build a private staging server that genuinely mirrors production. Explore VPS hosting plans for my staging setup.
How to Protect a Staging Site from Search Engines and Users
Indexed staging sites are a real problem — duplicate content, leaked pre-release pages, sometimes exposed customer data. Here's the checklist:
- HTTP basic auth on the whole domain. One
.htpasswdfile, done. This is the single most effective control because it stops crawlers and humans at the door. - IP allowlisting if your team works from fixed addresses.
- Send
X-Robots-Tag: noindex, nofollowfrom the server, plus anoindexmeta tag in your templates. - Don't rely on robots.txt. It requests that crawlers skip pages — it doesn't stop indexing, and it doesn't stop anyone typing the URL.
- Test API keys only. Sandbox payment credentials, test SMTP, staging webhook endpoints.
- Kill outgoing mail or catch it locally. Nothing is worse than blasting real customers with test order confirmations.
- Sanitise sensitive data — anonymise emails and phone numbers if you don't strictly need real records.
- Install SSL so mixed-content and cookie behaviour match production.
More hardening ideas in secure a website.
How to Deploy Changes from Staging to Production
Before you deploy, confirm: logins work, forms submit and deliver, checkout completes with test credentials, images and assets load, internal links resolve, redirects behave, and performance hasn't regressed — this is a good moment to optimize Core Web Vitals while you have a safe sandbox.
Then decide what you're actually deploying:
- Files only — theme edits, code changes, plugin updates. Straightforward and low risk.
- Files plus database — new content structures, settings, migrations. This is where dynamic sites get dangerous, because production has moved on since you cloned it.
For any site with orders, comments, or user signups, never overwrite the live database wholesale. Apply targeted changes instead — run the migration script, update the specific options rows, or replay the schema change. Take a fresh production backup immediately before deploying, deploy during your quietest hours, and re-test on production once you're done. Keep the previous release available so rollback is a two-minute job, not a two-hour panic. If you're moving hosts as part of this, migrating from shared hosting to a VPS follows a similar pattern.
Common Staging Environment Mistakes to Avoid
| Mistake | What goes wrong | Fix |
|---|---|---|
| Staging gets indexed by Google | Duplicate content, leaked pages in search results | Basic auth plus noindex headers, not robots.txt alone |
| Sharing production database or API keys | Test actions hit real customers, orders, or payments | Separate database, sandbox keys, mail catcher |
| Editing staging and production in parallel | Changes get overwritten in the next sync | Freeze production edits during a release cycle |
| Stale staging copy | Tests pass against data that no longer exists | Refresh the clone before each significant test round |
| No backup before deploying | Nothing to restore when a release fails | Automated backups plus a manual one pre-deploy |
| No rollback plan | Extended downtime while you improvise | Keep the previous release and a tested restore procedure |
| Environment drift | Works on staging, breaks on production | Match PHP version, web server, and caching layer |
Final Staging Setup Checklist and Next Steps
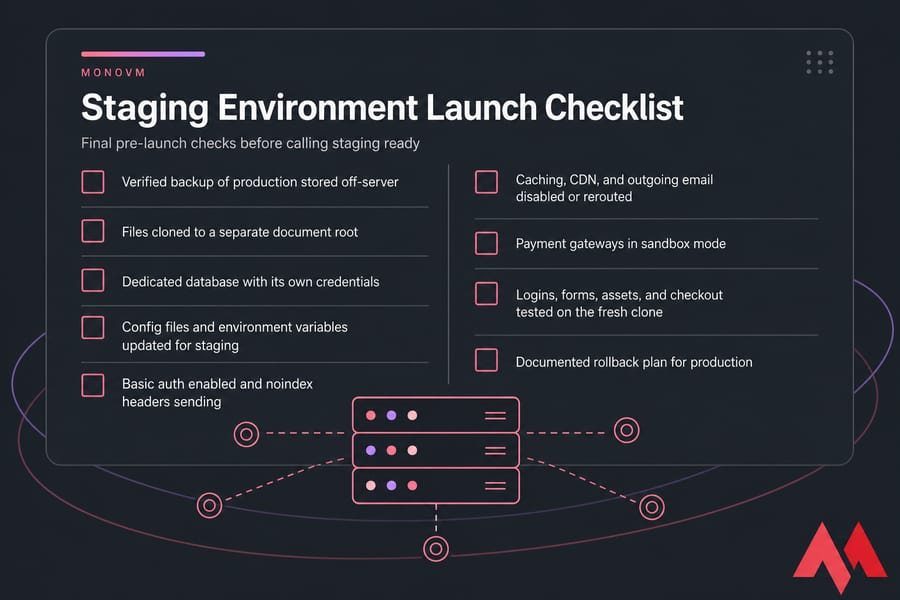
Run through this before you call your staging environment ready:
- Verified backup of production stored off-server
- Files cloned to a separate document root
- Dedicated database with its own credentials
- Config files and environment variables updated for staging
- Basic auth enabled and
noindexheaders sending - Caching, CDN, and outgoing email disabled or rerouted
- Payment gateways in sandbox mode
- Logins, forms, assets, and checkout tested on the fresh clone
- Documented rollback plan for production
If your current host won't give you a real staging site — or you're tired of fighting plugin limits — that's usually the signal to move. A VPS gives you the isolation and control to run staging properly, and if you'd rather not handle server administration yourself, managed hosting covers the maintenance while you focus on shipping.
Whether you run WordPress, a custom app, or a stack of client sites, MonoVM's developer-friendly infrastructure lets you build production-like staging environments and deploy with far less risk.

An experienced tech and developer blog writer, specializing in VPS hosting and server technologies. Fueled by a passion for innovation, I break down complex technical concepts into digestible content, simplifying tech for everyone.