
There are many services that a web hosting provider can offer, with a dedicated server being the pinnacle of them. Instead of sharing a server as you would with a VPS or Shared Hosting service, you get a full bare-metal server to yourself. All of that machine’s resources are available only for you to use as you please.
So, you bought dedicated server, what should you do now? Well, first things first; you have to install your desired operating system on it. This could be done through the server console, IPMI, or KVM, depending on what OS you wish to install.
What is IPMI? [Definition]
This is a term you will hear about a lot when discussing setting up a server. IPMI stands for Intelligent Platform Management Interface and is a set of standardized specifications for hardware-based platform management systems. It allows the user to control and monitor servers remotely.
IPMI allows you to access the server even when the operating system is not yet installed or is malfunctioning. It is a hardware solution developed by Intel, Dell, Hewlett Packard, and NEC.
How to Install an Operating System Using IPMI?
For your convenience, we provided a short tutorial on how to install an OS using IPMI. Before you begin, however, the following requirements must be fulfilled:
prerequisite:
- The system has to be set to OnBoard(VGA) video output.
- Network connection with either Dedicated IPMI port or Eth0(w/shared IPMI port).
Follow these quick and easy steps to install the OS:
Step 1: Log in to the desired target system with IPMI web GUI (i.e. graphical user interface). Please note that you must have Java installed on the machine you are connecting from.
Step 2: Navigate to the Remote Control tab and select Console Redirection.
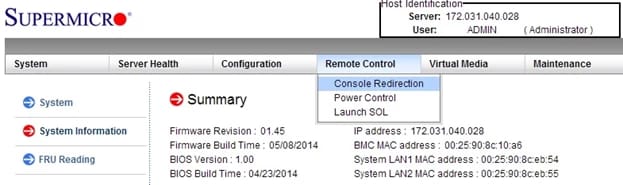
Step 3: Click on Launch Console.
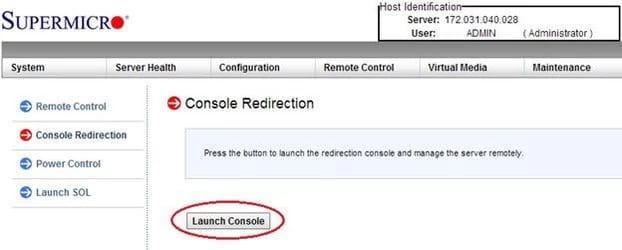
Step 4: A file named jnpl will be downloaded. Once it’s finished downloading, run it. This will open a remote window.
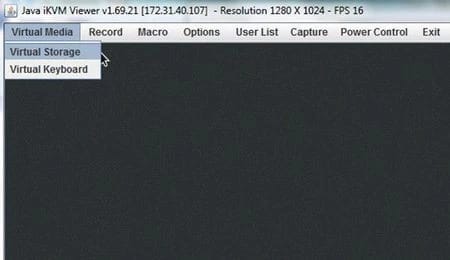
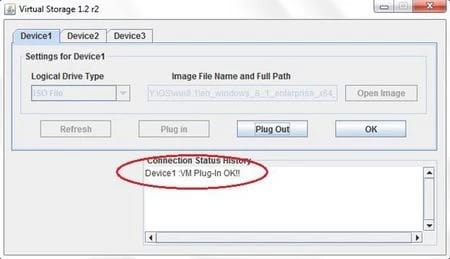
Step 5: Within the remote window, select the Virtual Media tab and click on Virtual Storage.
Step 6: Under Logical Drive Type select ISO.
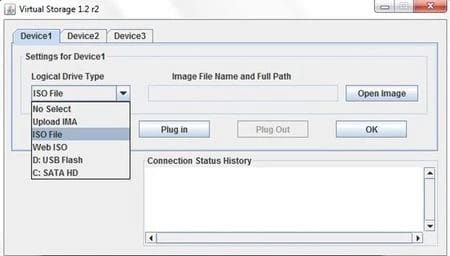
Step 7: Click on Open Image and select the image file location.
Step 8: Click on Plug-In and then click OK to mount the virtual drive. The setup is now complete.
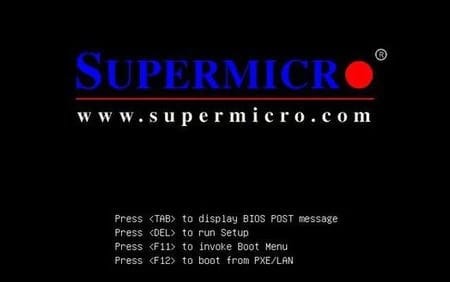
Step 9: Restart the system and press F11 on your keyboard to invoke the boot menu.
Step 10: Select the Virtual CDROM as the boot device.
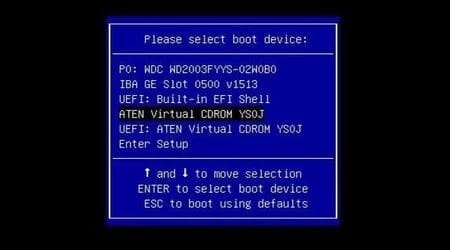
Step 11: The system will now boot up from the virtual CD-ROM and you can now follow the OS installation steps.
Conclusion:
Given that you have followed these steps correctly, you now should have your desired operating system installed on your dedicated server. In order to proceed further, you should install the desired network configuration. After doing so, you can simply connect to it through either Remote Desktop Protocol for Windows Server OS versions or through Secure Shell (i.e. SSH) for Linux server installations.
If you found this article useful, leave a comment, and share it so others can find it easier. We are also open to suggestions on what articles we should write next.
People Are Also Reading:

I'm fascinated by the IT world and how the 1's and 0's work. While I venture into the world of Technology, I try to share what I know in the simplest way with you. Not a fan of coffee, a travel addict, and a self-accredited 'master chef'.