Welcome to the world of Mac, where sleek design meets powerful functionality. While Apple has always been dedicated to simplicity, you might be surprised that hidden files lurk on your Mac. Quick answer first: open Finder and press Command + Shift + . (period). Hidden files appear as faded icons. Press the same keys again to hide them. To always show hidden files on Mac, run defaults write com.apple.finder AppleShowAllFiles -bool true in Terminal, then killall Finder. That's the whole answer. For most people, the Finder shortcut is enough — it takes half a second and doesn't change any system settings permanently. Tested on macOS Sonoma 14.5 and Ventura 13.6.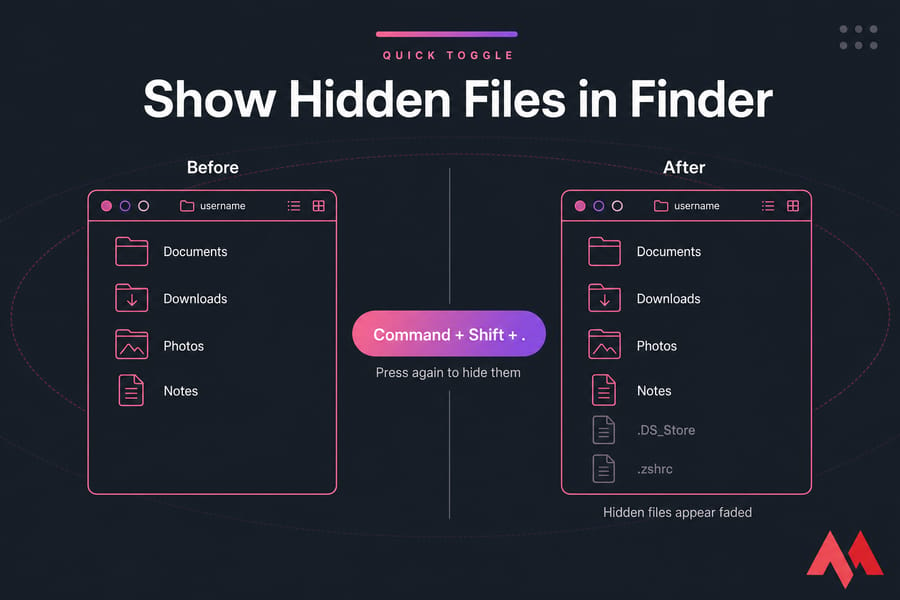
🤔 Why Are Some Files Hidden on macOS?
Mac computers have a reputation for being user-friendly and intuitive, but they can also be complex machines with many layers of features and functions. Sometimes, files are hidden on a Mac for a variety of reasons:
- System Protection: macOS hides anything you shouldn't casually drag to the Trash. Unix directories like
/usr,/etc, and/privatekeep the OS running. Hiding them prevents a bad afternoon. - Sensitive Information: Some hidden files contain vital information that would be best left untouched by the average user. For example, the Library, cache, and preferences folders contain important data that allows apps and software to run smoothly. If these files were easily accessible, users could accidentally alter or delete them, causing significant issues.
- User Experience: Any file starting with a dot is hidden by convention —
.DS_Store,.gitignore,.bash_profile. Apps scatter these everywhere for configuration. If Finder showed all of them, your Documents folder would look like a junk drawer. - Streamlined Interface: Hidden files might contain settings for the Dock or Finder that could confuse novice users. By hiding these files, Apple ensures a streamlined and user-friendly experience.
💻 Showing Hidden Files on Mac via Terminal
This guide will walk you through accessing hidden files on your Mac using the Terminal app. Open Applications → Utilities → Terminal, or hit Command + Space and type "Terminal." If you're new to the command line, our guide on using Terminal on Mac covers the basics.
Terminal Command to Show Hidden Files
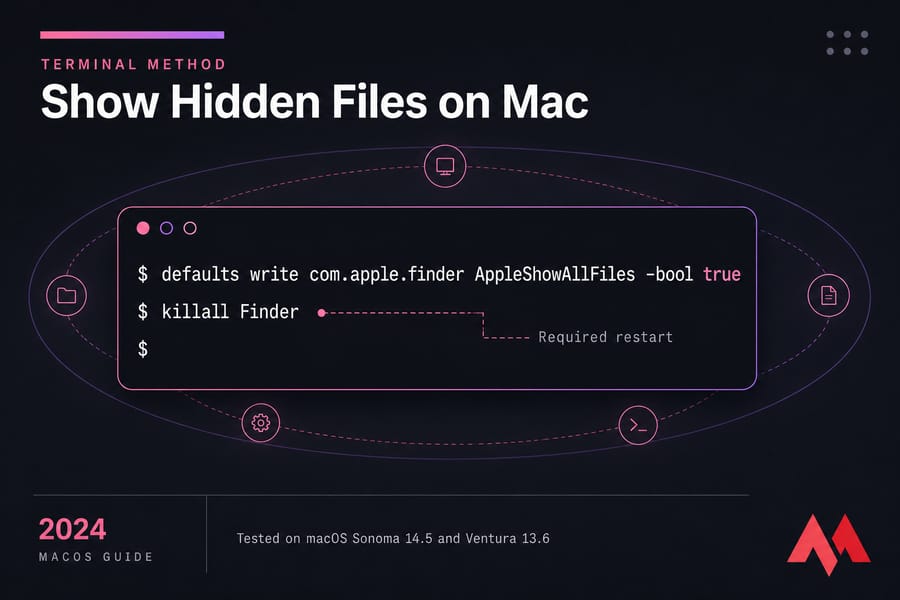
defaults write com.apple.finder AppleShowAllFiles -bool true
killall Finder
Run them one at a time, pressing Return after each. Your desktop icons will blink and reappear — that's normal.
Command to Hide Hidden Files Again
defaults write com.apple.finder AppleShowAllFiles -bool false
killall Finder
Only one character changes: true becomes false. Easy to miss when you're skimming.
Why You Need to Restart Finder
The defaults write command writes the new value to Finder's preferences file, but Finder already loaded its settings into memory when it launched. killall Finder force-quits it, and macOS relaunches it a second later. Without that step, nothing visibly changes and you'll assume the command failed.
🖱️ Showing Hidden Files on Mac via Finder
This is the fastest way to see hidden files on Mac, and honestly the only one most users ever need. These steps should work on the latest macOS versions, including Sonoma, Ventura, Monterey, and Big Sur.
- Open Finder (click the smiley face icon in the Dock).
- Navigate to any folder — your Home folder, Documents, or the root of your drive.
- Press Command + Shift + . (period).
- Hidden files and hidden folders appear immediately, greyed out and semi-transparent.
- Press the same combination again to hide them.
It's a toggle, not a setting. Finder remembers it between windows but not forever — a reboot or a Finder restart usually resets it. And yes, this shows hidden files and hidden folders in Finder, not just files. There's no separate command for folders.
📁 How to Access the Hidden Library Folder on Mac
Here's something people search for constantly: "show hidden files on Mac" when they actually just want one folder — ~/Library. That's where app preferences, caches, and application support files live.
Open Library from the Go Menu
- Click on the desktop or any Finder window to make Finder active.
- Click Go in the menu bar.
- Hold down the Option key.
- "Library" appears between Home and Computer. Click it.
You can also press Command + Shift + G and type ~/Library, which is quicker once you know the path.
When You Might Need the Library Folder
Clearing a corrupted app preference file. Pulling Mail data before a migration. Deleting leftover files from an app that uninstalled badly. Grabbing a plugin folder for an audio app. This method doesn't reveal every hidden item on your system — it just opens one specific hidden folder, which is safer anyway.

📊 Finder vs Terminal: Which Method Should You Use?
| Method | Difficulty | Best for | Persistent? | Reversible |
| Finder shortcut (Command + Shift + .) | Very easy | One-off peeks, beginners | No — session-based toggle | Yes, same shortcut |
Terminal (AppleShowAllFiles) |
Moderate | Developers, sysadmins, repeat use | Yes — survives reboots | Yes, run with -bool false |
Best for Beginners
Use the keyboard shortcut. There's no way to break anything, and you can flip it off just as fast.
Best for Advanced Users
If you're editing .zshrc, poking around .git directories, or working with config dotfiles daily, set the Terminal flag once and forget it. Same logic applies when you're managing files on macOS with an FTP client — hidden files matter, and most FTP clients have their own "show hidden files" toggle too.
⚠️ Is It Safe to View Hidden Files on Mac?
What You Can View Safely
Viewing is completely safe. Toggling visibility changes nothing about the files themselves — it's a display setting, full stop. Browse freely.
What You Should Not Delete or Edit
- .DS_Store — harmless to delete (macOS regenerates it), but pointless to edit.
- Library and preferences files — deleting a
.plistresets that app's settings; sometimes that's the fix, sometimes you lose your license key. - System and cache files — anything in
/System,/private, or/usr. Don't touch. macOS protects most of it, but not all.
🔧 Troubleshooting: Hidden Files Still Not Showing
Shortcut Not Working in Finder
Nine times out of ten, Finder isn't the active app. Click a Finder window or the desktop first, then press the keys. Also make sure you're pressing the period key — not the comma, and not the numpad decimal.
Terminal Command Not Working
Check the spelling of com.apple.finder and AppleShowAllFiles. Capitalization matters. If you copied the command from a webpage, a curly quote or stray space may have tagged along — retype it manually.
Restart Finder or Restart Your Mac
Run killall Finder again. Still nothing? Option-right-click the Finder icon in the Dock and choose Relaunch. A full reboot fixes the stubborn cases. This applies whether you're working locally or through remote desktop software for Mac, where Finder can lag behind changes. Need to connect to a Windows machine from your Mac? Here's how to use RDP client for Mac.
🖥️ Does This Work on Sonoma, Ventura, Monterey, and Older macOS Versions?
Yes. The Command + Shift + period shortcut works on macOS Sonoma, Ventura, Monterey, Big Sur, and every release back to Sierra (10.12). The Terminal command goes back much further.
On really old versions — Mavericks and earlier — the shortcut doesn't exist, so Terminal is your only option. Some pre-Mavericks systems used AppleShowAllFiles YES instead of -bool true. Both still work on modern macOS, but stick with the boolean form.
🎯 Conclusion
- Hidden files on macOS are usually important system files that the average user should not modify or delete. Hiding these files helps to prevent accidental changes that could affect the stability and performance of the system.
- Finder provides a user-friendly way to unhide files on macOS. By pressing Command + Shift + Dot while Finder is active, users can reveal hidden files and folders.
- The Terminal app provides a persistent way to unhide files using a command-line interface. Best suited for advanced users who need the setting to survive reboots.
Working with files across multiple machines or need a reliable environment for your projects? A VPS server gives you full control with 24/7 uptime — perfect for remote development and file management workflows.


I'm fascinated by the IT world and how the 1's and 0's work. While I venture into the world of Technology, I try to share what I know in the simplest way with you. Not a fan of coffee, a travel addict, and a self-accredited 'master chef'.