List of content you will read in this article:
It seems like for decades we were unable to use Apple and Microsoft devices together. However, as technology progresses, the two competitors are putting aside their rivalries and closing the divide between Windows and Mac applications for the benefit of the user. In this article, you will get to know the answer to the question “is there an RDP client for mac?”.
Not that long ago, it was hard to imagine being able to fully control a Microsoft Windows device from a macOS device. Thankfully, if you have macOS version 10.10 or higher, there is a way to use RDP from Mac using Microsoft’s RDP, and we will show you how. However, first, let us get into what exactly is the Remote Desktop Protocol (RDP).
What is RDP? [Definition]
The Windows Remote Desktop Protocol, or RDP for short, is a proprietary protocol developed by Microsoft which provides a user with a graphical interface to connect to another computer over a network connection. It gives the user full access to the tools and software installed on the host Windows machine as well as shares key peripherals such as the keyboard and mouse with the remote computer.
Put simply, with the Remote Desktop tool, you can connect to a Windows computer over the internet and use it as if it were right in front of you. For this connection to work, two things are needed: an RDP server and an RDP client. In this case, the RDP server is the Windows PC or server you will be connecting to and controlling.
The RDP client for mac OS, on the other hand, is the machine from which you are connecting to the server. Although the computer you are connecting to can be just a PC or a laptop with Windows Remote Desktop enabled on it, we will refer to it as the RDP server in this article for the sake of convenience.
As RDP is built into Windows, it is a Windows-only protocol, therefore you can only establish remote connections using it with computers running Windows OS or Windows Server OS. Even then, not all Windows versions support running them as an RDP server – Windows 10 Home, for example, can only be used as a client to connect to other Windows Remote desktops and NOT vice versa.
Keep in mind that only a single connection to a Windows computer with Remote Desktop enabled can be established via RDP. If you wish to connect multiple users to one system at the same time, the RDP server must be running a Windows Server OS with the Remote Desktop Services (RDS) component installed and enabled.
How to connect through RDP from macOS? [Step by step guide]
Unlike Windows, macOS does not have an inbuilt application for establishing an RDP connection. Therefore, the very first step is installing an app that is known by many to be the best RDP client for mac to Windows, the Microsoft Remote Desktop.
Step 1: Navigate to Dock and click on the App Store.
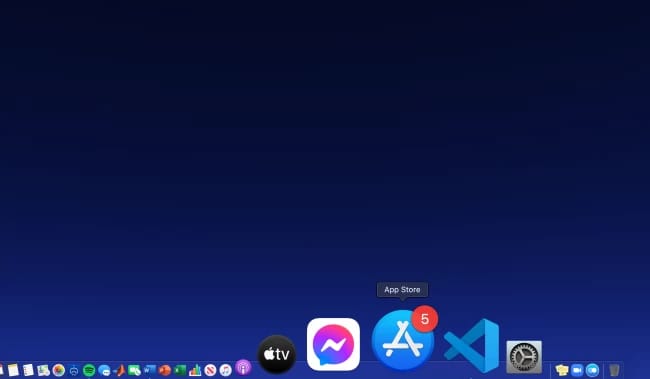
Step 2: Within the App Store, search for Microsoft Remote Desktop and install the official app from Microsoft Corporation; which is the best RDP client for macOS.
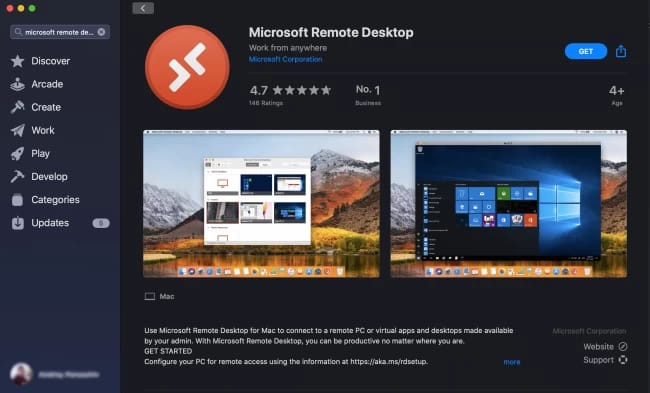
Step 3: Once the installation is completed, click on the Launchpad icon in Dock and click on Microsoft Remote Desktop.
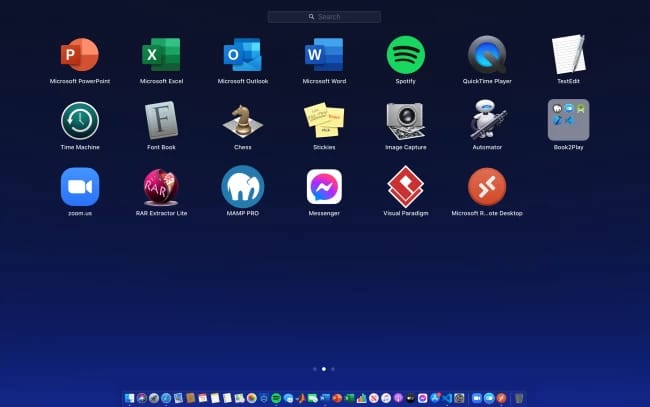
Step 4: Now, let’s add a new remote desktop connection. Click on the + icon on the top and select Desktop from the drop-down list.
Step 5: Type in the IP address section of the RDP server into the PC name field. Under it, select Add User Account. (This step is optional, however, very convenient if you don’t want to type in the username and password each time you use this connection.) If you do not add a user account, skip the next step.
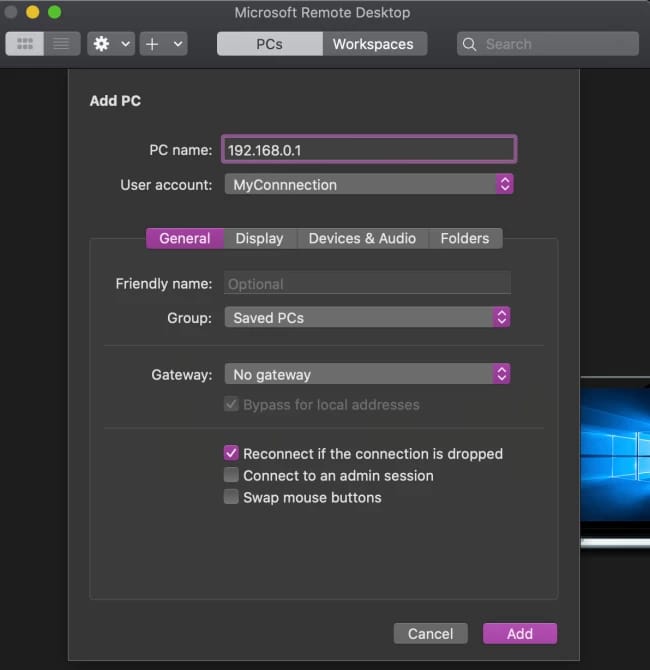
Step 6: Enter the Username and Password of the RDP server. Here you can also select a “Friendly Name” to identify the server easier. Click on Add section when finished.
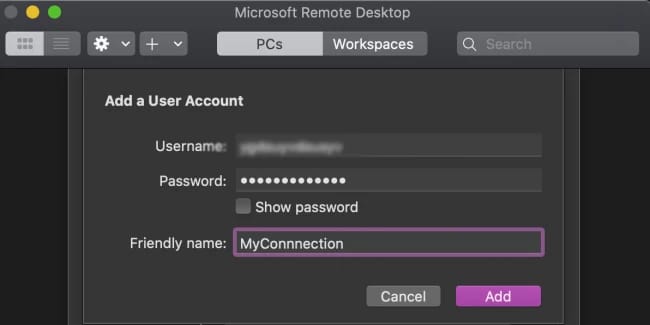
Step 7: You can edit the rest of the settings for your convenience, however, from this point on, clicking Add again will create the RDP connection and it should immediately appear in the Desktops list on the default interface.
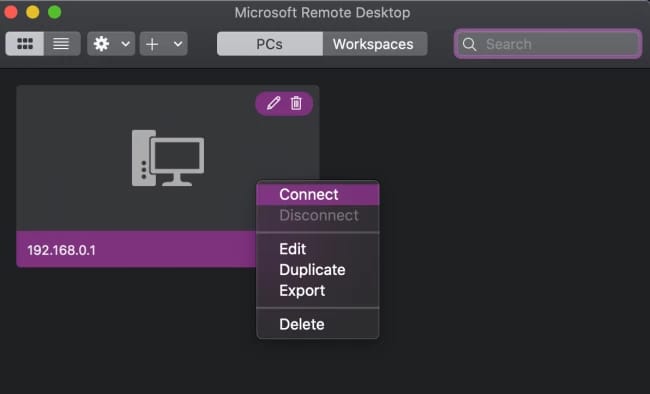
Step 8: On the default page, select your newly added connection. If you skipped step 6, you will be asked to provide a username and password, if not, you may see a certificate warning. Click on Continue and enjoy being able to control a Windows device from an Apple one.
So, we think here you are completely familiar with setting up an RDP client for MacBook. for using the RDP client for mac OS you should be familiar with enabling RDP in windows machines. So, here you can start with:
How to Enable RDP on your Windows Machine? [Tutorial]
service must first be enabled on the RDP server. Here’s a small tutorial on how to do exactly that on Windows 10 Professional operating system.
Step 1: First, click on the Start button on the bottom left corner of your screen (this can also be done by simply clicking the Windows button on your keyboard). Then click on the Settings.
Step 2: Click on System in the newly opened settings window and, on the next page, select the Remote Desktop option in the left pane.
Step 3: Find the Enable Remote Desktop toggle and move it into the On section, then new blue windows will appear and click on Confirm.
Step 4: When all the steps are implemented correctly then the Enable Remote Desktop toggle should turn blue.
By default, the Microsoft account you use to sign in to the computer will also be the account you use to connect it remotely. To additionally allow other users to connect, in the same settings screen, click on Select users that can remotely access this PC and click on Add in the newly opened window.
How to Establish a secure RDP connection?
Now before you go on enabling an RDP connection, or any remote connection for that matter, there are some precautionary steps you should take, as enabling any type of remote connection creates a vulnerability that could be exploited. Here are some tips that might keep you a bit safer while using this feature:
- Enable Network Level Authentication
Although this feature is automatically enabled in Windows 10 and Windows Server 2012 versions and any newer version after that, if you are using an older one, this is a must. With this feature enabled, the right username and password are required in order to establish a connection.
- Use complex, secure passwords
This should go without saying, however, here it is again – use a combination of letters, numbers, and special characters. Do not reuse old passwords. This is a good tip to follow in any situation which requires a password.
- Use the highest level of encryption
By default, this should be already enabled, but it’s always best to double-check. This can only be done through the Group Policy Editor and here’s how:
- Press the Windows key and R on your keyboard at the same time. In the opened “Run” window, type gpedit.msc and press the Enter key.
- Navigate to Computer Configuration > Administrative Templates > Windows Components > Remote Desktop Services > Remote Desktop Session Host > Security and double-click on Set client connection encryption level.
- In the new window, select the Enabled radio button, and in the drop-down menu below, select High Level.
Conclusion
At this point in time, we hope you know the complete knowledge base about the RDP client for Mac, how to use RDP file on mac, before setting up it How to enable RDP on windows, and tips you need to know how to do it and how to establish a secure RDP connection.
If you have any comments or feedback then you can comment here. Keep learning.
People are also reading: