
Finding the right hosting for a growing project usually means choosing between two extremes. Shared hosting is cheap but restrictive. A dedicated server gives you total control but comes with a price tag that doesn't make sense for most small to mid-size projects. A Windows Virtual Private Server sits right in the middle you get your own isolated environment with dedicated resources, running a familiar Windows operating system, without paying for an entire physical machine.
The catch? Setting one up feels intimidating if you've never done it before. The interface might be familiar, but the context firewall rules, remote desktop protocols, server security is new. This guide exists to bridge that gap. We'll walk through the entire process from purchase to production, explaining not just the steps but the reasoning behind them, so you finish with a server you understand, not just one you followed a tutorial to build.
Before we get into the practical instructions, let's ground ourselves with some basics about what a Windows VPS actually is and why you might choose one over the alternatives.
What Is a Windows VPS?
A Windows VPS is a virtual private server running a Windows operating system. Behind the scenes, a hosting provider uses virtualization technology to divide one powerful physical server into several isolated virtual machines. Each one gets its own allocation of CPU, RAM, storage, and bandwidth, and behaves like a completely independent computer.
This is fundamentally different from shared hosting, where dozens or hundreds of websites compete for the same pool of resources. On a VPS, what's allocated to you is yours — no noisy neighbor can suddenly consume all the CPU and slow your site to a crawl. You also get full administrative control, meaning you can install any Windows-compatible software, configure every setting, and tailor the environment to exactly what your application needs.
If the whole concept of VPS hosting is new to you, it might help to start with a broader overview of How to Setup VPS before focusing specifically on the Windows side.
Why Choose a Windows VPS?
People pick Windows VPS hosting for a mix of practical and personal reasons. The most common one I hear is familiarity if you've spent years working in a Windows environment, managing a server through a desktop interface you already know is genuinely easier than learning Linux command-line administration from scratch.
Beyond comfort, there are solid technical reasons. Windows Server natively supports ASP.NET applications, Microsoft SQL Server, and enterprise tools that are either unavailable or require workarounds on Linux. For businesses that rely on the Microsoft ecosystem think Active Directory, Exchange, or custom .NET applications — a Windows VPS isn't just convenient; it's often the only viable choice.
Other benefits worth noting:
- Performance consistency: Dedicated resources mean your application's response time doesn't depend on what other customers are doing.
- Scalability: Need more RAM or CPU next month? Most providers let you upgrade with a few clicks and a quick reboot.
- Isolation and security: Your VPS runs in its own contained space, and you control the firewall, user accounts, and security policies.
Developers, small businesses, Forex traders running automated platforms, and entrepreneurs launching SaaS products all find their way to Windows VPS hosting. For a broader look at what's possible, explore our full list of Windows VPS use cases. If you're curious about specific scenarios, our guide on How to Set Up VPS for Forex Trading walks through one of the more specialized use cases.
How to Set Up Your Windows VPS?
Step 1 — Choosing and Purchasing Your Windows VPS
The setup process starts before you ever log into a server it starts with picking the right plan. I've seen people grab the cheapest option available and then struggle for months with an underpowered machine, only to migrate everything later. That's far more painful than spending an extra few dollars up front. If you're not sure what to prioritize when comparing plans, our breakdown of Windows VPS hosting features covers what actually matters.
When you're comparing providers and plans, focus on these specifics rather than just the headline price:
- RAM and CPU: Think realistically about what you'll run. A small website with SQL Server Express needs more memory than a static HTML page. If you're planning to host multiple applications, err on the side of more RAM it's the resource you'll miss first.
- Storage type and size: SSD storage is the minimum standard now; NVMe is better if it's available. Don't underestimate how quickly logs, databases, and backups consume disk space.
- Bandwidth allowance: Check whether your plan includes unmetered bandwidth or has a monthly cap. Going over can get expensive or get your server throttled.
- Windows licensing: Read the fine print. Some providers bundle the Windows Server license into the plan price; others add it as a separate monthly fee that can substantially change the total cost.
- Support quality: Particularly for your first VPS, 24/7 support matters. When RDP won't connect at midnight, you'll want someone who can look at the hypervisor level, not just tell you to check your password.
One final thought on choosing a plan: think in terms of the next 12–18 months, not just what you need today. Migrating a configured server is tedious. It's better to grow into a slightly larger plan than to outgrow a small one in three months.
Step 2 — Accessing Your Windows VPS via Remote Desktop
After your purchase goes through, the provider sends you three essential pieces of information: the IP address of your VPS, a username (almost always "Administrator"), and a temporary password. Guard these anyone with those three items can reach your server's desktop.
The tool that makes this connection possible is Remote Desktop Protocol, or RDP. Think of RDP as Microsoft's built-in remote control system for Windows machines. It gives you a full graphical desktop over the internet, so you're not squinting at a command line you're seeing the same Start menu, taskbar, and windows you'd see sitting in front of a physical PC.
Here's how to connect from a Windows PC:
- Open the Remote Desktop Connection app hit the Windows key, type "mstsc" or "RDC", and it'll appear.
- In the "Computer" field, enter your VPS IP address.
- Type your username (usually Administrator) when prompted.
- Click Connect, then enter the temporary password you received.
- If a security certificate warning pops up, accept it this is normal for newly provisioned servers that don't yet have a trusted SSL certificate.
Once connected, you're looking at a Windows desktop that behaves almost identically to a local PC. The difference is that every program you open, every setting you change, is happening on a machine in a data center somewhere not on your own computer.
If you're on macOS, download the Microsoft Remote Desktop app from the App Store and follow the same steps. Linux users can use open-source clients like Remmina or rdesktop. For a wider look at connection methods across different operating systems, our How to Connect to VPS guide covers the full picture, and How to Connect to a Windows Server goes deeper into advanced RDP configurations.
Step 3 — Initial Server Setup and Hardening
The moment you first log in, your VPS is at its most vulnerable. The password is temporary, Windows hasn't been updated, and the firewall is in its default state. This section covers the tasks you should complete before installing anything else think of it as the first-hour security checklist.
Change the administrator password immediately.
I cannot emphasize this enough. Default credentials are the single biggest attack vector for newly provisioned VPS instances. Inside your RDP session, press Ctrl + Alt + End (this sends the command to the remote machine rather than your local PC), then select Change a password. Use a genuinely strong password at least 12 characters mixing uppercase, lowercase, numbers, and symbols. Avoid dictionary words, and don't reuse a password from another service.
Configure the Windows Firewall.
Open Windows Defender Firewall with Advanced Security from the Start menu. You'll see inbound and outbound rules governing every type of network traffic. At minimum, confirm that RDP (TCP port 3389) is allowed, then review what else is open. If you plan to host websites, add rules for HTTP (port 80) and HTTPS (port 443). Disable or delete any inbound rules for services you don't recognize or need every open port is a potential entry point.
Run Windows Update before anything else.
Go to Settings → Update & Security → Windows Update and click Check for updates. Let it download and install everything available, then restart. A freshly patched server eliminates dozens of known vulnerabilities that automated scanners look for. I recommend running updates once more after the reboot to catch any patches that depend on earlier updates being installed first.
Install only the software you need right now.
A clean server is a secure server. If you're hosting a web application, install IIS or Apache. If you need a database, install SQL Server or MySQL. But resist the urge to install everything at once each additional service expands your attack surface and consumes resources. You can always add more later.
Step 4 — Optimizing Performance for Your Workload
Windows Server ships with conservative defaults designed for physical hardware. On a VPS, where resources are virtualized and often shared at the hypervisor level, tweaking a few settings can meaningfully improve responsiveness.
Switch to the High Performance power plan.
This is an easy win that many people overlook. Go to Control Panel → Hardware and Sound → Power Options and select High Performance. By default, Windows Server may use a Balanced plan that throttles the CPU to save energy great for a laptop running on battery, pointless for a server sitting in a data center.
Reduce visual effects.
Navigate to System → Advanced system settings → Performance Settings and choose Adjust for best performance. This disables animations, shadows, and transparency effects. On a remote desktop connection, every graphical flourish consumes bandwidth and CPU cycles that could go to your actual workload. The interface will look slightly more utilitarian, but it'll feel noticeably snappier.
Set up automatic backups before you need them.
I've learned this one the hard way. Windows has a built-in Backup and Restore tool, and most VPS providers offer snapshot backups at the infrastructure level. Enable both if you can. A snapshot taken before a major configuration change can save you hours of rebuilding if something goes wrong. Test your backups periodically a backup you've never restored is just a theory.
Keep Windows Defender enabled.
It's already built into Windows Server and does a solid job for most use cases. If you have specific compliance requirements, a third-party antivirus may be necessary, but for the majority of users, Defender plus regular updates plus sensible firewall rules is a robust security baseline.
Step 5 — Security Best Practices to Maintain Long-Term
The initial hardening in Step 3 gets you to a safe starting point. Keeping the server secure over months and years requires a few ongoing habits none complicated, but all easy to neglect when things are running smoothly.
Keep the firewall active and review your rules periodically.
It's tempting to disable the firewall temporarily when troubleshooting a connection issue, then forget to re-enable it. Don't. Instead, use the Windows Firewall with Advanced Security console to add precise rules for the specific traffic you need, and leave everything else blocked.
Create separate user accounts for different people and purposes.
Logging in as Administrator for everyday tasks is a risk one wrong click on a malicious link and the attacker has full control. Create a standard user account for routine work, and only elevate to Administrator when you need to change system settings. If multiple people access the server, each should have their own account with the minimum permissions their role requires.
Consider a VPN for an additional security layer.
For sensitive environments, restricting RDP access to only those connected through a VPN adds meaningful protection. This way, port 3389 isn't exposed to the entire internet it's only reachable once the VPN tunnel is established.
Build maintenance into your routine.
Run Windows Update at least monthly. Rotate passwords quarterly. Review the Event Viewer logs for unusual login patterns or repeated failed attempts. Take a snapshot before any major configuration change. These aren't exciting tasks, but they're what separates a reliable production server from one that becomes a cautionary tale.
Troubleshooting Common Problems
Even with a careful setup, things occasionally go wrong. Here are the three issues I see most often and how to resolve them quickly.
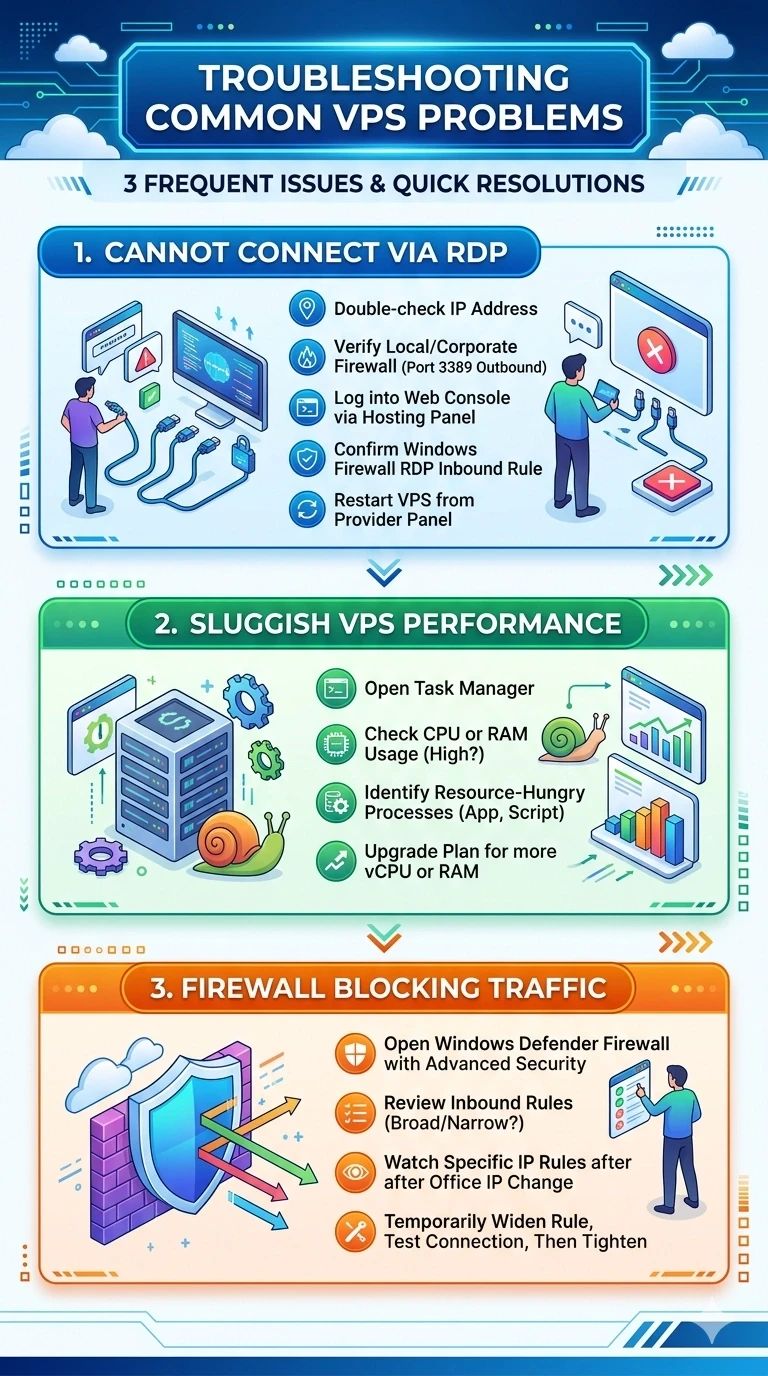
Cannot connect via RDP
First, double-check the IP address it's surprisingly easy to copy it wrong. Next, verify that your local firewall or corporate network isn't blocking outbound connections on port 3389. If those are fine, log into your hosting provider's control panel (most offer web-based console access even when RDP is down) and confirm that the Windows Firewall inbound rule for RDP is still enabled. As a last resort, restart the VPS from the provider panel.
VPS feels sluggish
Open Task Manager and check whether CPU or RAM usage is consistently near 100%. If it is, identify the process responsible sometimes a misconfigured application or a runaway script is the culprit, not the server size. If resource usage is high across the board with no obvious offender, it may be time to upgrade your plan to one with more vCPU cores or additional RAM.
Firewall is blocking legitimate traffic
Open Windows Defender Firewall with Advanced Security and review the inbound rules. Pay special attention to rules that are too broad or too narrow. A rule that allows traffic only from a specific IP range might block you if your office IP changes. If you're unsure, temporarily create a wider rule, test the connection, then tighten it again once you confirm what's needed.
Conclusion
Setting up a Windows VPS doesn't require years of system administration experience. What it requires is a methodical approach: pick appropriate hardware, connect securely, harden the server before doing anything else, optimize for your actual workload, and maintain good security habits over time.
In this guide, we've walked through choosing a plan that won't limit you, establishing a secure RDP connection, changing the default password and configuring the firewall, running updates, tuning performance settings, and establishing ongoing maintenance practices. You've also got troubleshooting steps for the most common roadblocks.
From here, your VPS is ready for whatever you're building whether that's hosting websites, running business applications, or serving as a remote development environment. If you need a reliable Windows VPS to put these instructions into practice, explore our Windows VPS hosting and choose the configuration that fits your project.

An experienced tech and developer blog writer, specializing in VPS hosting and server technologies. Fueled by a passion for innovation, I break down complex technical concepts into digestible content, simplifying tech for everyone.