List of content you will read in this article:
Redis is a very multifunctional tool, however, it does not have built-in Windows support. Nevertheless, in today's article, we will show you how to install Redis on Windows.
What Is Redis?
Redis is an open-source in-memory data structure store, used as a database, cache, and message broker. It provides data structures such as strings, hashes, lists, sets, stored sets with range queries, bitmaps, hyperlog logs, geospatial indexes, and streams. Redis also has built-in replication, Lua scripting, LRU eviction, transactions, and different levels of on-disk persistence.
It can run atomic operations on the following types: appending a string, incrementing a value in hash, pushing an element to a list, computing set intersection, union, and difference, and getting the member with the highest ranking in a sorted set. For maximum performance, Redis works with an in-memory dataset.
If you want to know how to install Redis on Windows, continue reading.
🔗 Explore our in-depth comparison of Memcached vs Redis to make an informed caching decision! 📊🚀
Install Redis for Windows
Official support for Redis for Windows is not provided. Nonetheless, you can set up the Redis Windows environment for development purposes by following the steps outlined below. Here, we tell you to Install Redis on Windows without WSL in 5 steps.
Step 1: Install Ubuntu
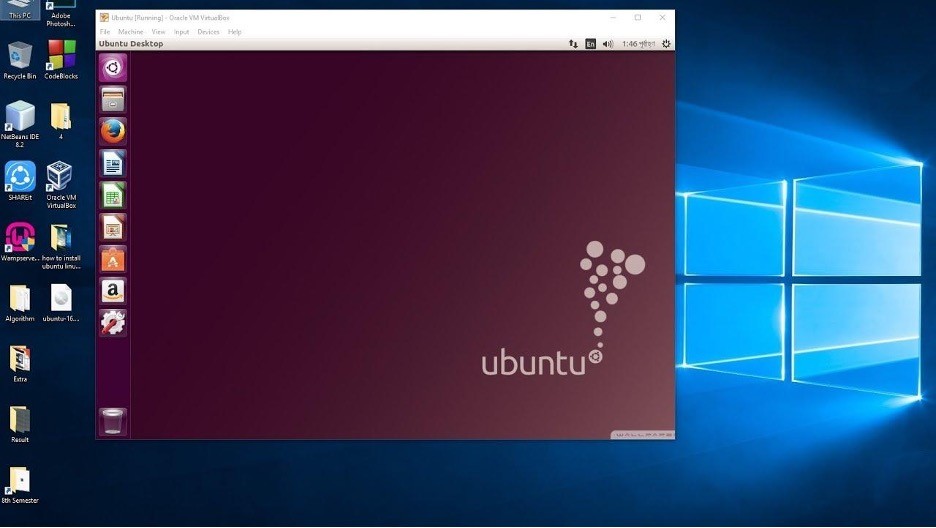
To Install Redis on Windows without WSL, open the Microsoft Store search for "Ubuntu" and choose the version you want (e.g., Ubuntu 20.04 LTS). Then, Click "Install and set up Ubuntu:
- Launch the installed Ubuntu application.
- Set up your username and password when prompted.

Now, you have Ubuntu installed on your Windows machine using the Windows Subsystem for Linux (WSL 2).
Step 2: Update Package Information
To update package information on Ubuntu running on Windows, you can follow these steps:
- Launch the Ubuntu application on your Windows system. This will open a terminal window.
- In the terminal, run the following command to update the package lists:
sudo apt update
This command will fetch the latest information about available packages from the Ubuntu repositories.
- When prompted, enter your user password. Note that when you type the password, no characters will be displayed on the screen. This is normal behavior for security purposes.
- Press Enter after entering the password. The terminal will now connect to the Ubuntu repositories and update the package lists. It will display the progress and download information for each repository it accesses. Wait for the process to complete.
- After updating the package lists, you can also update the installed packages to their latest versions. To do this, run the following command in the terminal:
sudo apt upgrade
This command will upgrade all the installed packages on your Ubuntu system to their latest available versions. You will be prompted to confirm the upgrade before proceeding.
👉 "Want to learn more about checking your Ubuntu version? Explore our in-depth guide on how to 'Check Ubuntu Version' for detailed steps and tips!" 👈
Step 3: Install Redis
After successfully running Ubuntu on your Windows system, you can proceed with the instructions outlined in the "Install on Ubuntu/Debian" section to set up the latest stable versions of Redis from the official packages.redis.io APT repository. Add the repository to the apt index, refresh it, and proceed with the installation:
curl -fsSL https://packages.redis.io/gpg | sudo gpg --dearmor -o /usr/share/keyrings/redis-archive-keyring.gpg
echo "deb [signed-by=/usr/share/keyrings/redis-archive-keyring.gpg] https://packages.redis.io/deb $(lsb_release -cs) main" | sudo tee /etc/apt/sources.list.d/redis.list
sudo apt-get update
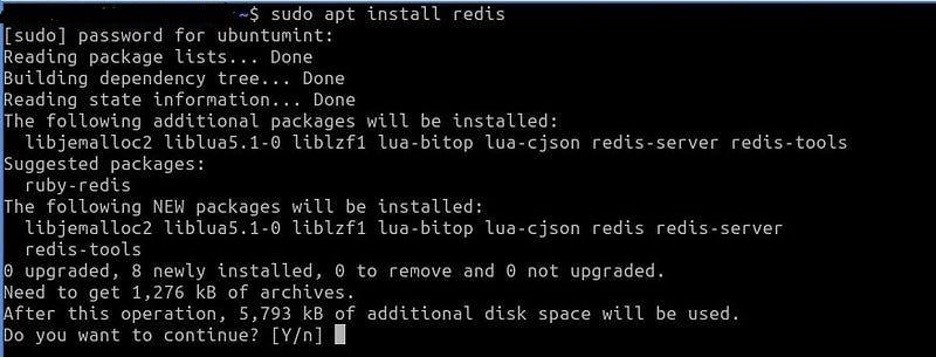
sudo apt-get install redis

Step 4: Start the Redis Service
Start the installed Ubuntu distribution, and in the terminal, run the following commands:
sudo apt-add-repository ppa:redislabs/redis
sudo apt-get update
sudo apt-get upgrade
sudo apt-get install redis-server

Note: Depending on your system's user configuration, you may need to use the sudo command.
📚 Want to master essential Linux commands? Check out our comprehensive "Basic Linux Commands Cheat Sheet" for a quick reference guide! 🐧💡
Step 5: Test if Redis is Active
To check if Redis is active, you can use the Redis CLI (Command Line Interface) to perform a simple ping test.
- Open Command Prompt or Terminal.
- Run the following command to start the Redis CLI:
redis-cli
- Send a Ping Command:
ping
If Redis is active, it will respond with "PONG."
Here's an example:

Keep in mind that following instructions presume the local machine's Redis settings is set to default. If you're connecting to a Redis server on a different host or port, you may need to enter additional information when running the Redis CLI. For example:
redis-cli -h <hostname> -p <port>
Replace `<hostname>` with the actual hostname or IP address of the Redis server, and `<port>` with the port on which Redis is running.
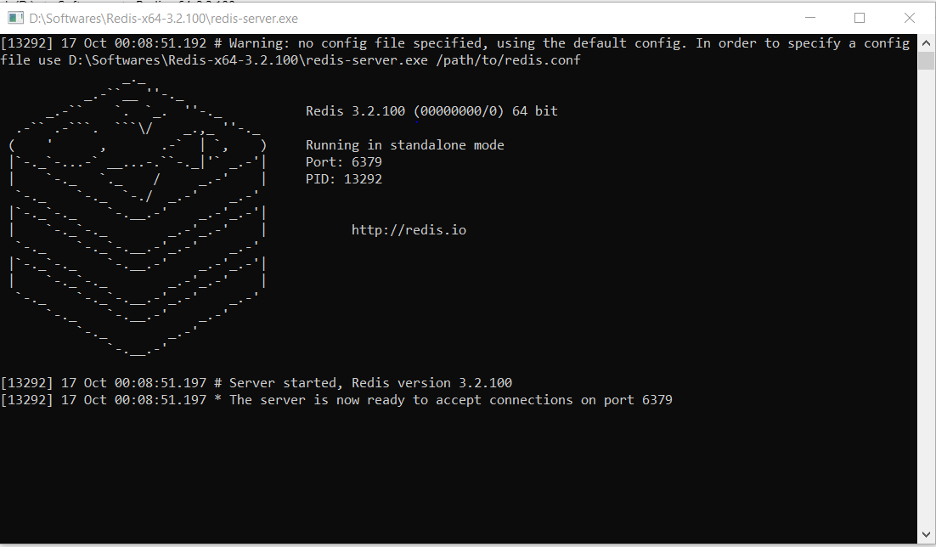
Now you can install Redis on Windows without WSL whenever you want.
🔗 Explore Other Redis Configuration Settings: Learn more about Redis by checking out our guide on "Redis Port" and discover how different configuration settings can optimize your Redis server's performance. 🚀
How to Install Redis on Windows 10/11 Using WSL?
We told you how to Install Redis on Windows without WSL. Now, to initiate the installation of Redis Windows, it is essential to activate WSL2 (Windows Subsystem for Linux). WSL2 facilitates the execution of Linux binaries directly on Windows. Please note that this approach requires Windows 10 version 2004 or later, or Windows 11.
How do I know if I have Windows 10 with WSL?
To determine the installed WSL version on Windows 10 or 11, follow these instructions:
- Open the Start menu.
- Search for Command Prompt (or PowerShell), right-click the top result, and choose the "Run as administrator" option.
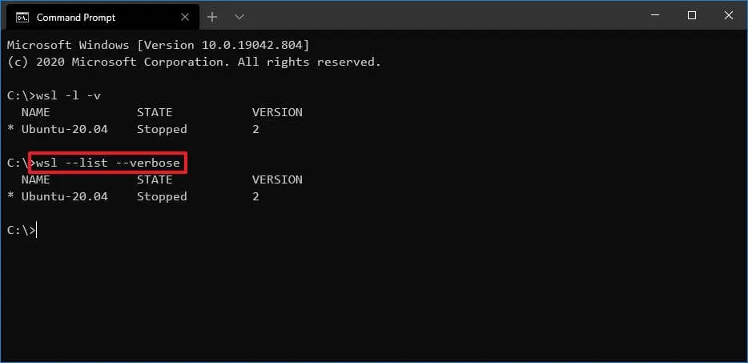
- Enter the following command to check the WSL version on your device and press Enter:
wsl --list –verbose

(Alternatively, you can use the concise command: wsl -l -v)
- In the "Version" column, verify the WSL version installed on your Windows 11 or 10 system.
Upon completion of these steps, if the output displays "2" under the "Version" column, WSL2 is installed on your machine. If there is an error or no version number is shown, it indicates WSL1 is installed on Windows.
How to set up WSL?
Launch PowerShell as an Administrator and execute the following command to enable WSL2:
Enable-WindowsOptionalFeature -Online -FeatureName Microsoft-Windows-Subsystem-Linux
Restart your system (this step is required only once).
After this, follow the tutorial that we mentioned before.
How to install the Redis client library
To install the Redis client library, the steps depend on the programming language you are using. Here are examples of several popular programming languages:
Python
Using `pip`, you can install the `redis` library for Python:
pip install redis
Node.js (JavaScript/TypeScript)
For Node.js, you can use the `ioredis` library. Install it using `npm`:
npm install ioredis
Java
For Java, you can use the Jedis library. If you're using Maven, add the following dependency to your `pom.xml`:
<dependency>
<groupId>redis.clients</groupId>
<artifactId>jedis</artifactId>
<version>3.8.0</version> <!-- Check for the latest version -->
</dependency>
Ruby
For Ruby, you can use the `redis` gem:
gem install redis
C# (.NET)
For C# and .NET, you can use the StackExchange.Redis library. If you're using NuGet, you can install it using the Package Manager Console:
Install-Package StackExchange.Redis
PHP
For PHP, you can use the `predis` library. Install it using Composer:
composer require predis/predis
Go
For Go, you can use the `github.com/go-redis/redis/v8` package. Install it using `go get`:
go get -u github.com/go-redis/redis/v8
After installing the respective library for your programming language, you can use it in your code to interact with Redis. Ensure that you have a running Redis server that your client library can connect to.
Drawbacks of Redis on Windows
While Redis can be utilized on Windows via the Windows Subsystem for Linux (WSL) or native Windows ports, there are a few downsides and concerns to keep in mind when using Redis Windows.
- Performance: Redis was developed for Unix-like operating systems, so its performance on Windows may not be optimal. Some features, such as fork-based persistence, may not function optimally on Windows.
- Official Support: Redis does not officially support Windows. Official Redis releases are primarily designed for Unix-like systems. Windows users may need to use community-supported ports or WSL to run Redis.
- Memory Management: Redis employs the 'fork' system call for memory management, which may not work properly on Windows. This can cause behavioral variations when compared to operating Redis on Unix-like systems.
- Persistence Mechanisms: Fork-based persistence methods, such as RDB snapshots and AOF (Append-Only File), may function differently on Windows, affecting data persistence and recovery.
- File System Compatibility: Some Redis capabilities rely on file system features that may not work properly with Windows file systems. This can cause changes in behavior, particularly when it comes to file locking and atomic operations.
- Limited Redis Version Support: Some Redis versions may not be available or completely supported on Windows. Users may have to rely on community builds or versions that are optimized for Windows.
- Security Concerns: Using Redis on Windows may have security concerns. It is critical to adhere to established practices for safeguarding Redis instances, especially on Windows platforms.
- Compatibility with Other programs: While some programs and utilities operate effortlessly with Redis on Unix-like platforms, they may not be fully compatible or supported on Windows.
Tips for Optimizing Redis
Optimizing Redis performance can greatly enhance its efficiency and scalability. Here are some tips for optimizing Redis:
- Use Appropriate Data Structures: Choose the right Redis data structures (e.g., hashes, sets, lists) based on your specific use case and access patterns.
- Set an Appropriate Max Memory Policy: Configure `maxmemory` and `maxmemory-policy` to manage memory usage efficiently.
- Optimize Persistence: Fine-tune persistence options (RDB snapshots, AOF) based on your requirements for data durability and recovery speed.
- Use Connection Pooling: Employ connection pooling to manage Redis client connections efficiently.
- Lua Scripting: Utilize Lua scripts for complex operations to reduce round-trips and enhance performance.
- Key Naming and Data Modeling: Use meaningful key names and optimize data models to reduce redundancy.
- Monitor and Profile: Regularly monitor Redis performance using tools like `redis-cli MONITOR` and profiling tools to identify and address bottlenecks.
- Parallelism (Redis 7+): Take advantage of multi-threaded I/O by enabling it in Redis 7 for improved performance on multi-core systems.
- Consider Data Sharding: Distribute large datasets across multiple Redis instances or clusters using data sharding.
- Eviction Policies: Choose eviction policies (e.g., LRU, LFU) based on your data access patterns.
- Optimize Network Configuration: Fine-tune network settings, and use the `bind` configuration to control network interfaces.
- Avoid Large Hashes or Lists: Break down large datasets into smaller hashes or lists to reduce memory consumption.
- Regularly Benchmark and Test: Benchmark your Redis setup regularly to identify performance improvements and potential issues.
- Security Best Practices: Implement proper security measures, including authentication and restricted network exposure.
- Update to the Latest Version: Keep Redis updated to benefit from performance improvements and bug fixes.
Limiting memory usage
To limit the memory usage of Redis, you can configure the `maxmemory` parameter in the Redis configuration file. Set `maxmemory` to a value representing the maximum amount of memory Redis is allowed to use. When this limit is reached, Redis employs its configured eviction policy to remove less frequently used keys or data.
For example, you can set `maxmemory` to "1GB" to limit Redis to 1 gigabyte of memory. Additionally, consider adjusting the `maxmemory-policy` parameter to specify the eviction policy, such as LRU (Least Recently Used) or LFU (Least Frequently Used), to determine which keys to remove when the memory limit is reached. Regular monitoring and fine-tuning of these parameters are essential for effective memory management in Redis. Also. You can:
- Enable compression in Redis
- Optimize Data Structures
- Set time-to-live (TTL) values for keys in Redis
- Use Redis Modules or External Solutions
- Shard Data Across Multiple Redis Instances
Making Redis Run on Startup
- Open Task Scheduler on your Windows machine.
- Create a new task and configure it as follows:
|
General tab |
Provide a name and description for the task. |
|
Triggers tab |
Add a new trigger for "At startup." |
|
Actions tab |
Add a new action and specify the path to the Redis server executable as the program/script. |
|
Conditions tab |
Optionally, configure any desired conditions. |
|
Settings tab |
Ensure that "Run task as soon as possible after a scheduled start is missed" is selected. |
- Save the task and exit Task Scheduler.
Note: Adjust the file paths and other details to match your Redis installation.
Conclusion
In this article, we briefly discussed what is Redis and followed up with a tutorial on how to install it on Windows OS. If you have any questions or suggestions, leave them in a comment down below.
