![How to Update Python Version? - [Upgrade Python Version]](/wp-content/uploads/2022/11/how-to-update-python-version962-main.webp)
If you’re a developer, you know Python for sure! This super flexible and open-source programming language works on all platforms, from personal computers and laptops to big and powerful servers. But how can you benefit from all its advantages? It’s obvious! You should keep it up to date. If you update Python version regularly, you can enjoy all the cool new stuff that provides better performance and more security. But do you know how to upgrade Python on Windows/macOS/Linux? If not, stay with us till the end as we’re going to show you how to do that. But before starting the upgrading process, let’s see what is PIP.
What is PIP?
PIP stands for "Pip Installs Packages." It's the package manager for the Python programming language, making it easy for developers to install and manage software libraries written in Python. PIP is used to augment Python with additional functionalities that aren't part of the standard library.
History and Evolution:
PIP was introduced as a replacement for easy_install, another older package management system for Python. As the Python community grew and more libraries became available, there arose a need for a more efficient, user-friendly package manager. PIP, with its straightforward syntax and wide range of functionalities, soon became the preferred choice.
Core Features:
- Installing Python Packages: The primary function of PIP is to fetch and install packages from the Python Package Index, also known as PyPI. With a simple command like pip install package-name, developers can get and set up their desired Python library.
- Requirements File: Developers can list multiple packages with their respective versions in a requirements.txt file. Using pip install -r requirements.txt, all the mentioned packages can be installed simultaneously, making it easy to replicate environments.
- Uninstalling Packages: PIP also provides an easy way to uninstall packages with the pip uninstall package-name.
- Listing Packages: With the pip list, developers can view a list of installed packages.
- Searching Packages: pip search package-name allows users to search for packages available on PyPI.
- Managing Different Versions: PIP makes it easier to upgrade to newer versions of packages or downgrade to older ones, providing flexibility based on project requirements.
Updating Python on Windows
There are two simple ways to update your current Python version with the latest one. They are as follows:
- Using the Python Installer
- Using the Windows Chocolatey Package Manager
So let’s see how we can update the Python version with these two methods, one by one.
Method 1: Python update on Windows using the Python Installer
This method of updating the Python version will work whether Python is installed or not on your System.
If Python is already installed on your system, you can check it using the Python -V command.

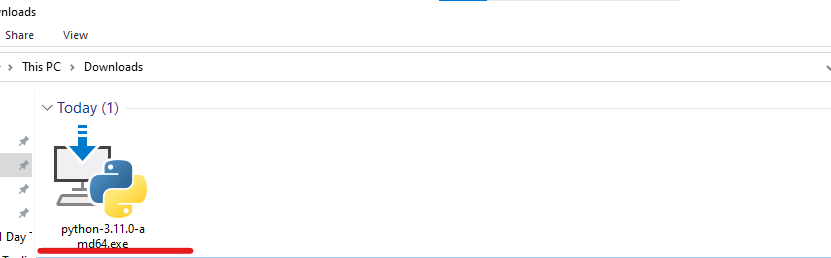
Step 1: Download the Python installer from the Official Website of Python
The easiest way to update the Python version is to download the latest version from the official website (https://www.python.org/downloads/)
You can click on the Download Python 3.11.0 button, and it will download the latest compatible Python version for your system.
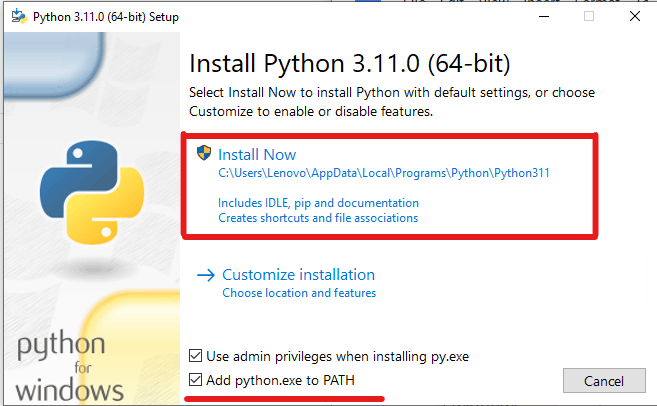
Step 2: Install the Downloaded Python Installer
After downloading the exe file, double-click on it to install Python on windows.
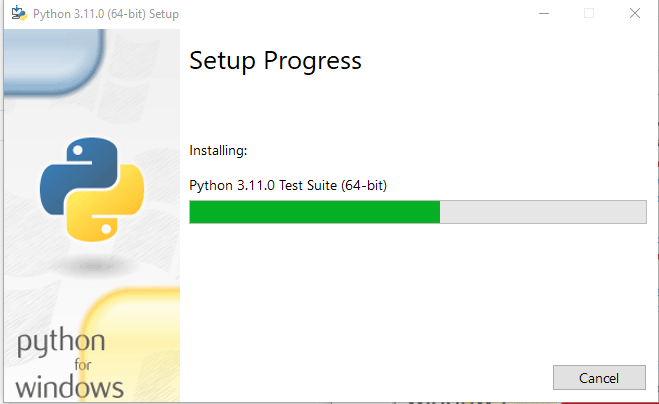
Step 3: Install Python
Now, you can install the latest version of Python.
Check the “Add python.ext to PATH”, then click on the “Install Now” button.
This will start the installation process.
After processing, the latest version of Python will be installed on your system.
Click on the “Close” Button.
Step 4: Verify the Update
After successful installation, you can verify whether or not the latest version is installed on your system. To check the Python version, you can again run the same command, python -V, on the prompt command.
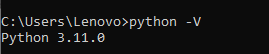
Now, you can see that it is showing the latest installed version, i.e., Python 3.11.0.
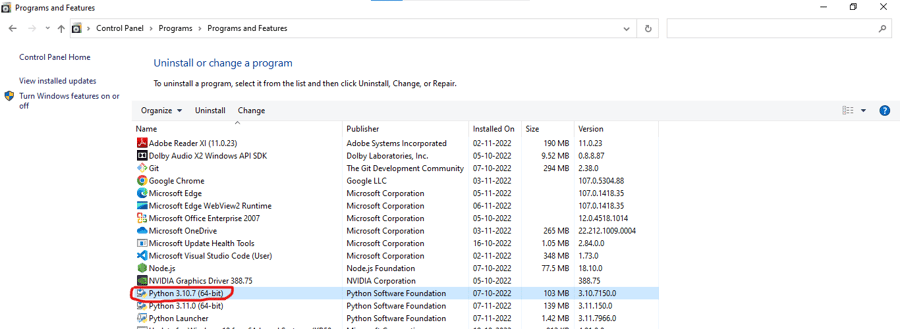
Note: If it still shows the old version, you may restart your system. Or uninstall the old version from the control panel.
Method 2: Install Python using Command Line Only using the Chocolatey Package Manager
Chocolatey is a Package Manager command line tool for Windows, and we can use it to install software for our Windows system. In our case, we can use it to install Python or update the current version of Python.
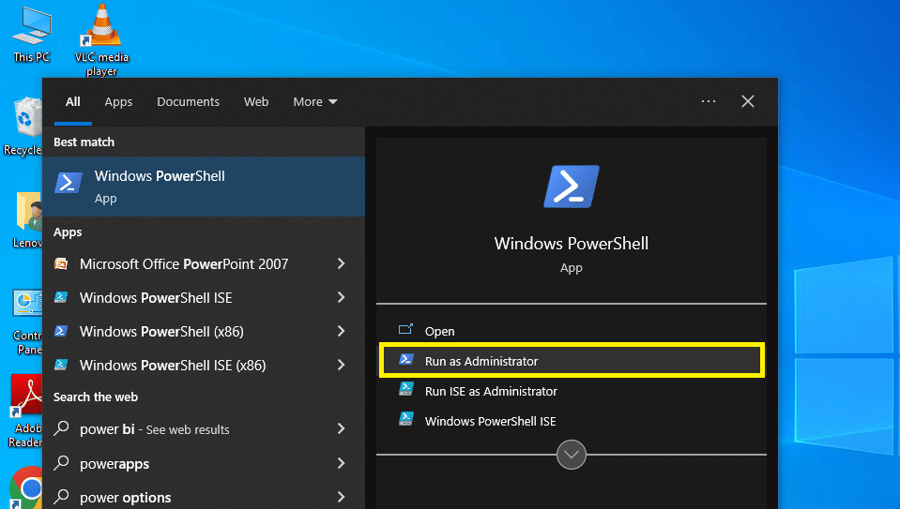
Step 1 Open The Powershell as Administrator
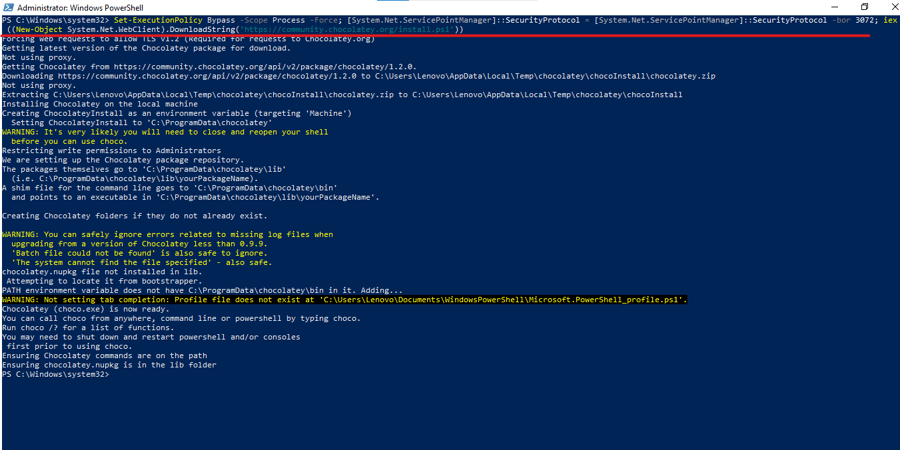
To install Chocolatey, you need to open PowerShell as Administrator.
Step 2: Install the Chocolatey Package Manager Command
Now, you can install the Chocolatey package manager using the following command.
Set-ExecutionPolicy Bypass -Scope Process -Force; [System.Net.ServicePointManager]::SecurityProtocol = [System.Net.ServicePointManager]::SecurityProtocol -bor 3072; iex ((New-Object System.Net.WebClient).DownloadString('https://community.chocolatey.org/install.ps1'))
Step 3: Verify the Chocolatey Installation
Now, you need to check whether Chocolatey has been installed successfully. To check it, run the “choco” command.

It is installed successfully because it is showing version Chocolatey v1.2.0.
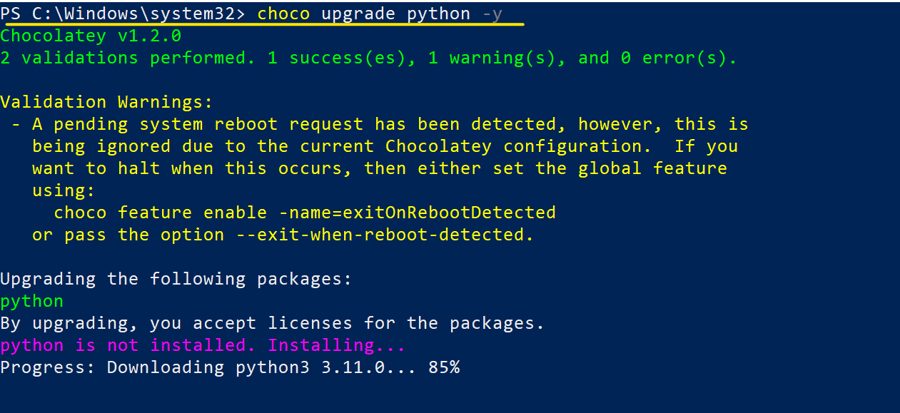
Step 4: Update Python with Chocolatey
With the help of the choco upgrade command, we can update our current Python version.
choco upgrade python -y
Step 5: Verify the Version
You can again check the latest installed Python version using the following command.
python -V
![]()
Note: The old version of Python will remain on your system. You can uninstall the old version from the control panel.
How to Update Python on macOS?
We’re going to mention how to update Python on macOS with two effective methods: using the official Python installer and using Homebrew which is a popular package manager. If you want to upgrade Python using the command line, the Homebrew should be your choice. But if you prefer a Graphical User Interface (GUI), you should use a Python installer. Let’s start:
Method 1: Using the Python Installer (GUI)
If you’re comfortable with a graphical interface, this method is for you. Here are the steps:
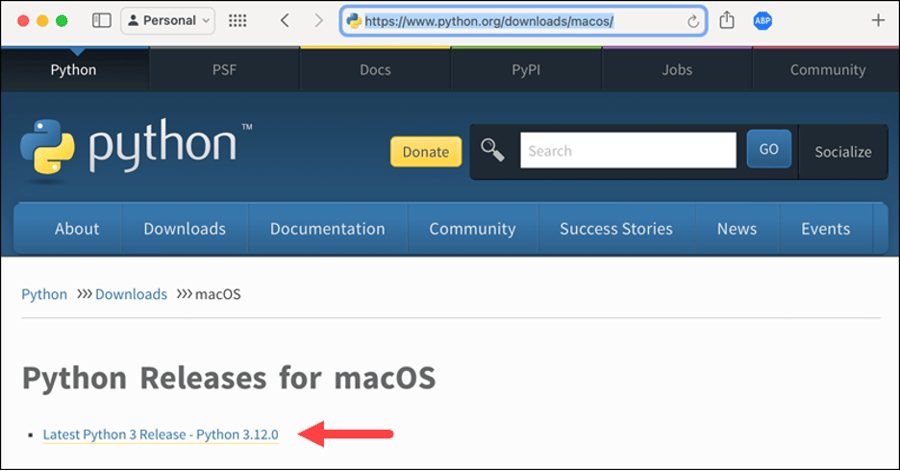
Step 1: Download the Latest Python Installer
Before anything, you should download and install the latest version of Python installer. To do that, open your browser and go to the Python Releases for macOS page. By clicking on the link for the latest Python 3 release, you will be directed to the installer downloads page, as the following picture shows:
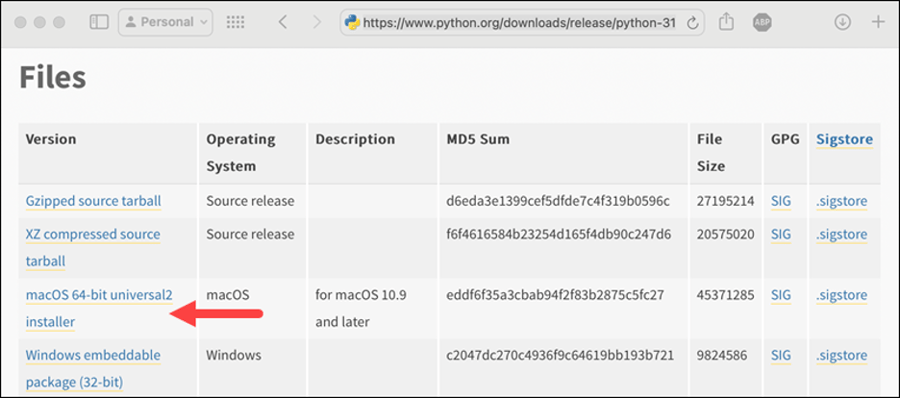
Step 2: Select the macOS Universal Installer
Now, scroll down and find the section with the heading “Files”. There’s a table under that in which you can see the macOS universal installer. Click on that to download and wait until the download is completed.
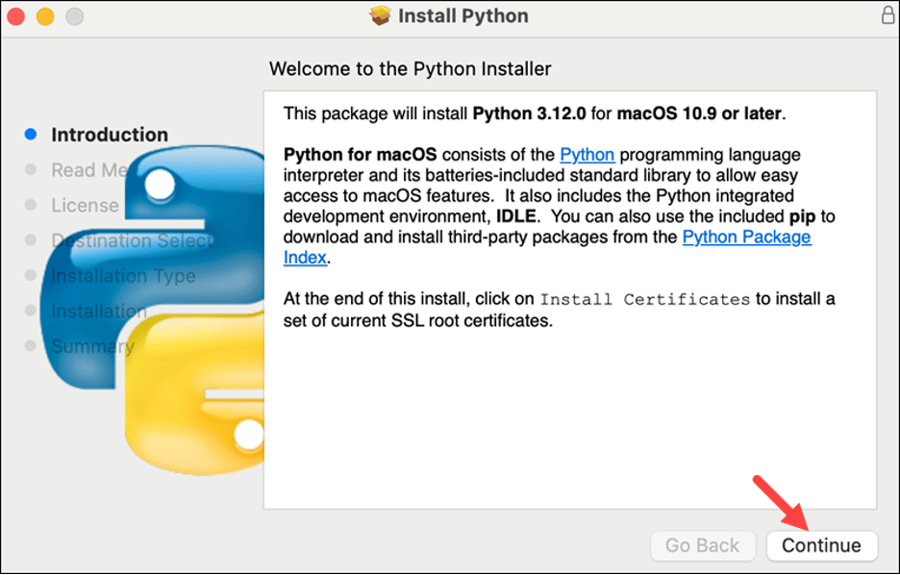
Step 3: Run the Installer
Now that the download process is complete, you need to open the installer file. In this step, to agree to the License Agreement, you should click on "Continue" button. To complete the installation process, you should confirm the installation location and choose the type of installation you want. But typically, the default is ok.
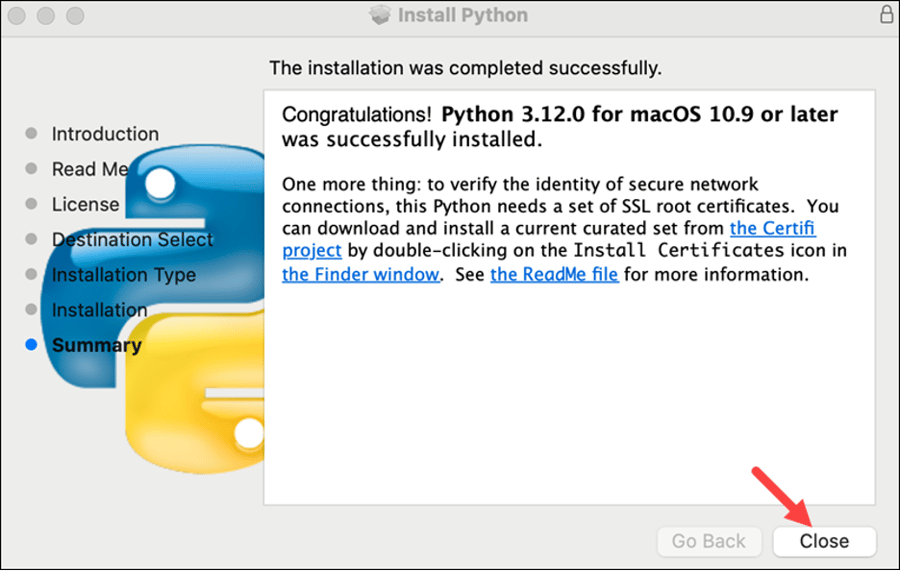
Step 4: Complete the Installation
Wait until the installer finishes copying the necessary files. After that, to exit the installer, click "Close".
Step 5: Check if it is updated successfully
If you want to ensure whether Python is updated successfully on your macOS or not, you can type the following command in your terminal:
python3 --version
If the output displayed the version number of the latest Python release, it means the updating process was successful. The output will be like:

Method 2: Updating Python via Homebrew (CLI)
Are you comfortable with the command line for upgrading Python on macOS? So, the Homebrew can be a better option for you as it offers a faster and easier process. To use this method, you need to download Homebrew first if you don’t have it on your system. Using the following command, you can set it up:
/bin/bash -c "$(curl -fsSL https://raw.githubusercontent.com/Homebrew/install/master/install.sh)"
After the installation process, you should ensure if Homebrew is up-to-date using this command:
brew update
Now, you can update Python easily. If you’re going to upgrade Python from version 2 to 3, use this command:
brew install python3
But if you have installed Python 3 before and now you want to update it, use this command:
brew upgrade python3
Now you can check the Python version to ensure the updating process was successful by running this command:
python3 --version
Extra Tips for Mac Users
If you’re a Mac user, these tips can be useful for you:
- Dealing with several Pythons: Your Mac may already contain Python 2. Always use python3 and pip3 to avoid issues when dealing with Python 3.
- Making Python 3 the default: If you want Python 3 to be the default version, you can add the following shortcut to your shell configuration file (such as.bash_profile or.zshrc):
alias python='python3'
alias pip='pip3'
In this manner, when you type Python or pip in the terminal, Python 3 and its package management are instantly loaded.
How to Update Python on Linux?
In this guide, we tell you how to update Python on Linux distributions. First, we identify 2 methods to update Python on Ubuntu Linux. Then, we mention the methods for other distributions including Arch Linux, Fedora, and Debian. For Ubuntu, we can use two methods each offering specific benefits. Here are the methods and you can choose what you prefer:
Method 1: Using PPA (Better Method)
An easy way to install and update Python on your Ubuntu system is the deadsnakes PPA because it has the newest and most up-to-date versions of Python. If you want to use this method, follow these steps:
- Add the deadsnakes PPA: Before anything, you need to add the PPA repository to your Ubuntu system. Use this command to add it:
sudo add-apt-repository ppa:deadsnakes/ppa
- Install the Latest Python Version: After adding the PPA, you can install the latest Python version for your Ubuntu system using this command:
sudo apt install python3.13
This command updates to version 2.13.
- Confirm the installation: After running this command, it prompts for confirming the installation. To confirm, type `y`. If you want to replace any other versions, replace 3.13 with the demand version.
- Verify the Installation: To verify the installation, after completing the installation process, you should run this command:
python3.13 --version
In the output, you will see the Python version you installed right now. If you didn’t, it means there was a problem with that.
- Install PIP: We talked about PIP at the beginning of this blog post. If you think you need to manage Python packages, installing PIP can be a good idea. To do that, run this:
curl -sS https://bootstrap.pypa.io/get-pip.py | python3.13
Remember to replace `python3.13` with the Python version you’ve installed in the last step.
Method 2: Compiling Python from Source Code
Sometimes the version of Python that you want to install is not available in the deadsnakes PPA. What should you do in this situation? Fortunately, there’s another method. You can compile it from source by the following steps:
- Install the Required Libraries: In the first step, you need to install the necessary build tools and libraries needed to compile Python using the following commands:
sudo apt install build-essential checkinstall \
libreadline-gplv2-dev libncursesw5-dev libssl-dev \
libsqlite3-dev tk-dev libgdbm-dev libc6-dev libbz2-dev
- Download the Python Source Code: To download the Python source code, you should go to the `/usr/src` directory. There, you can download the source code for the Python. Attention to choose the desired version. The official Python website includes the latest versions and you can choose.
cd /usr/src
sudo wget https://www.python.org/ftp/python/3.12.0/Python-3.12.0.tgz
Replace `3.12.0` with the version number you want to install.
- Extract the Archive: In the next step after downloading, you should extract the tarball:
sudo tar xzf Python-3.12.0.tgz
- Configure the Build: Go to the extracted directory and set up the build for improvements:
cd Python-3.12.0
sudo ./configure --enable-optimizations
- Compile and Install Python: In this step, you need to compile the source code. Run the following command:
sudo make altinstall
Using altinstall ensures that the new Python does not replace the old one. It may take a while to install.
- Verify: At last, to verify the installation process, run this command:
python3.12 --version
Update Python on Other Linux Distributions
If you use other Linux distributions instead of Ubuntu, the updating process for Python will be different. For the most popular Linux distros, do the following instructions to update Python version:
Debian commands:
sudo apt update
sudo apt install python3.11
Fedora commands:
sudo dnf upgrade python3
Arch Linux commands:
sudo pacman -Syu python
Be Careful Upgrading System Python on Linux
The older versions of Python often are pre-installed in Linux systems. Especially Python 2 or an older version of Python 3. These pre-installed versions of Python are necessary for the computer to function and run properly. Updating Python in such systems can have so many benefits but on the other hand, it can result in breaking essential tools such as software installers or scripts. It can make your computer unstable or cause different errors. But should we avoid updating Python versions? No!
It would help if you did not experiment with the pre-installed Python to avoid the aforementioned concerns. Instead, install the newest versions separately from the older ones without uninstalling them.
Create and use a virtual environment
Some technologies, such as virtual environments or PyEnv, can help you stay organized and avoid conflicts across Python versions.
Virtual environments allow you to build isolated areas for each of your projects. This allows each project to have its own Python version and packages. As a result, newer versions won’t affect the pre-installed Python or other projects. If you don’t know how to create and use a virtual environment, here we show you how:
- If you don’t have venv in your system, run the following command:
sudo apt install python3-venv
- Now, make a Virtual Environment. First, go to your project folder first:
python3.11 -m venv myenv # Replace "myenv" with your desired name
- Then run this command to activate the Environment.
source myenv/bin/activate
You can now install packages and run scripts relevant to this isolated environment. When you are finished, type deactivate to turn it off.
PyEnv Tool for Easy Switching Between Python Versions
If you want to use different Python versions in your system that won’t affect the built-in Python version, you can use PyEnv tool. It enables you to manage multiple Python versions on your computer. Using it, you can switch between different Python versions for different projects without any issues. Here is the installation process:
Run this command in your terminal to install PyEnv:
curl https://pyenv.run | bash
Now, install the desired Python version using this command:
pyenv install 3.12.0 # Replace "3.12.0" with the version you want
In the next step, you should set the global or local python version. To set the default Python version for your entire system, run this command:
pyenv global 3.12.0
Now, you should set a specific Python version for a particular project directory:
pyenv local 3.12.0
Post-Upgrade:
- Check the Python version:
bashCopy code
python --version
- If you have multiple versions of Python installed, you might need to use python3 instead of python to invoke the new version.
- Consider using virtual environments (venv, virtualenv, etc.) to manage project-specific Python versions and dependencies.
- Remember that if you upgrade to a new major version of Python (e.g., from 2.x to 3.x), there might be compatibility issues with your existing scripts or libraries. Always back up your work and test your projects after an upgrade.
Note: Always make sure to back up important data and configurations before making any system-wide changes or updates.
Why We Should Upgrade Python
Upgrading Python to the latest version or a more recent one provides a multitude of benefits, some of which pertain to performance, security, and new features. Let's elucidate the reasons for upgrading Python:
- Performance Enhancements: With each successive version, the Python core development team makes myriad optimizations. Upgrading can yield substantial performance improvements, enabling your code to run faster and more efficiently.
- Security Fixes: Like any software, older versions of Python might contain vulnerabilities. Regularly updating ensures that you receive patches for any security issues, fortifying your applications against potential threats.
- New Features: Newer versions of Python invariably introduce novel features, constructs, and syntactical improvements. By upgrading, developers can leverage these enhancements to write more concise and readable code.
- Improved Library Support: Many third-party libraries and frameworks gradually phase out support for older Python versions, focusing instead on compatibility with newer releases. To ensure that you can utilize the latest versions of these libraries, it's imperative to use a supported Python version.
- Deprecated Features: Over time, some Python functions and features become deprecated and are eventually removed in subsequent versions. Upgrading ensures you're aligned with the latest best practices and avoids potential issues arising from deprecated features.
- Bug Fixes: Beyond major features and improvements, newer versions of Python also address a multitude of bugs present in prior releases. These fixes enhance stability and predictability.
- Extended Standard Library: Python's standard library is frequently augmented with new modules and functions. Upgrading provides access to these additional tools, broadening the repertoire of built-in utilities at a developer's disposal.
- Type Hints and Annotations: Introduced in Python 3.5 and refined in subsequent versions, type hints allow developers to specify expected data types, enhancing code clarity and facilitating better IDE integrations and error checking.
- Concurrency and Parallelism: Newer Python versions have improved support for concurrency and parallelism, crucial for applications that require high performance and responsiveness.
- Support and Longevity: Older versions of Python will eventually reach their end-of-life (EOL), meaning they won't receive any further updates, even for critical security issues. Staying updated ensures that you're using a version that's actively supported by the community and core developers.
- Consistency and Collaboration: If multiple developers or teams are working on interrelated projects, using different Python versions can introduce inconsistencies. Regularly updating ensures a uniform development environment, mitigating potential conflicts and incompatibilities.
While the aforementioned reasons make a compelling case for upgrading Python, it's also essential to exercise caution. Before transitioning to a newer version, one should assess compatibility with existing applications, libraries, and frameworks. Conduct thorough testing in a controlled environment to ensure that the upgrade doesn't introduce unforeseen issues.
Conclusion
We have seen how to update the Python version on operating systems like Windows, Mac OS, and Linux. Follow the guide carefully to update your Python software. We believe this guide fulfills your requirement though you can install the latest version successfully. Leave your comments below for your feedback and queries.
