If you are planning to host a site, you can never go wrong with WordPress. It is simple to install, easy to use, and provides thousands of free plugins to improve your site’s functionality, looks, and feel. That is precisely why more than 50% of all websites on the world wide web use WordPress to host their sites and manage their sites’ contents.
Today, we bring you an illustrated step-by-step tutorial on how to install WordPress using the cPanel control panel. Let’s get straight into it.
How to Install WordPress on cPanel VPS
WordPress is one of the most popular CMSs (Content Management Systems), which has attracted many advocates recently. This system has a simple and flexible environment that makes it easy to use. Also, Monovm has added WordPress hosting as a service recently so that you can benefit from our dedicated WordPress-optimized hosting, designed specifically to host WordPress sites.
In this tutorial, we use cPanel as our web hosting control panel and we will install WordPress on it. Follow these simple steps to do so on your system:
Step 1: Download WordPress by following this link: “Download WordPress”
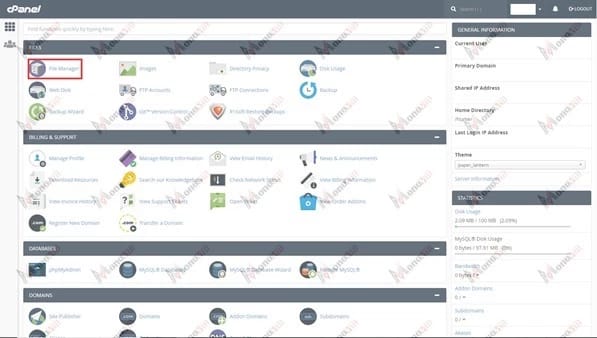
Step 2: In the cPanel environment, select “File Manager”
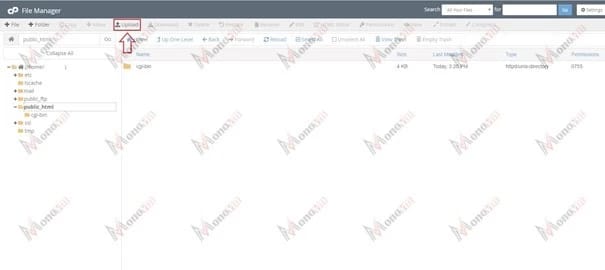
Step 3: Go to “Public html” directory and click on “Upload” button.
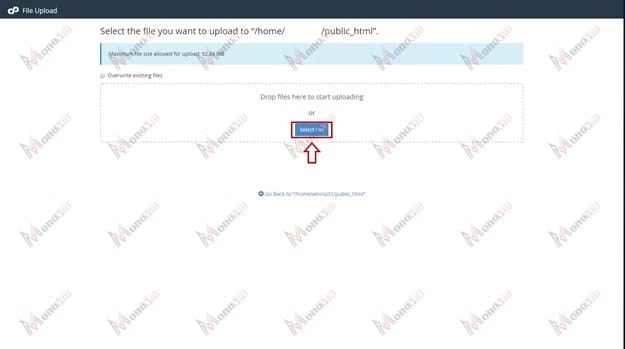
Step 4: On the upload page, click on “Select File” button and select the downloaded WordPress file.
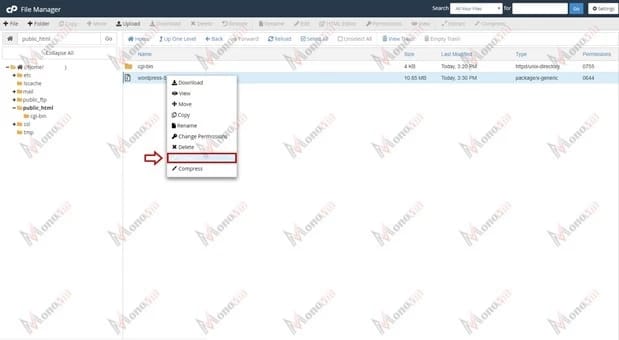
Step 5: After uploading the zip file, right-click on it and select “Extract” to copy all files to “Public html/” directory.
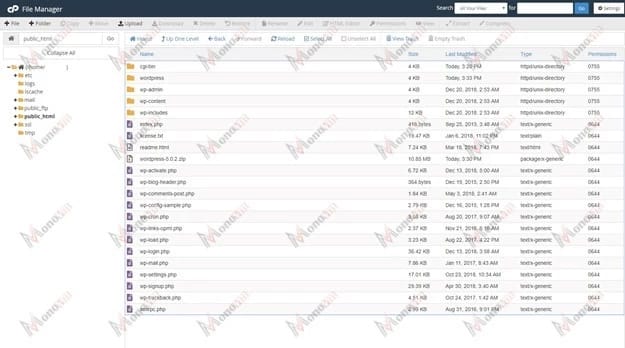
The directory should now look like this:
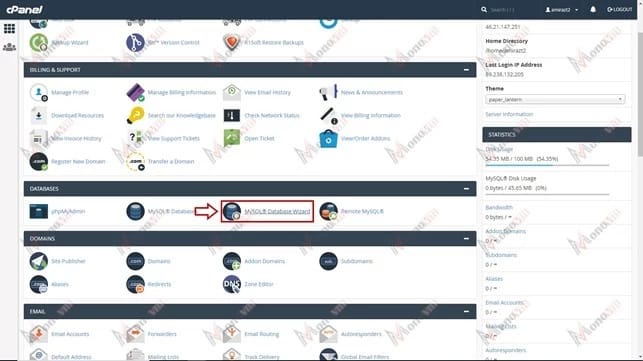
Step 6: After copying files, you must create a database for WordPress. To do so, open cPanel’s main page and select “MySQL Database Wizard”.
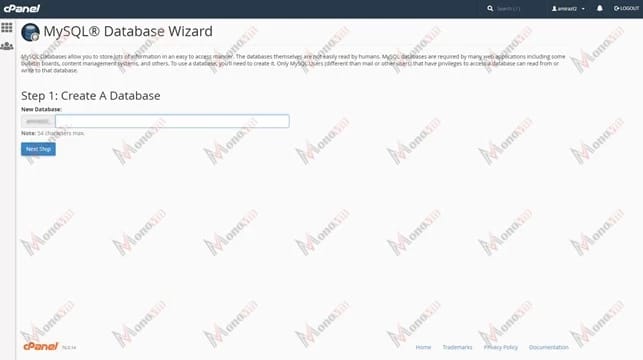
Step 7: Enter a database name in “New Database:” field and click on “Next Step” button.
Step 8: In the next step, you must create a user for the new database. Please enter a username and password into the respective fields.
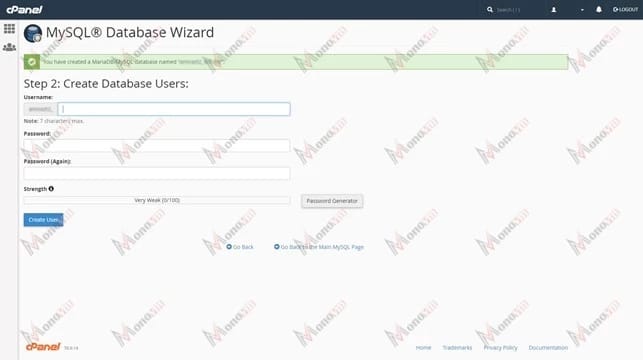
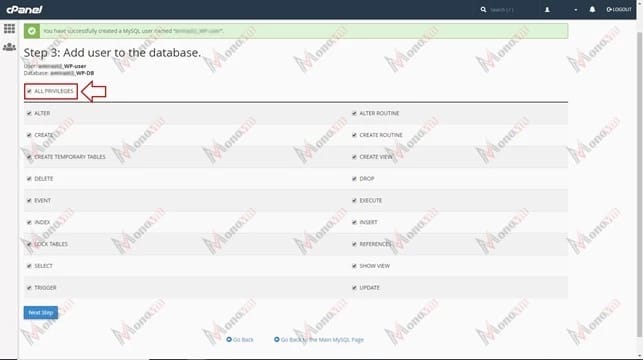
Step 9: You must activate all database privileges for the created user. Click on “ALL PRIVILEGES” to give all permissions to the user for managing the database. After that click on “Next Step” button.
At this point, you have completed the database creation and you must start WordPress installation.
Step 10: Open a browser and enter your domain name in the URL bar to start WordPress installation.
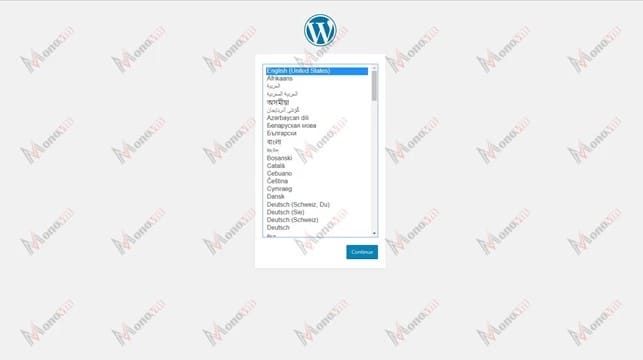
Step 11: Select your language and click on “Continue” button.
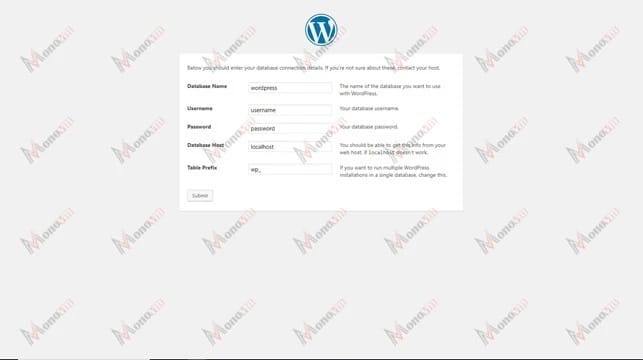
Step 12: In this step, WordPress will ask you for the details of the database. You must fill out the respective fields such as database name, username, and password which you entered when creating the database. Click on “Submit” when done.
After clicking on “Submit” button, WordPress will check database connection status and will automatically proceed to the next step.
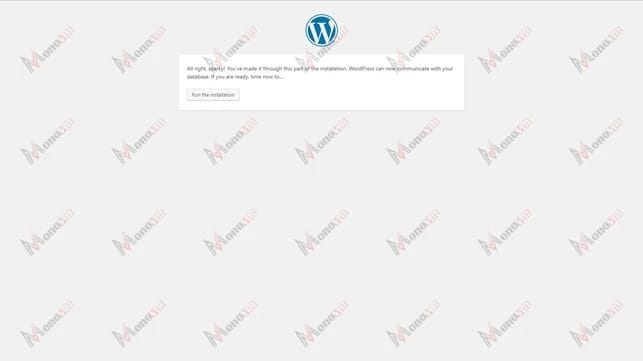
Step 13: If this process goes well, you should be able to run the WordPress installation, in this step click on “Run the installation” button.
Step 14: Give your WordPress site a title and enter the information necessary to create your admin account.
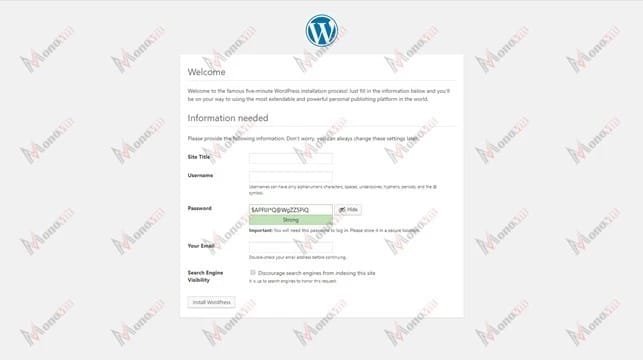
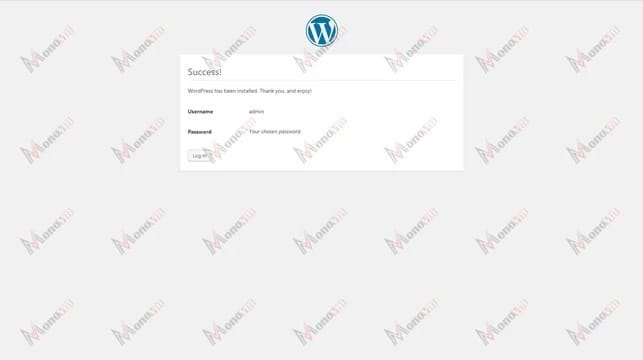
Step 15: Then click “Install WordPress” and the WordPress login page will appear automatically.
Step 16: To access the WordPress control environment, open a browser, enter your domain name in the URL bar with “/wp-admin” at the end.
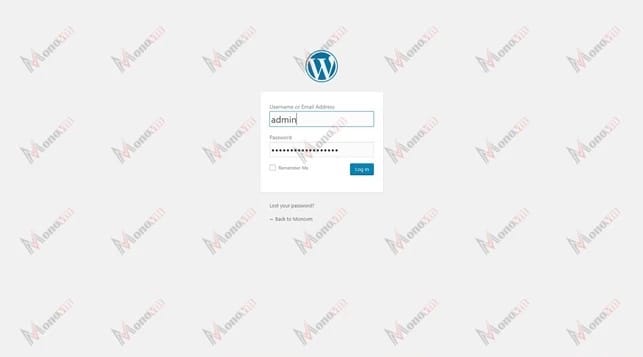
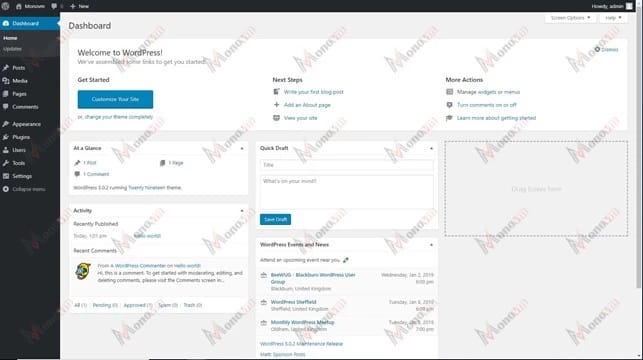
Step 17: After entering the WordPress user account details (username and password), WordPress “Dashboard“ page will open, and you can begin to customize your website.
Conclusion
In today’s article, we provided a very in-depth step-by-step tutorial on how to install WordPress on the cPanel control panel. We hope that by following the 17 simple steps outlined in this blog, you were able to successfully install WordPress on your cPanel VPS/server. If you run into any troubles during the installation process, have any questions or suggestions, please leave them in the comment section below.