![How to Enable Root Account in Ubuntu? [Ubuntu Root Login]](/wp-content/uploads/2021/05/cover849-main.webp)
If you are a newbie, you may be scratching your head about how to enable your root account in Ubuntu! Well, for several security purposes, the ubuntu root login account is kept disabled. Before we begin, here is some preface.
When you install Ubuntu, a root account is created. The issue here is that you do not have the provision to set the password for the account.
Let us guide you to enable the root user account in the Ubuntu server! This tutorial will also help you understand several other factors, including how to disable the account and set up a password for your root account. Let's dive into understanding further.
Follow the below listed commands to find out the root user account password details:
sudo grep root /etc/passwd
Output:

The x in the output signifies that the account’s password is empty.
sudo grep root /etc/shadow
Output:

Here, ! signifies that the password is locked. What does this mean? Well, this means that the user cannot set a password for the account.
This is an issue. Here is a solution. Following are a few methods that you must follow to enable the account and subsequently set a password:
- Temporary Method
- Command-Line and Graphical User Interface Method
- Command-Line Method
1: How to enable Ubuntu root Login Temporarily?
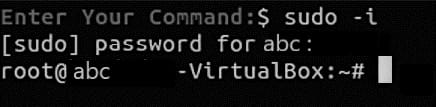
You can use this method when you want to enable ubuntu root account temporarily. Follow the command mentioned below:
sudo -i
Output:
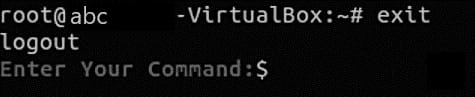
Now, if you want to disable an account, log out of the session and type the following command:
exit
Output:
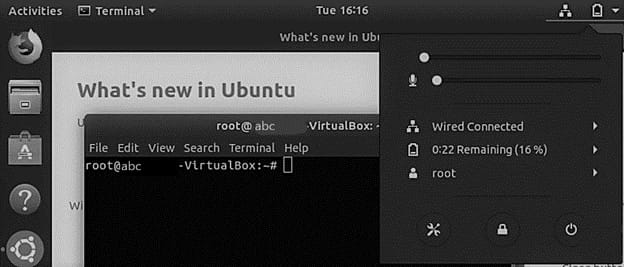
2: How to enable root user in ubuntu via Graphical User Interface?
Here is how you can access the root account through the graphical user interface.
Type root in the first textbox.

Type your root account password.
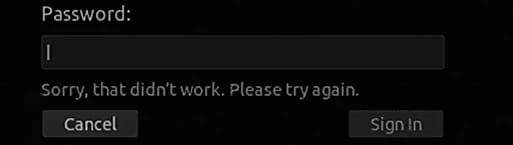
As soon as you type the password, you encounter an error message. The reason is that a security layer in the graphical interface stops any login until and unless several other configuration files are configured.
This basically provides extra security. To log in through the graphical user interface, follow these steps and edit the following files:
/etc/gdm3/custom.conf
/etc/pam.d/gdm-password
Before editing these files, back up the following configuration files:
sudo cp /etc/gdm3/custom.conf /etc/gdm3/custom.conf_backup
sudo cp /etc/pam.d/gdm-password /etc/pam.d/gdm-password_backup

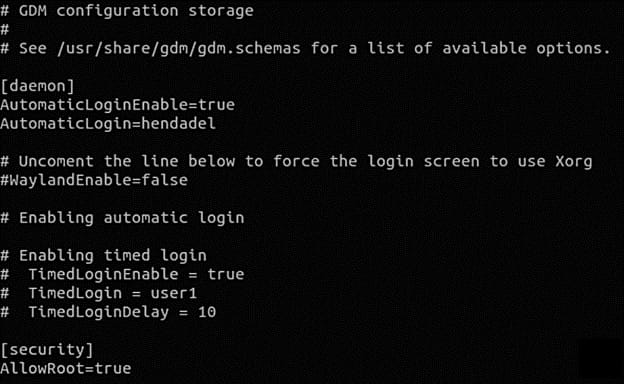
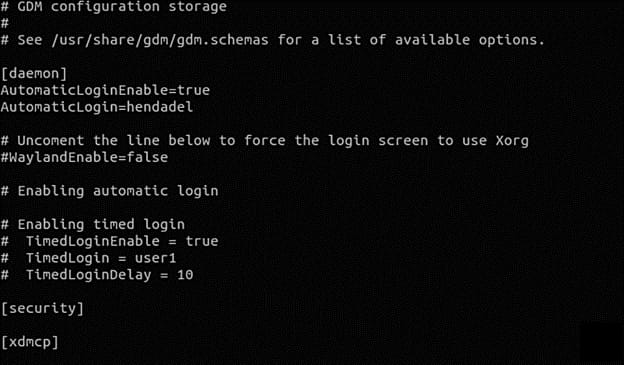
Now, simply, open the “/etc/gdm3/custom.conf” configuration file
sudo vi /etc/gdm3/custom.conf
![]()
Moving on, write the following mentioned line under the ‘security’ textbox.
AllowRoot=true
Output:
Press save and exit.
Now, open “/etc/pam.d/gdm-password” which is a configuration file.
![]()
As soon as you hunt down the following line, add ‘#’ at the beginning of that line, just as shown below.
#auth required pam_succeed_if.so user != root quiet_success
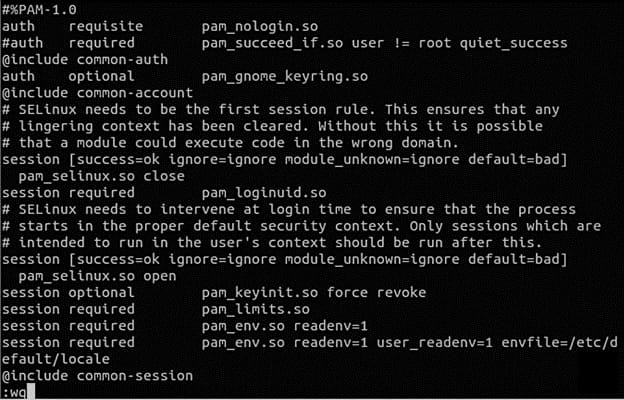
Just save and hit exit on the ‘gdm’ configuration file.
To see the changes that you just made, simply reboot the system. To do so, type the following command:
sudo reboot -f
As you have rebooted your system, login into the root account now.
You can log in to the root account easily.
Additionally, if you want to disable the root account, simply use the following command:
sudo passwd -dl root
Output:

Reverse whatever changes you made in the two configuration files earlier.
Delete “AllowRoot=true” from the “/etc/gdm3/custom.conf” configuration file as shown below.
Next, delete the ‘#’ from “/etc/pam.d/gdm-password”.

And you are done!
3: How to enable ubuntu root in Command-line?
Using the command-line method, you can easily enable or disable the root account through the command line. Here, you cannot log in through a graphical interface.
Use the following command to enable the root account:
sudo -i passwd root
Output:
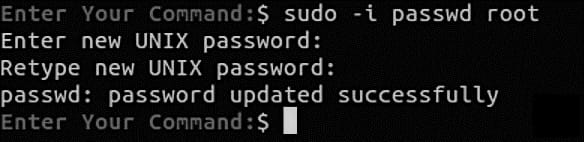
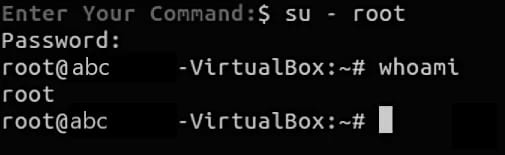
The screenshot shows that you can access the root account. Along with that, you can set the password for the root account as well. Now, you can go to your root account by typing the following command:
su – root
Output:
Moreover, to disable the root account, enter the following:
sudo passwd -dl root
Output:

To be sure, switch to the root account and see if the process is successful.
su - root
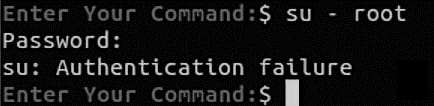
If you see the same message as the above image, then yes, you have successfully disabled the account, as now you can see that the authentication has failed.
Conclusion
These were a few methods to help you enable or disable the root account in Ubuntu. Also, a few root user login commands help you to enable it.
We hope that the article solved your queries and provided you with a better understanding of the topic. If you have any questions or suggestions, please leave them in the comment section below.
People are also reading:
