
At first, maybe we think the time and date is not important but after we get more experience we know that the time and date is the most important thing in every system. With a correct date and time, we will have a correct log file and even have the possibility to trade between other servers or devices. Follow the steps below to set time and date in MikroTik:
At first log in to your MikroTik via Winbox.
Choose “Clock” from “system” menu.
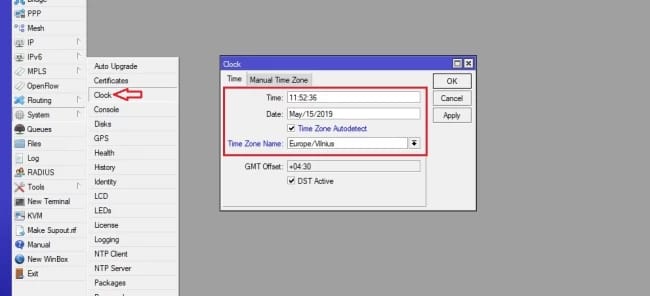
In the first tab, you can set the time. Available options are defined below:
Time: the current time of the device.
Date: the current date of the device.
Time zone auto-detect: the time zone is automatically set based on the IP address of the device.
Time zone name: with this option, you can define the time zone based on your requirement.
Click on apply to see the changes.
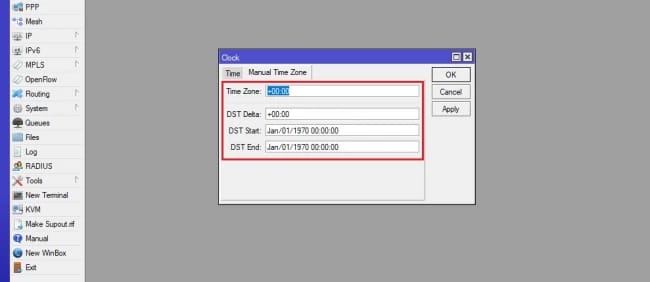
The second tab allows you to define your own time zone location based on DST.
Note: if you use a certificate in your network, set the time and date correct to avoid any problem.
People are also reading:

I’m Oliver k. I have MS degree in Computer Engineering. For nearly 5 years that I have been working on web programing and also in last 2 years I have worked on windows and Linux VPS. This is my honor to share my experiences with a new community.