![How to Install Chrome on Ubuntu via Terminal 🚀 [3 Ways]](/wp-content/uploads/2023/10/0b838c0d-6ea5-4cce-8c8f-b0e4101d3e51432-main.webp)
Short answer: download Google's official .deb package with wget, install it with dpkg, then let apt clean up the dependencies. That's three commands and about a minute of your time. This guide covers Ubuntu 20.04, 22.04, and 24.04, using both the direct package method and the official Google repository — plus updating, verifying, uninstalling, and fixing the errors that trip people up. If you're running Ubuntu on a Ubuntu VPS, these same terminal commands apply over SSH. Not sure Chrome is the right pick? Check our browsers for Ubuntu comparison before committing. New to the ecosystem entirely? Start with What is Ubuntu.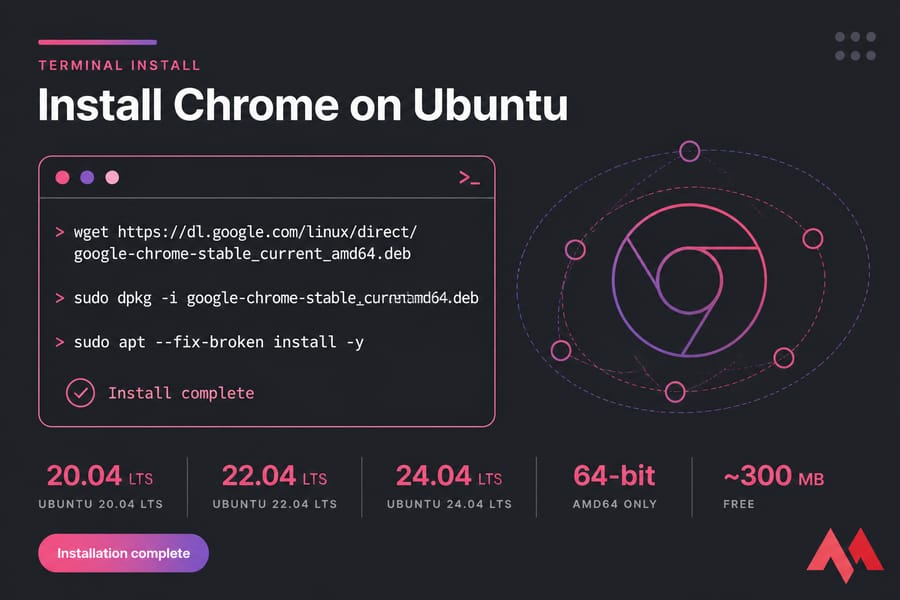
🔍 Before You Start
Supported Ubuntu Versions
Everything here works on Ubuntu 20.04 LTS, 22.04 LTS, and 24.04 LTS. It also works on non-LTS releases and most Ubuntu flavours (Kubuntu, Xubuntu, Pop!_OS, Linux Mint). The commands don't change between versions — only the wording in the graphical installer does.
Architecture Note — This One Matters
Google only ships Chrome for Linux as a 64-bit amd64 package. There's no official ARM build for Ubuntu, so Raspberry Pi and ARM64 servers are out. Check what you're on:
dpkg --print-architectureIf that returns arm64 or armhf, stop here and install Chromium instead.
📋 Prerequisites
- Ubuntu Operating System: This guide is specifically tailored for Ubuntu users. Ensure that you have Ubuntu installed on your system.
- Terminal Access: You should have access to a terminal window. Press
Ctrl+Alt+Tor search for "Terminal" in the application menu. On a remote server, use an SSH session. - Sudo Privileges: To install software on Ubuntu, you need administrative privileges. Ensure that your user account has sudo privileges.
- Internet Connection: Required to download the package and updates.
- Disk Space: Roughly 300 MB of free disk space.
🛠️ Method 1: Install Google Chrome with the Official .deb Package
This is the fastest route. Four commands, done.
Step 1: Update Your Package List
sudo apt updateStep 2: Download the Latest Chrome Package
Pull it straight from Google's servers — never a mirror, never a random PPA.
wget https://dl.google.com/linux/direct/google-chrome-stable_current_amd64.debStep 3: Install It with dpkg
New to .deb packages? Here's a full guide on how to install deb files in Ubuntu.
sudo dpkg -i google-chrome-stable_current_amd64.debStep 4: Fix Dependencies If Needed
On a fresh system dpkg will often complain about missing libraries. That's normal — apt resolves it:
sudo apt --fix-broken install -yStep 5: Verify the Installation
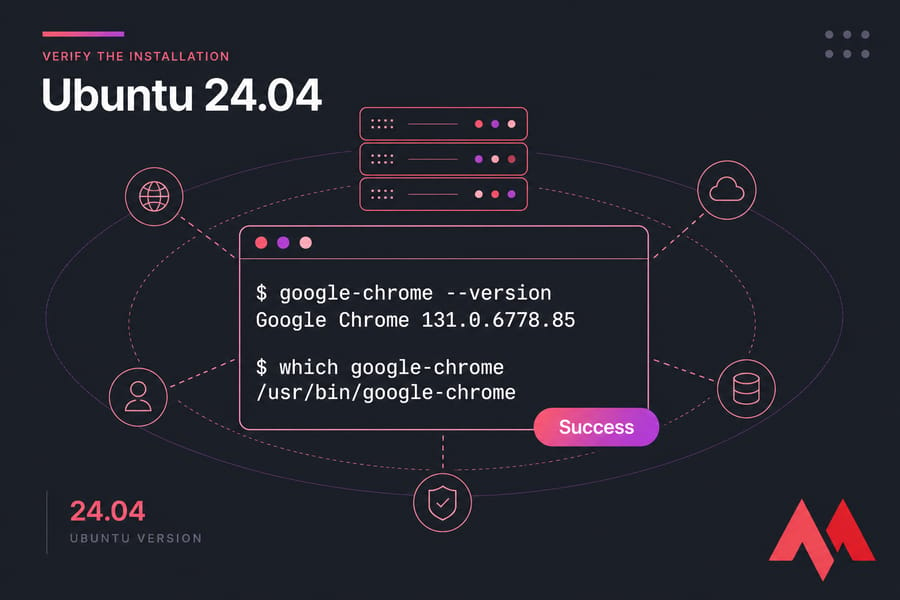
google-chrome --version
which google-chrome
You should see something like Google Chrome 131.0.6778.85 and the binary path /usr/bin/google-chrome. If both return output, you're done.
🛠️ Method 2: Install Chrome via the Official Google Repository
The .deb method actually adds Google's repo for you behind the scenes. But if you're building a server image, automating with Ansible, or you just want explicit control, add it yourself. Do not use apt-key add; it's been deprecated since Ubuntu 22.04 and removed in newer releases.
Step 1: Create the Keyring Directory
sudo mkdir -p /etc/apt/keyringsStep 2: Import Google's Signing Key
wget -q -O - https://dl.google.com/linux/linux_signing_key.pub | gpg --dearmor | sudo tee /etc/apt/keyrings/google-chrome.gpg > /dev/nullIf gpg isn't installed, run sudo apt install gnupg -y first.
Step 3: Add the Signed Repository Entry
echo 'deb [arch=amd64 signed-by=/etc/apt/keyrings/google-chrome.gpg] https://dl.google.com/linux/chrome/deb/ stable main' | sudo tee /etc/apt/sources.list.d/google-chrome.listThe signed-by directive ties that key to this one repository only. That's the whole point of the modern approach.
Step 4: Update APT and Install
sudo apt update
sudo apt install -y google-chrome-stable
google-chrome --version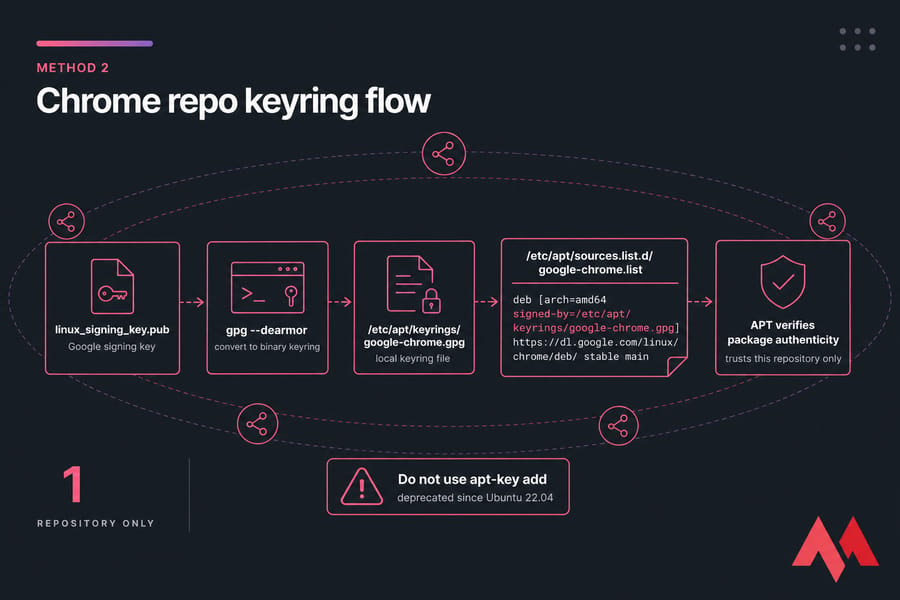
🖱️ Method 3: Install Google Chrome on Ubuntu Using the GUI
For many users, the graphical environment offers a more user-friendly experience. This approach is particularly well-suited for individuals who find the terminal environment daunting.
- Launch Your Current Browser: Open Firefox (the default Ubuntu browser).
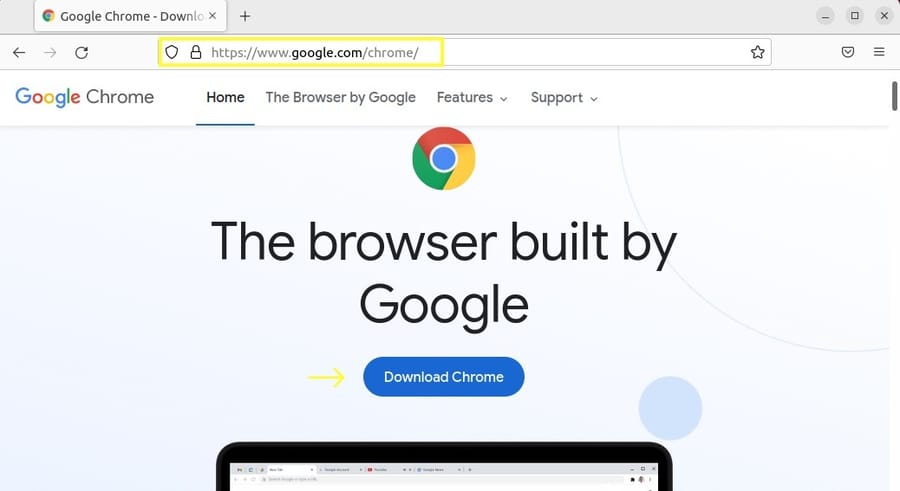
- Visit Google Chrome's Official Page: Navigate to https://www.google.com/chrome/
- Download Chrome: Select the "Download" button and choose 64 bit .deb (For Debian/Ubuntu). Then click "Accept and Install."
- Access the Download: Once the download is complete, locate the downloaded package in your default download directory.
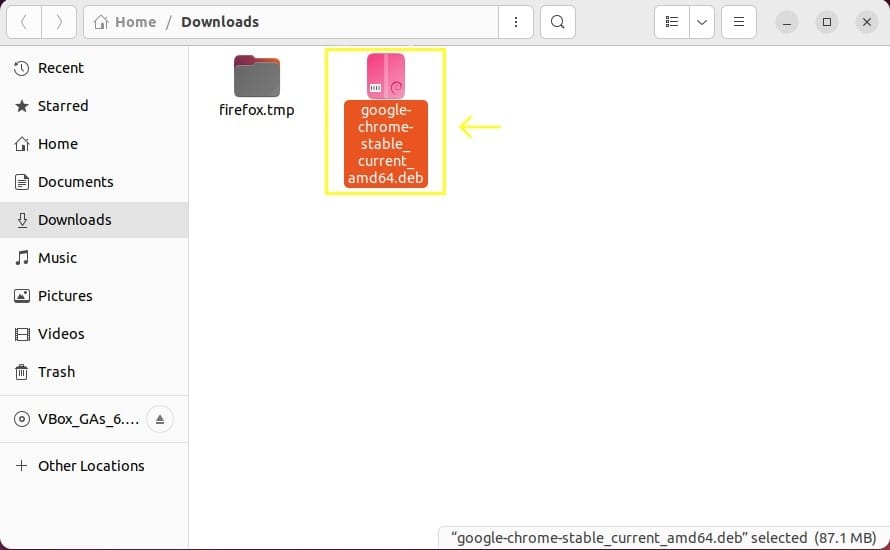
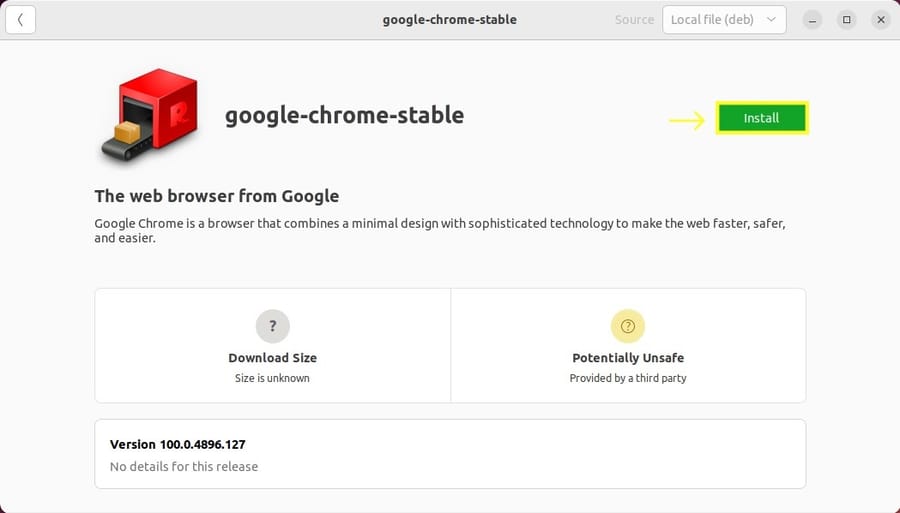
- Installation via Software Center: Double-click on the downloaded package. On Ubuntu 24.04 it opens in App Center; on 22.04 and 20.04 it's Software Install. Click "Install."
- Completion: Congratulations, you have now successfully installed Google Chrome on your Ubuntu system. Do you also know how to keep your Ubuntu system updated? It's helpful for Linux users.
.jpeg)
- Launching Chrome: Navigate to the activities menu located on the left side of your screen and search for "Chrome."
If double-clicking does nothing (it happens on 24.04 with the Snap-based App Center), right-click the file and choose Open With Other Application → Software Install. Or just use Method 1. Honestly, that's what I do. Prefer a full graphical desktop remotely? Here's how to set up Ubuntu RDP for GUI access.
🚀 Launching, Updating, and Setting Chrome as Default
Launch Chrome
From the terminal: google-chrome. Add & to free up the shell. Or hit the Super key and type "Chrome" in the applications menu. First launch asks whether you want Chrome as your default browser and whether to send usage stats — both are optional.
Update Chrome from Terminal
Because the install adds Google's repo, Chrome updates with everything else:
sudo apt update
sudo apt install --only-upgrade google-chrome-stable
Or just run sudo apt upgrade as part of your normal maintenance routine. Confirm afterwards with google-chrome --version.
Set Chrome as Default Browser
GUI route: Settings → Default Applications → Web, pick Google Chrome.
- Open System Settings: Click on the system settings icon or search for "Settings" in the Activities menu.
.jpeg)
- Navigate to Default Applications: Look for "Details" or "Default Applications" and click on it.
- Choose Google Chrome as the Default Web Browser: Click on the dropdown menu next to "Web" and select "Google Chrome."
.jpeg)
CLI route:
xdg-settings set default-web-browser google-chrome.desktop🗑️ How to Uninstall Google Chrome from Ubuntu
sudo apt remove google-chrome-stable
sudo apt purge google-chrome-stable
sudo rm -f /etc/apt/sources.list.d/google-chrome.list
sudo rm -f /etc/apt/keyrings/google-chrome.gpg
sudo apt update
remove deletes the program but leaves system config files. purge removes those too. Neither touches your personal profile — bookmarks, passwords, extensions live in ~/.config/google-chrome. Delete that folder manually if you want a truly clean slate.
⚠️ Common Errors When Installing Chrome on Ubuntu
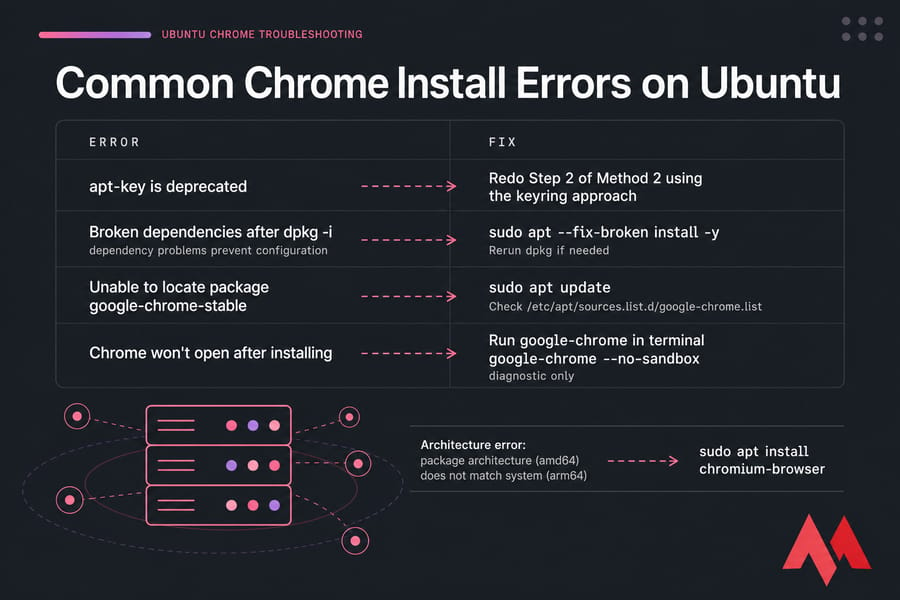
"apt-key is deprecated"
You followed an old tutorial. Delete anything you added with apt-key and redo Step 2 of Method 2 using the keyring approach.
Broken Dependencies After dpkg -i
Symptom: "dependency problems prevent configuration". Fix: sudo apt --fix-broken install -y. Rerun the dpkg command if it still complains.
"Unable to locate package google-chrome-stable"
The repository isn't registered or you skipped sudo apt update. Check that /etc/apt/sources.list.d/google-chrome.list exists and contains the exact line from Step 3.
Chrome Won't Open After Installing
Run google-chrome in a terminal and read the error. On containers and some minimal server images you'll see a sandbox failure — launch with google-chrome --no-sandbox to confirm that's the cause, but treat that flag as a diagnostic, not a permanent fix.
Wrong Architecture
"package architecture (amd64) does not match system (arm64)" means Chrome simply isn't available for your hardware. Install Chromium: sudo apt install chromium-browser.
🔄 Google Chrome vs Chromium on Ubuntu
| Feature | Google Chrome | Chromium |
| Licence | Proprietary, built on Chromium | Fully open source |
| Google account sync | Yes | Limited or unavailable |
| Proprietary codecs (H.264, AAC) | Bundled | Depends on the build |
| Packaging on Ubuntu | Official .deb from Google | Snap package by default on 20.04+ |
| ARM support | No | Yes |
| Telemetry | More, tied to Google services | Less |
Pick Chrome if you need account sync, DRM-protected streaming, or Widevine-dependent sites. Pick Chromium if you're on ARM, want to avoid proprietary components, or are testing on a low-resource Ubuntu VPS.
🎯 Final Thoughts
Use the .deb method when you want Chrome running in under a minute. Use the repository method when you're scripting installs or want explicit, signed package management you can audit later. Either way, always pull from Google's own servers — third-party PPAs for Chrome aren't worth the risk.
In this comprehensive guide, we've explored various methods to install, update, and set Google Chrome as the default web browser on your Ubuntu system. Whether you prefer the command-line efficiency, the user-friendly GUI, or both, you now have the tools to harness the power of Google Chrome for a seamless web browsing experience.


Hello, everyone, my name is Lisa. I'm a passionate electrical engineering student with a keen interest in technology. I'm fascinated by the intersection of engineering principles and technological advancements, and I'm eager to contribute to the field by applying my knowledge and skills to solve real-world problems.