
If you wish to establish a connection with any remote desktop Windows on the internet or even on a local network, you can do it with ease! Microsoft has launched its very own RDP tool [Remote Desktop Protocol tool] that assists you in accomplishing this task. this article will help you with how to Enable Remote Desktop Connection and tips to establish a secure remote desktop connection on Windows, and macOS.
Therefore, you can connect with a Windows PC or a server through another PC. But, it would help if you took note that only some versions of Windows allow you to have RDP connections. Moving on, let us give you a more detailed explanation of the topic.
🔗 Learn more about the benefits of RDP (Remote Desktop Protocol) in our comprehensive guide on "What is RDP." 📚✨
How to Enable Remote Desktop Connection on windows? [Step by step guide]
To begin with the process, you first have to enable a remote desktop on the remote server or PC, whichever is your requirement.
Step 1: Go to the Window settings menu.
Step 2: Click on Start, and then go to the Settings option. Here, click Settings and then Remote Desktop, as shown in the snapshot below.
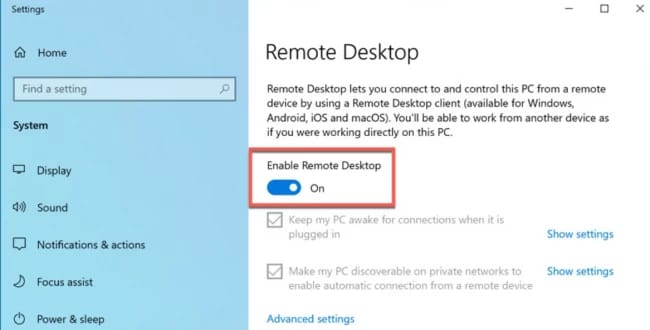
As you can see on your screen there are two options automatically enabled on the PC. One is to keep your PC awake for the connections when plugged in. The other is to make the PC discoverable on private networks to enable the automatic connection from any remote device.
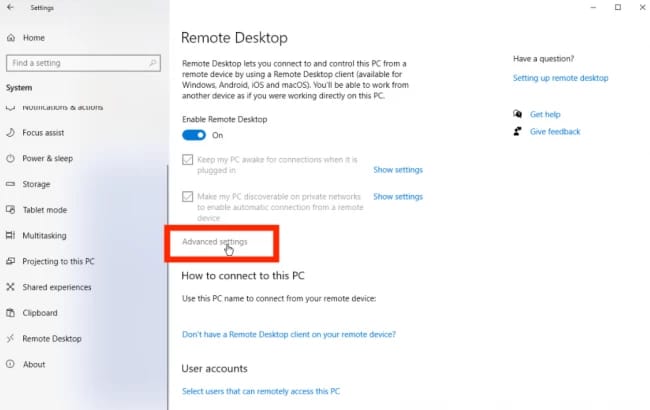
Step 3: Both the options can be left as it is. For now, click on the Advanced Settings option. You see this window now.
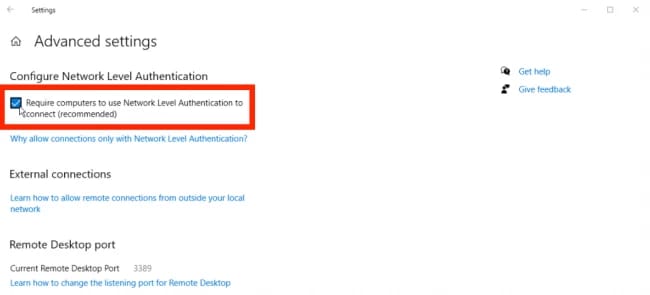
Step 4: Now, as soon as you tap on the option, check on the box stating, "Require computers to use Network Level Authentication (NLA) to connect”. Why did we do this step? The reason is that NLA helps to provide more security for all the connections established on the same network.
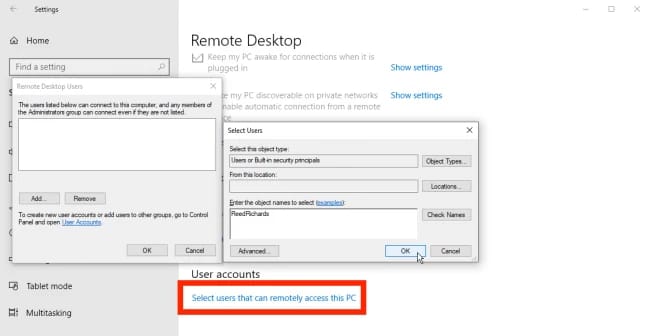
Step 5: Now, go to the previous window and click on Remote Desktop Protocol Settings again. Suppose, you are the administrative user of Windows, you can remotely sign in to the account. In case you wish to grant remote access to another account, simply click on “Select users that can remotely access this PC”, as shown on the screen below.
Step 6: Now, tap on Add and type the username of that respective account.
Remember the name of this PC for further use.
That’s it, you can close this window. Moving further, the next segment is how to use RDP from Windows.
Approach 1: How to Enable Remote Desktop Connection on Windows?
Now, let’s say that you want to establish a connection with a PC from your desktop. You have to begin with the RDC or Remote Desktop Connection tool.
Step 1: Click on Start and then Windows Accessories. And then hop onto the option - Remote Desktop Services.
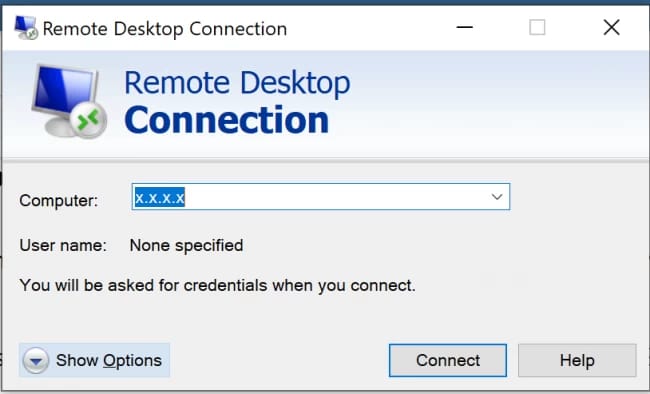
Step 2: When you have the remote desktop software window in front of you, simply type the IP address of the remote desktop in the textbox as shown below in the snapshot.
Step 3: Next, tap on the Show option. To log into the account, enter your username. You have an option to save your credentials too. Choose it as per your requirements.
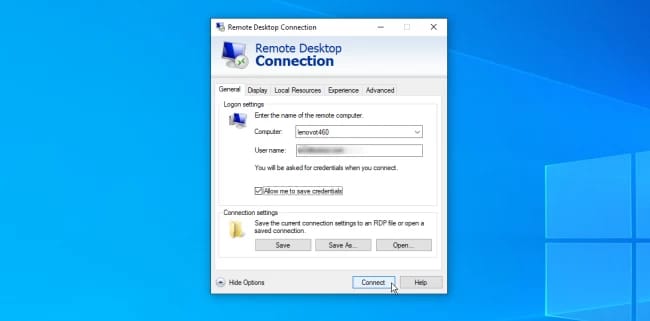
Step 4: Press Connect as shown in the picture. Now, the next window asks for your password, enter your respective password, and tap on OK.
Step 5: At this step, the remote desktop connection tries to build a connection with the remote desktop that you mentioned. In such cases, a message pops up saying that the ‘identity of the remote computer can not be verified’, fret not. Just check on the checkbox saying ‘Do not ask me for connections to this computer’, and move ahead.
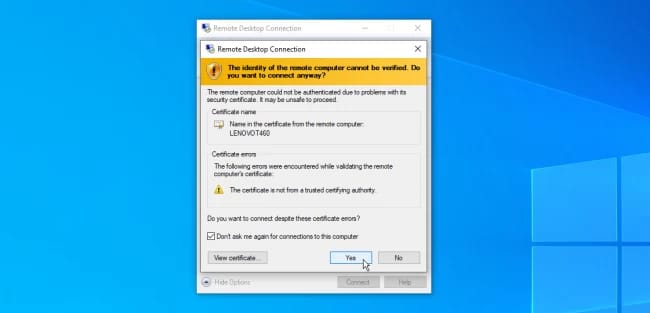
Step 6: Now, click Yes. You should be able to connect to the remote desktop.
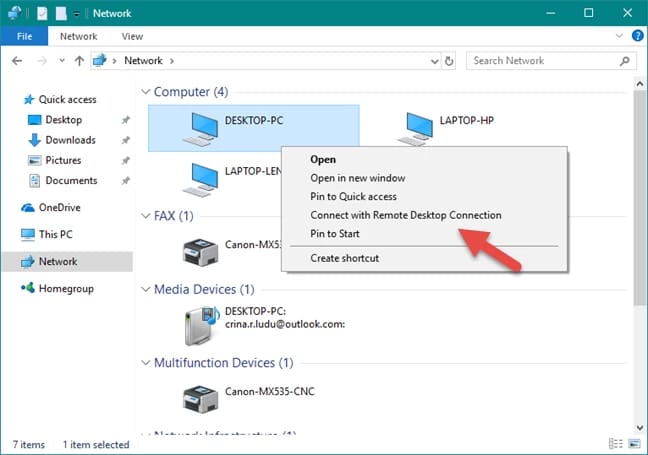
If you are using remote desktop software in your local network then you can follow this step.
Step 7: From now onwards, whenever you want to connect, simply right-click on the computer PC folder and directly click on - Connect to remote desktop connection, as shown below.
Let’s step ahead. Here is a detailed process showcasing the use of the Remote Desktop App in Windows. Take a look.
Approach 2: How to access a Remote Desktop App in Windows?
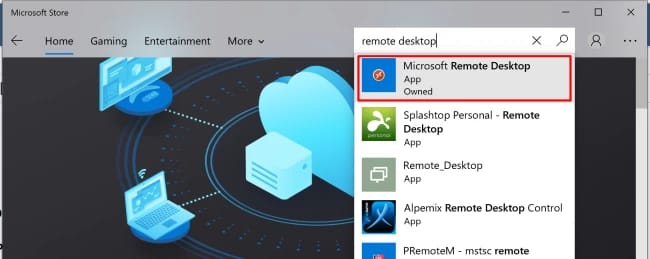
Step 1: Firstly, go to the Microsoft Store and install the app.
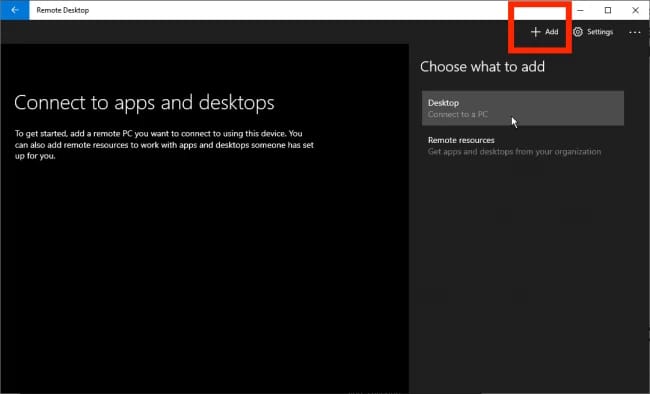
Step 2: Press Add on top of the window and then Desktop, as shown in the below-presented snapshot.
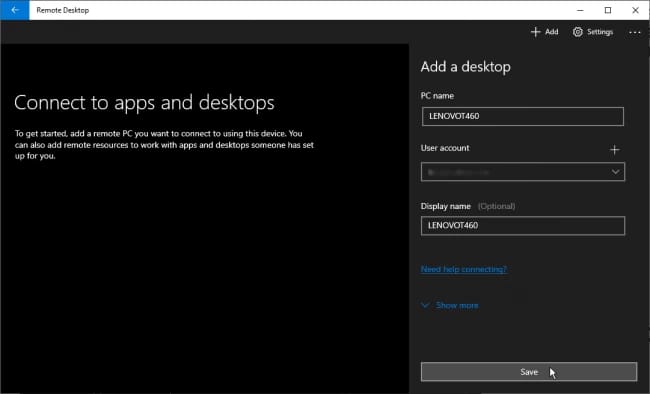
Step 3: After you click on Desktop, you see a textbox, and PC name. Enter the name of the desktop with which you wish to connect. Below this textbox, as you can see, there are two options. Add your username and subsequently the password. When you are done, press Save.
Step 4: Double-click on this PC icon and click on Connect.
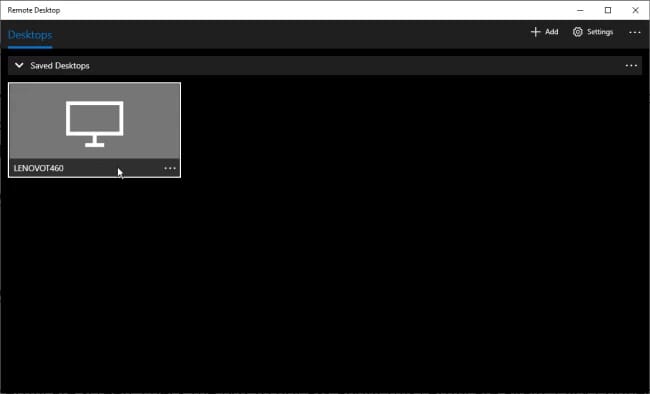
That’s it. You have successfully established a connection with the remote PC.
Now, if you are a macOS user, here is a guide for you to use RDP!
Tips to establish a secure Remote Desktop Connection in Windows
When we talk about RDP, the RDP port is 3389, and it is known to go through regular scanning to trace any exploits.
Now, when we talk about enterprises, they can easily opt for a more secure way, that is, via Remote Desktop Gateways. Such gateways help to establish a secure way with an RDP server. This option is unavailable for Windows users.
Therefore, there are some methods that you can follow to secure your RDP connection. Take a look.
- Do not forget to enable NLA (Network Level Authentication): What does NLA do? It simply ensures an authenticated connection after you enter the correct username and password. Additionally, NLA is by default present in Windows 10 or Windows Server 2012. You can install it if it is not installed in your respective systems.
- Set complicated passwords: It’s extremely important to set complex passwords in general but especially for your remote desktop connections. It gives an extra layer of safety.
- Limit the number of password attempts: To limit the number of attempts to insert a password simply implies protection against any kind of destruction from a denial of service attack.
- Set the RDP for maximum encryption: RDP always tries to attain the maximum level of encryption. You can set the RDP encryption level. Follow these steps:
- First, open the group policy editor,
- Then navigate to this path - Computer Configuration, Administrative template, Windows Components, Remote Desktop Services, Remote Desktop Session Host, Security,
- Set client connection encryption level, Enabled, and in the end, High Level.
- Make sure you do not allow open RDP connections on the Internet: To establish an open network connection on the internet is full of risks. You should not take this chance. For your security, set up a VPN or Virtual Private Network. You can also use a Remote desktop gateway to build a rather secure tunnel for the respective local network.
Conclusion
With this article, we have reached a complete to understand of How to Enable Remote Desktop Connection on Windows and How to use RDP on Windows and macOS. We hope that all your ambiguities related to the usage of RDP are clear now. If you have any trouble setting up or connecting to an RDP connection, please leave a comment in the comment section below.
