The Remote Desktop Protocol (RDP) port is a crucial component of Windows operating systems that facilitates remote desktop connections, allowing users to access and control another computer over a network. default RDP port is 3389 to listen for incoming connections. This port acts as a gateway for administrators and users to connect to a computer remotely, providing the flexibility to work from any location as if they were sitting right in front of the remote machine. The ability to change this default port is an essential security measure for reducing unauthorized access risks by making the service less discoverable to potential attackers.
Explore the fundamentals and applications of RDP in remote desktop technology.
RDP port is an essential feature for many users while setting up a remote desktop connection in windows or mac devices with the remote access port. However, changing the default RDP port [Default RDP Port Number is 3389, and it is used for Microsoft terminal server] can also create issues in maintaining the usual working devices. To fix this problem, this guide will help you with this tutorial on change RDP port in windows.
When you connect to a remote computer (either a Windows client or Windows Server) through the Remote Desktop connection, the Remote Desktop feature on your computer "hears" the connection through a listening port (3389 by default). You can change that listening port on Windows computers by modifying the registry. This article will guide you to change the RDP port used in remote desktop access.
Discover the power of seamless remote computing with our Windows VPS solutions, designed for optimal performance and security.
Security Implications of Changing the RDP Port
Changing the default Remote Desktop Protocol port is a common security measure known as port obfuscation. This practice involves altering the standard port number (3389) to a different value. The primary reason for doing so is to reduce the visibility of RDP services to automated scans and attacks that often target default port configurations, potentially lowering the risk of unauthorized access attempts.
Why Change the RDP Port?
Reduced Attack Surface: By moving away from the well-known default port, you make it slightly more difficult for attackers to identify open RDP services on your network. This can be particularly effective against bots and automated attack tools that scan large IP ranges for open default ports.
Obscurity as a Layer of Defense: While not a robust security measure on its own, port obfuscation can add an extra layer of defense by obscuring your RDP setup. It's akin to hiding a door from a would-be burglar; while it doesn't make the door any stronger, it might make it less likely to be targeted.
Limitations of Port Changing
- Not a Standalone Solution: It's crucial to understand that changing the RDP port is not a substitute for comprehensive security practices. Without proper authentication methods, strong passwords, and encryption, a non-standard port alone offers minimal security enhancement.
- Potential for False Security: There's a risk of developing a false sense of security upon changing the RDP port. Attackers with enough determination or resources can still discover the new port through advanced scanning techniques or by exploiting other vulnerabilities within the network.
- Operational Challenges: Changing the default port can lead to operational issues, such as difficulties in configuring firewalls, additional steps for users to connect, and potential conflicts with other services.
Enhance your remote work efficiency with our secure Buy RDP services.
How to Change RDP Port in Windows Using Windows Registry? [Change Default RDP Port]
In Windows, Windows Registry works as a configuration settings database for installed apps, Windows services, etc. Windows Registry is the best way to change the default RDP port from 3389 to the desired custom port. Here you go with a complete step-by-step guide to change default RDP port.
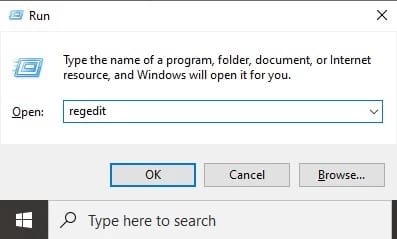
Step 1: First, right-click on the start menu and click on the Run option, or you can use the Windows+R keys on the keyboard to open the Run utility. Then, type the regedit and press OK to launch Windows Registry Editor.
regedit
Step 2: In the Windows Registry Editor, go to the below path and click on the following registry folder:
HKEY_LOCAL_MACHINE\System\CurrentControlSet\Control\Terminal Server\WinStations\RDP-Tcp
Step 3: After that, double-click on the PortNumber in the RDP-TCP folder.
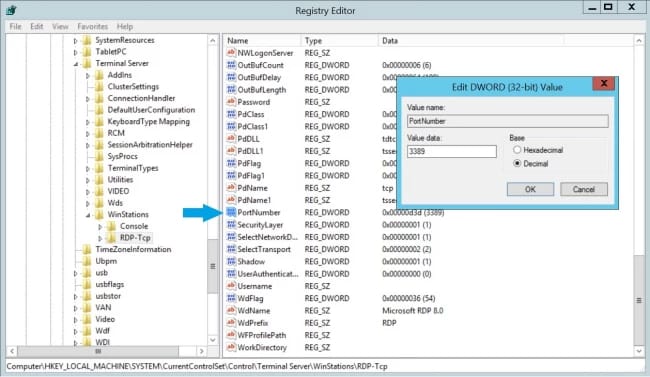
Step 4: Select the Decimal option in the Edit DWORD(32-bit) value box and type a new port number. You can select the values between 1 and 65353.
Important Note: You have to ensure that the values don't match any common ports, so if you select a common port (like port 80 for the web traffic), you can't establish the Remote Desktop connection afterward.
Step 5: Finally, press OK to save the changes and restart the system to make changes successfully.
How to Connect a Remote Desktop with a Custom RDP Port?
Here you will get a detailed step-by-step guide that will help you to connect a remote desktop with a custom RDP port:
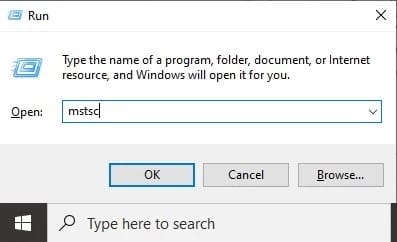
Step 1: Open the run utility by pressing Windows + R (Explore Windows keyboard shortcuts.)keys, then type mstsc and press Enter button. Simply type "RDP" into the Windows search bar if you're using Windows 10.
mstsc
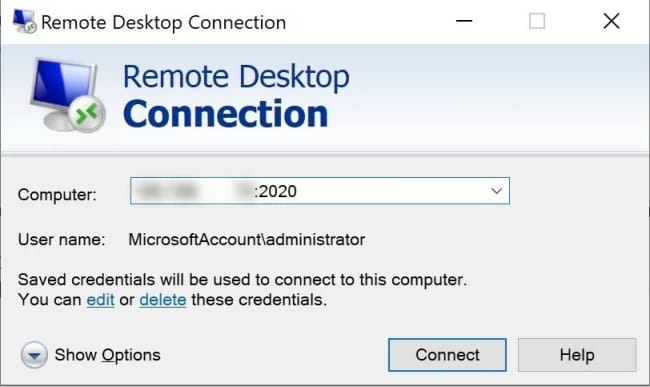
Step 2: Now provide a specific IP address of the remote server and a new port number in a "Remote Desktop Connection" window, then press Enter button to begin the connection. It should be written in the following format: serveripaddress:customport. For our example, we used port 2020.
Example:
23.211.23.1:2020
We hope this guide help you how can connect RDP with the custom RDP port. Let's learn how to configure a windows firewall for a custom RDP port.
How to Configure Windows Firewall for Custom RDP Port?
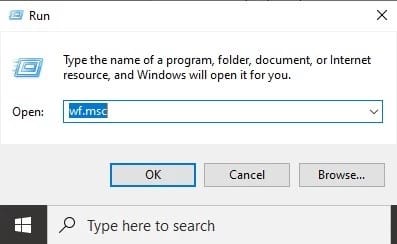
Step 1: Open the Run utility using Win+R key and type wf.msc, then click the press Enter button. This command will open the Windows Firewall management options in which you can add a new firewall rule.
wf.msc
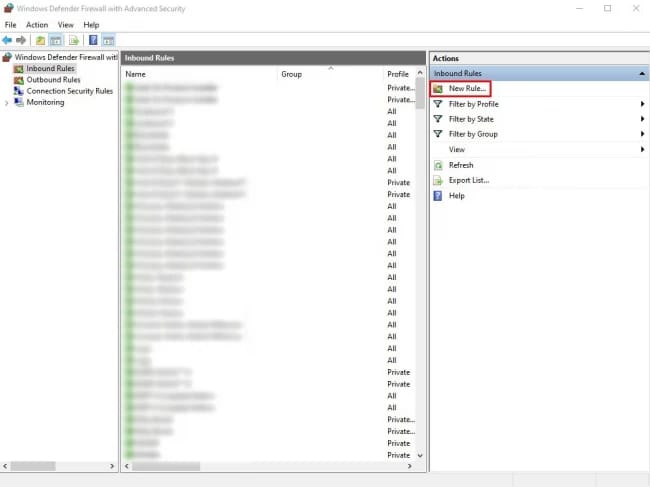
Step 2: Now select inbound rules in the Windows Firewall MMC menu. After selecting these values, select a new rule by Actions Panel on the right.
Step 3: Afterward, select Port from the options list in the new Inbound Rule window. Then click on Next.
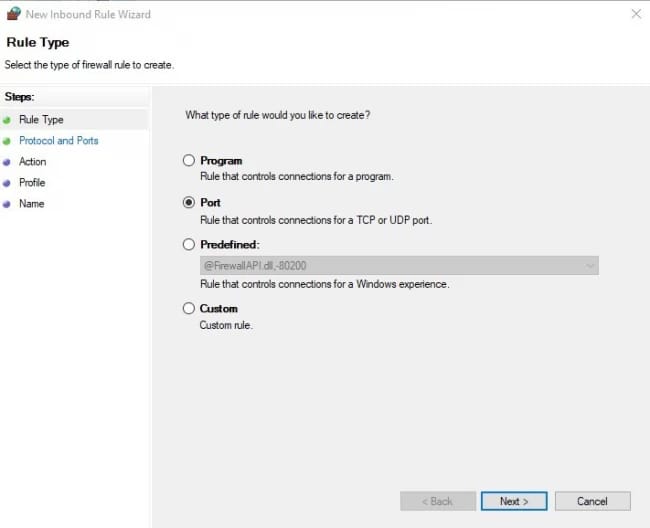
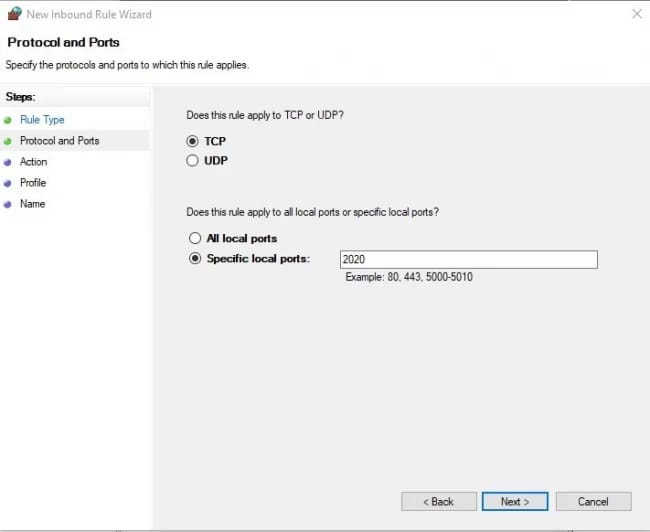
Step 4: As we are creating a custom rule for UDP and TCP ports, so first select TCP, then select Specific Local Ports, type in the custom RDP port you chose in section one, and click Next.
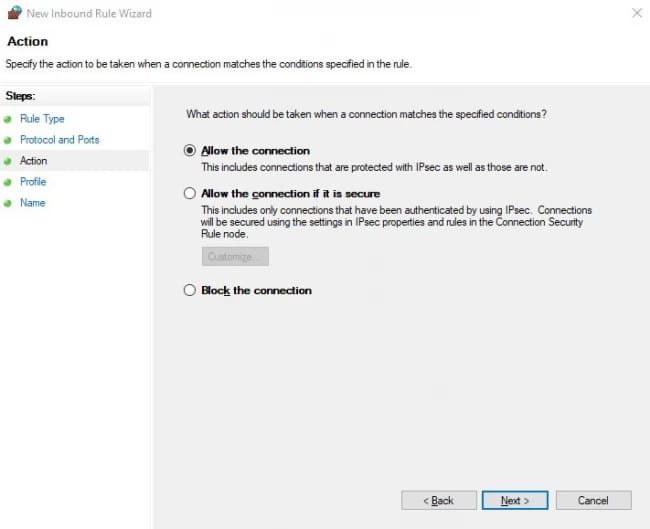
Step 5: Select Allow the connection and press Next to continue.
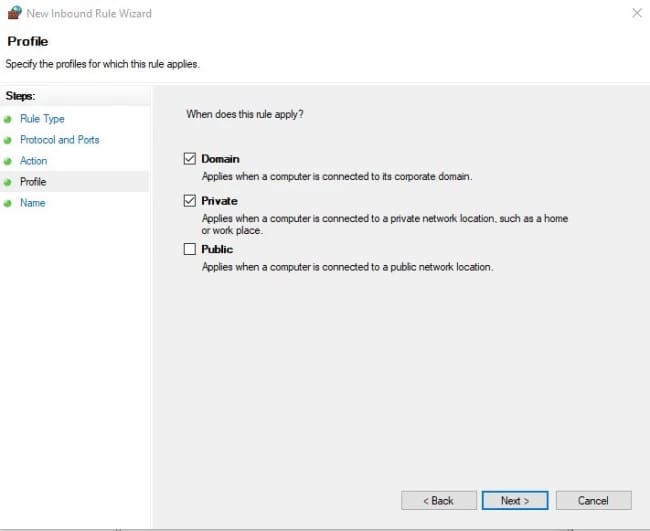
Step 6: Now, leave all entries selected for full access except for Public to prevent establishing the Remote Desktop Connection on a public network. Then, click on Next to continue.
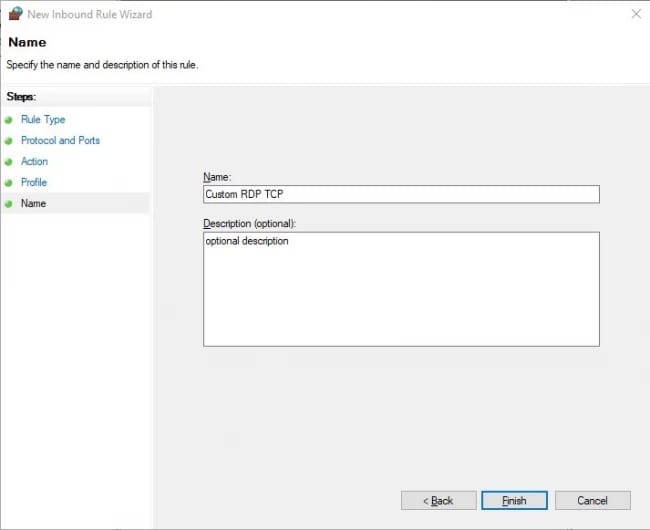
Step 7: Finally, provide the new network rule name with the description in the appropriate text boxes and click on the Finish button to add a new rule.
Step 8: Repeat steps 1 to 7 listed above, but select TCP in step 4 and restart the system after making the changes.
Common Issues After Changing the RDP Port
Changing the default Remote Desktop Protocol (RDP) port can be a straightforward process, but it may lead to several issues if not properly managed. Here are some common problems that users might encounter after altering the RDP port, along with potential solutions to ensure smooth remote access:
Connection Failures
- Problem: Users might experience difficulties connecting to the remote desktop after the port change, often due to incorrect port forwarding or firewall settings.
- Solution: Verify that the new port number is correctly configured in your router's port forwarding settings and that Windows Firewall (or any other firewall in use) has been updated to allow connections through the new port.
Security Software Interference
- Problem: Antivirus or security software might block the new port, mistaking the altered RDP traffic for suspicious activity.
- Solution: Add an exception for the new RDP port in your security software settings, ensuring that it allows traffic through the specified port.
Network Policy and Access Control Issues
- Problem: Changing the RDP port might conflict with network policies or access control lists (ACLs) that specify allowed services and ports.
- Solution: Update network policies and ACLs to include the new RDP port, ensuring compliance and accessibility within the network's security framework.
Remote Desktop Client Configuration
- Problem: Users may forget to append the new port number when connecting, leading to failed connection attempts.
- Solution: Educate users on the new connection format, which includes the IP address followed by a colon and the new port number (e.g., 192.168.1.1:3390). Ensure all users are aware of the change and know how to connect using the updated settings.
Port Conflicts
- Problem: The new port chosen for RDP may already be in use by another application, causing conflicts and connectivity issues.
- Solution: Before selecting a new port, use a tool like netstat to check for currently used ports on the system. If a conflict is discovered, choose another port for RDP that is not in use.
Conclusion
We have tested this article for various versions of Windows to change default RDP port like Windows 7, Windows 8, Microsoft Windows 10, Microsoft Windows Server 2003, Windows Server 2008, Windows Server 2012, Windows Server 2016, and Windows Server 2019. Here we have explained how to change the default RDP port, connect RDP with a custom port, and configure the RDP custom port in the windows firewall.

My name is Sophia H. My degree is MS in Information Technology Engineering. I have been working for 5 years on Java developing (j2ee), Computer Networking (Optical Networks), Virtualization and Hosting.