
In this detailed guide, we'll untangle the complexities of Install Python 3.6 CentOS 7, Install Python 3.10 CentOS 7, and Install Python 3.9 CentOS 7, providing a smooth and trouble-free experience for both novice and experienced coders. Continue reading as we demystify the installation process, providing insights, tips, and troubleshooting solutions to help you Install Python CentOS 7.
Installing Python on CentOS 7
If you're working in a CentOS 7 environment (Community ENTerprise Operating System), you may need to Install Python CentOS 7. You have two basic options including Yum install Python 3.8 CentOS 7. Here, we'll look at both ways and let you decide which one best suits your needs and preferences.
Option 1: Install Python From Package Manager
For those who prefer a streamlined installation process with minimal manual intervention, using the package manager is the go-to choice. Installing Python 3 on CentOS 7 using the package manager is a straightforward process. Yum installs Python 3.8 CentOS 7 is a way to install Python. CentOS uses the YUM (Yellowdog Updater, Modified) package manager to handle software installations. Follow these steps to Yum install Python 3.8 CentOS 7:
1- Update Package Repository: Ensure your system has the latest information about available packages.
sudo yum update
2- Install Python 3: Use the following command to Install Python 3.6 CentOS 7, the package is named `python3`.
sudo yum install python3
3- Verify Installation: Once the installation is complete, you can verify the installed Python version using:
python3 –version
Discover More Python Tips! Interested in learning more Python essentials? Click here to read our comprehensive guide on "How to Check Your Python Version and Why It Matters." Get step-by-step instructions, troubleshooting tips, and insights into how different versions can impact your coding projects.

This should display the installed Python 3 version.

The Python 3 version should now be available on your CentOS system.
4- Create a Virtual Environment (Optional): It's a good practice to work within a virtual environment to manage Python packages for specific projects. To create a virtual environment, use the `venv` module:
python3 -m venv myenv
Activate the virtual environment:
source myenv/bin/activate
You will see the virtual environment name in the command prompt, indicating that you are now working within the virtual environment.
Using the package manager, you have now successfully installed Python 3 on CentOS 7. Within the virtual environment, you can begin creating your Python projects or Install Python 3.10 CentOS 7 new packages as needed. Simply use the 'deactivate' command to exit the virtual environment if necessary.
Explore the Power of Linux!
🐧 Dive into our Comprehensive Linux Commands Cheat Sheet 📜
✅ Master Your Terminal Skills
✅ Save Time & Increase Efficiency
Option 2: Install Python From Source Code
Installing Python from source code on CentOS 7 provides you more control over the installation process and allows you to tailor Python to your specific needs. Here's a step-by-step procedure:
1- Update System Packages: Ensure your system has the necessary tools and libraries for building software.
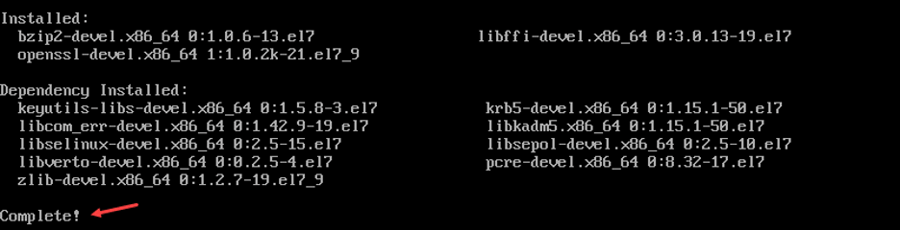
sudo yum groupinstall "Development Tools"
sudo yum install openssl-devel bzip2-devel libffi-devel
2- Download Python Source Code: Visit the Python Downloads page to find the latest version of Python. Copy the link to the "Gzipped source tarball" for the desired version.
cd ~
wget https://www.python.org/ftp/python/3.x.x/Python-3.x.x.tgz
Replace
`3.x.x`
with the specific version you want to install.

3- Extract the Source Code: Extract the downloaded tarball.
tar xzf Python-3.x.x.tgz
4- Configure and Build Python: Navigate to the extracted directory and configure the build.
cd Python-3.x.x
./configure --enable-optimizations
Start the build process:
Make

Install Python 3.6 CentOS 7:
sudo make install
5- Verify Installation: Check that Python 3 is installed successfully.
python3 –version

This example should display the installed Python 3 version.
6- Update `pip` and `setuptools` (Optional): It's recommended to update `pip` and `setuptools` after installing Python.
sudo python3 -m pip install --upgrade pip setuptools
Note: When using this approach, you may need to manage updates and dependencies manually.
Installing additional packages
The 'pip' package manager can be used to Install Python 3.10 CentOS 7 more packages. Here's a step-by-step procedure:
Using pip to Install Python Packages
1- Update `pip` (Optional): It's a good practice to ensure that `pip` is up-to-date.
sudo python3 -m pip install --upgrade pip
2- Install a Python Package: Use `pip` to install the desired Python package. Replace `package_name` with the name of the package you want to install.
sudo python3 -m pip install package_name
For example, if you want to install the popular data manipulation library Pandas:
sudo python3 -m pip install pandas
3- Verify Installation: After the installation is complete, you can verify that the package is installed correctly.
python3 -m pip show package_name
This command will display information about the installed package.
Using Virtual Environments (Optional but Recommended)
1- Create a Virtual Environment: It's a good practice to create a virtual environment for each project to isolate dependencies.
python3 -m venv myenv
2- Activate the virtual environment: source myenv/bin/activate
Now, your prompt should change to indicate that you are working within the virtual environment.
3- Install Packages within the Virtual Environment: Install Python 3.9 CentOS 7 packages as usual but within the virtual environment.
pip install package_name
Deactivate the virtual environment when you're done.
deactivate
Loading source files
To load and execute source files (Python scripts) on CentOS 7, you can follow these steps:
1- Open a terminal or SSH into your CentOS 7 server.
2- Navigate to the directory where your Python source file is located.
Example: You can use the `cd` command to change directories. For example, if your Python file is located in the `/home/user/scripts` directory, you can navigate to it by running:
cd /home/user/scripts
3- Once you're in the directory containing your Python script, you can execute it using the Python interpreter. Run the following command:
python your_script.py
4- Replace `your_script.py` with the actual name of your Python file.
5- If you have multiple versions of Python installed on your system, you may need to use `python3` instead of `python` to specify the Python 3 interpreter. For example:
python3 your_script.py
Note 1: By default, CentOS 7 comes with both Python 2 and Python 3 installed. If you want to execute your script with a specific version of Python, make sure to use the correct interpreter.
Note 2: Make sure to replace `your_script.py` with the actual name of your file and provide the correct path if the file is located in a different directory.
Python version update
Updating your Python installation is critical for accessing the most recent features, performance enhancements, and security patches. This command installs the most recent version of Python 3 from the CentOS 7 repositories. If you're using a different package manager or Python version, modify the command.
update python3
Installing Additional Python Packages
Update pip (Optional but recommended):
sudo python3 -m pip install --upgrade pip
Install Additional Python Packages:
sudo python3 -m pip install package_name
Replace `package_name` with the name of the Python package you want to install.
Loading Source Files
Create a Python Script (e.g., `myscript.py`)
# myscript.py
print("Hello, CentOS 7!")
Run the Python Script
python3 myscript.py
Replace `python3` with your Python interpreter command if necessary.
Check for Python Version Updates
Check Installed Python Version:
python3 --version
This command displays the currently installed Python version.
Check for Package Updates
Check for Outdated Packages:
sudo python3 -m pip list --outdated
This command lists outdated Python packages installed via pip.
Upgrade All Outdated Packages:
sudo python3 -m pip freeze --local | grep -v '^\-e' | cut -d = -f 1 | xargs -n1 sudo python3 -m pip install -U
This command upgrades all outdated Python packages.
Conclusion
Congratulations on successfully installing Python 3 on your CentOS 7 system! You’re now equipped to take full advantage of Python 3’s robust features and improved performance. Remember, keeping your Python installation up-to-date is crucial for security and efficiency, so be sure to check for updates regularly. We hope this guide has been helpful in your journey toward a more powerful and efficient computing experience. Happy coding!

One OF my major goals is getting new experiences about ICT and what’s more making progress through this field.