List of content you will read in this article:
If you wish to host a site on the internet, there are many things to keep in mind. One of these things is the web server software that you will be using. Today we will take a deep dive into what is a web server, followed by instructions on how to install Apache HTTP Server on Windows OS. Keep in mind, however, that it is recommended to use the Linux operating system when hosting a site. Without further ado, let’s get right into it.
What is a Web Server?
There are two separate things that can be named a Web Server, and they refer to either hardware or software. Finally, it could also describe the two working together. While today’s article focuses on the software side of things, we will shortly explain both definitions.
On the hardware side of things, a web server is a physical machine, basically, a computer, which stores the web server software and all the files and databases of the site. It allows connection to the internet and depending on the components, hosting of one or more sites.
From the software point of view, a web server is software that allows the machine to process requests from website users and send them the required files. As a bare minimum, it should be at least an HTTP server. Meaning, it should at least understand URLs and HTTP, and can be accessed through the domain names of the websites it stores. Today’s web server software of choice is Apache HTTP server.
What is Apache?
Apache is one of the most popular web server software, developed and maintained by Apache Software Foundation. It is based on Linux, however, due to its great functionality, users are also interested in getting it on Windows. You can use this tutorial to install Apache on all client and server versions of Windows except Windows XP and Windows Server 2003.
How to Install Apache on Windows?
Follow these simple illustrated steps and you will have Apache installed on Windows in no time.
Step 1: Click on the following link and download Apache web server for Windows: Windows Apache download
Note: Apache will require C ++ Redistributable Visual Studio to run on Windows. If you do not have it installed on your system, download it from one of the following links and install it.
C ++ Redistributable Visual Studio – 64bit
C ++ Redistributable Visual Studio – 32bit
Step 2: After downloading Apache, extract and copy it into a folder named Apache24 in C:
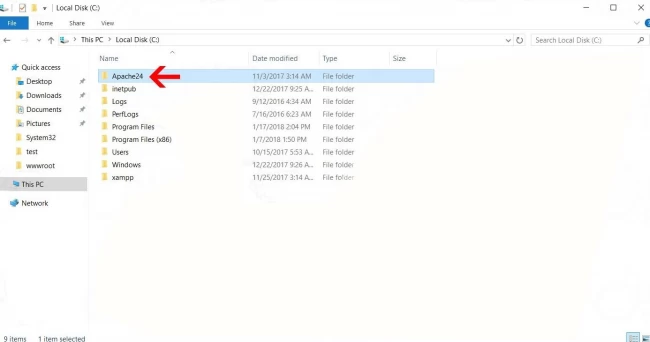
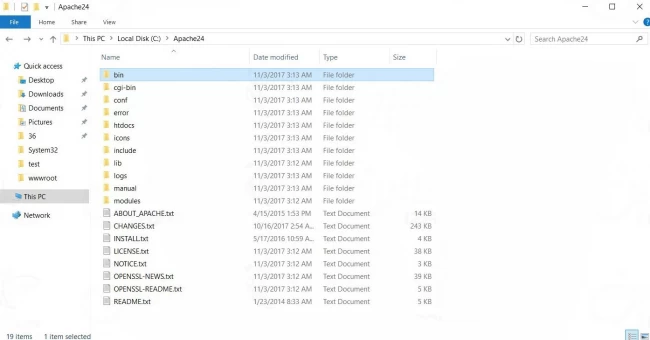
Step 3: Now, run CMD with administrator access. (to do so, press 'windows key' + 'R' simultaneously. In the opened 'Run' window, type: cmd)
Run the following command to enter the bin folder:
cd c:\Apache24\bin
Step 4: Now, enter the command shown below to install the Apache web server.
httpd.exe -k install -n “Apache HTTP”
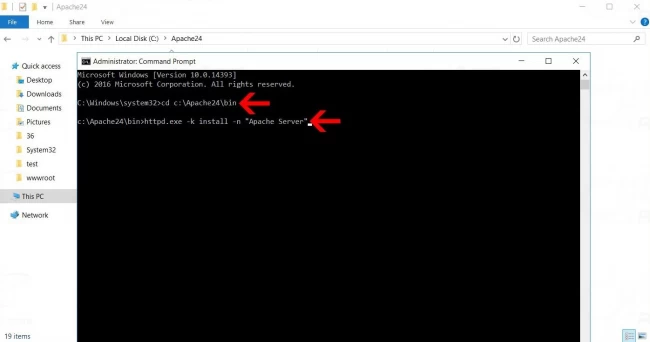
Step 5: Open 'Run' (refer to step 3 for a guide on how to) and enter services.msc.
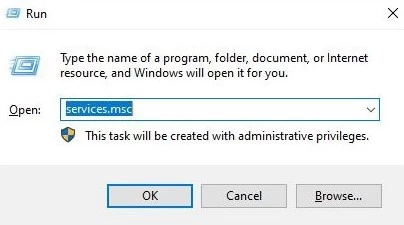
Step 6: Now, find Apache HTTP Server service and start this service by right-clicking and selecting 'Start'
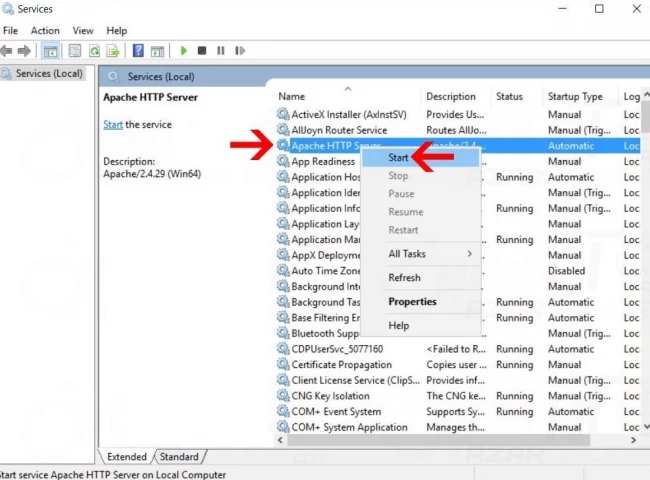
Now the Apache web server is installed and running on your Windows VPS/system.
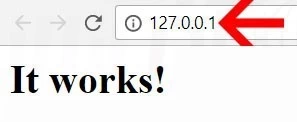
Step 7: Open a browser and enter your computer’s IP. If you have completed all the steps correctly, you should see a page similar to the below image.
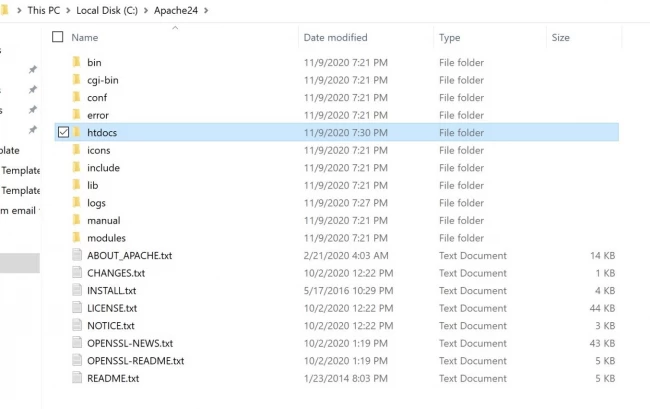
Step 8: Within this step, you can put your files in the apache root directory to be download or to be loaded in the browser. The default apache root folder for windows is htdocs, you can copy your files to this folder to be loaded from the browser as apache default index page.
Sometimes you will get an error on running Apache webserver "Could not determine the server's fully qualified domain name"
To solve this matter, check out this article Apache Could not determine the server's fully qualified domain name.
Conclusion
We hope that this article introduced you well to web servers and the software that needs to be run on them. While there are many web server software out there, today our focus is on Apache HTTP Server and we wrote a detailed step-by-step tutorial on how to install it on Windows operating systems. If you have any questions or suggestions, please leave them in the comment section below.
