![Install OpenSSL on Windows: Easy Guide [2026] 🔐](/wp-content/uploads/2023/06/install-openssl-on-windows500-main.webp)
If you need to generate a CSR, spin up a self-signed cert, or export a PFX for IIS, you need OpenSSL. Windows doesn't ship with it. So this guide walks you through how to install OpenSSL on Windows 10, Windows 11, and Windows Server — plus adding it to PATH, verifying the install, and fixing the errors that trip up almost everyone the first time.
I've done this install on maybe a hundred machines over the years. The install itself takes two minutes. The PATH and config-file weirdness is what eats the afternoon. We'll also walk you through OpenSSL Windows download options, how to configure environment variables, basic commands, troubleshooting, and safe update/uninstall procedures. If you're new to SSL/TLS, you can also check out our related guides such as What is SSL and TLS vs SSL.
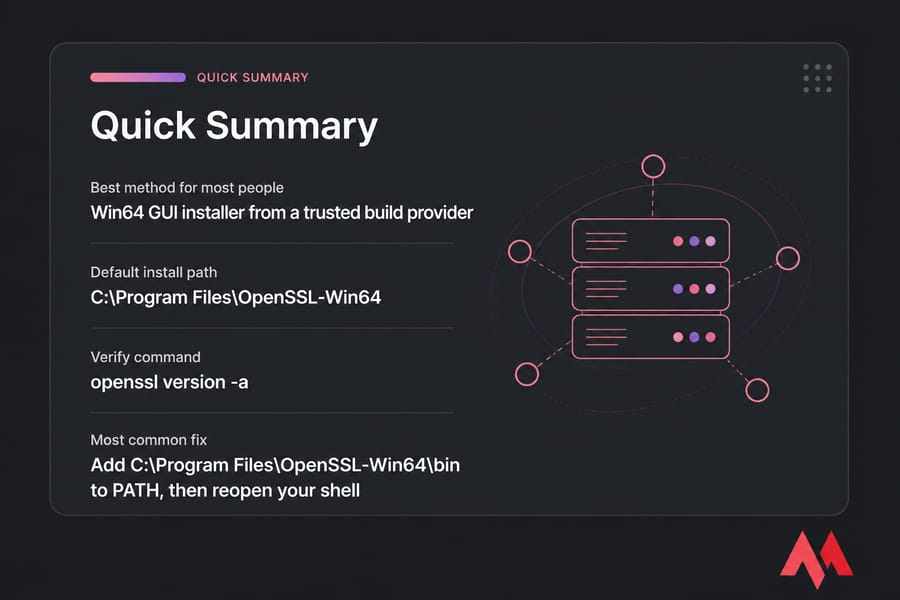
📋 Quick Summary
- Best method for most people: the Win64 GUI installer from a trusted build provider
- Default install path:
C:\Program Files\OpenSSL-Win64 - Verify command:
openssl version -a - Most common fix: add
C:\Program Files\OpenSSL-Win64\binto PATH, then reopen your shell
🔍 How to Check Whether OpenSSL Is Already Installed
Before installing anything, check. Git for Windows and some dev tools bundle their own copy.
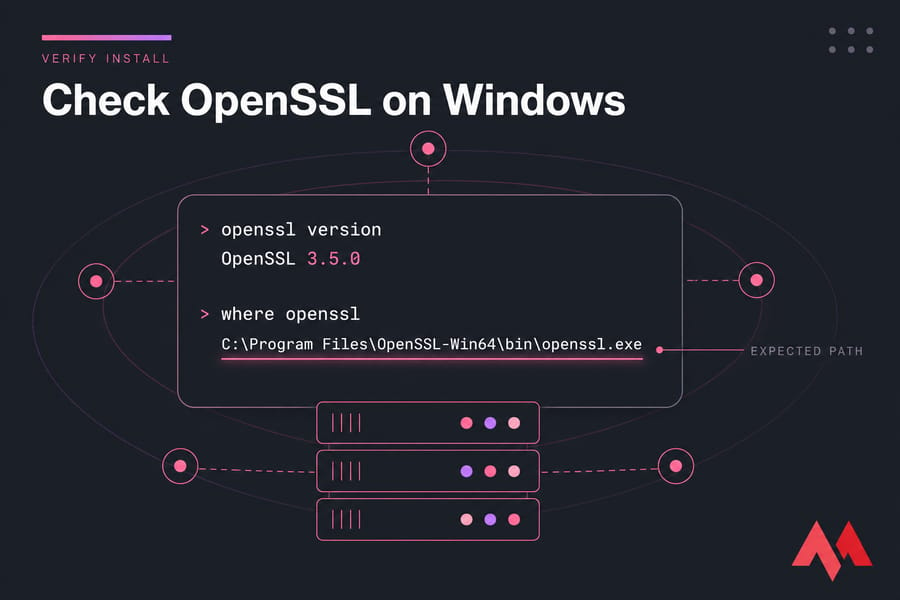
openssl version
where openssl
If you get a version string like OpenSSL 3.5.0, you're set. If you see 'openssl' is not recognized as an internal or external command, it's either not installed or not on PATH. The where openssl output matters too — if it points at C:\Program Files\Git\usr\bin\openssl.exe, you're using Git's bundled build, which is often older than what you want.
🚀 Why Install OpenSSL on Windows?

OpenSSL enables you to:
- Generate private keys and CSRs
- Create self-signed certificates
- Test SSL/TLS configurations
- Encrypt/decrypt files
- Validate certificates and certificate chains
- Sign and verify data
📊 OpenSSL Installation Methods on Windows
| Method | Difficulty | Best for | Trade-off |
| GUI installer (Win64) | Easy | Most users, Windows Server admins | Manual updates |
| Chocolatey | Easy | Automation, scripted builds | Needs Chocolatey installed first |
| Scoop | Easy | Developers who prefer per-user installs | No admin-wide PATH |
| WSL / Cygwin | Medium | Linux-style workflows | Awkward file paths between OS layers |
| Build from source | Hard | Custom builds, FIPS, specific ciphers | Requires Perl, NASM, Visual Studio build tools |
Building from source is genuinely advanced territory. Unless you need a specific compile flag, skip it.
📌 What Is OpenSSL and Why Use It on Windows?
OpenSSL is an open-source toolkit that implements essential cryptographic functions such as RSA, AES, SHA hashing, SSL/TLS protocols, certificate generation, key management, and secure network communication. If you want to understand the foundations behind these tools, read up on what data encryption is before diving deeper. Installing OpenSSL on Windows gives you access to the same powerful command-line tools available on Linux. By the way, you can check tutorials for installing SSL in real-world environments like How to Install SSL on VPS or How to Install a Free SSL on a Shared Web Host.
🛠️ Prerequisites
- Windows versions: Windows 10, 11, Server 2016/2019/2022/2025 — all fine on 64-bit builds
- Permissions: local administrator, if you're installing to Program Files or editing system PATH
- Dependencies: the Microsoft Visual C++ Redistributable. Most installers offer to pull it in. If you skip it, you'll hit missing DLL errors like
libssl-3-x64.dll not found
Choose Win64 unless you're on genuinely ancient 32-bit hardware. Win32 exists for legacy compatibility only.
📥 How to Download OpenSSL for Windows Safely
The OpenSSL project publishes source code, not Windows binaries. So the precompiled installers you find come from third-party maintainers. Two are widely trusted in the Windows world: the Shining Light Productions builds and the FireDaemon builds. Both publish checksums.
Rules I stick to:
- Download over HTTPS from the maintainer's own domain — never a mirror site or download aggregator
- Verify the published SHA-256 hash before running the installer
- Prefer the "light" build if you only need the CLI; the full build includes dev headers you probably won't touch
⚙️ Windows OpenSSL Setup Guide (Step-by-Step Installation)
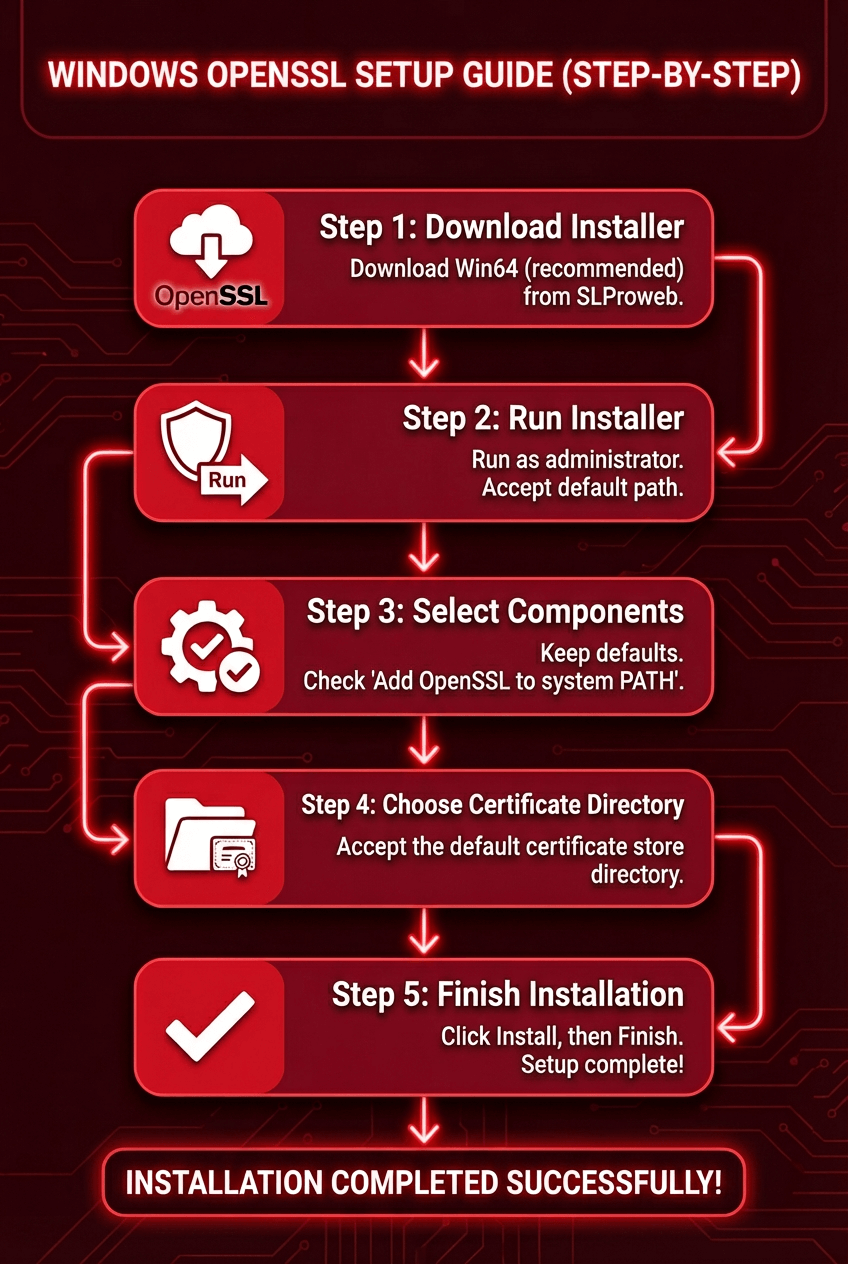
Step 1: Download OpenSSL Installer
- Visit the Shining Light Productions OpenSSL download page.
- Choose the correct version: Win64 OpenSSL (recommended) or Win32 OpenSSL (only for legacy systems).
- Download the .exe installer.
Step 2: Run the Installer
- Right-click the downloaded file.
- Select Run as administrator.
- Accept the license agreement.
Choose your installation directory (default is fine):
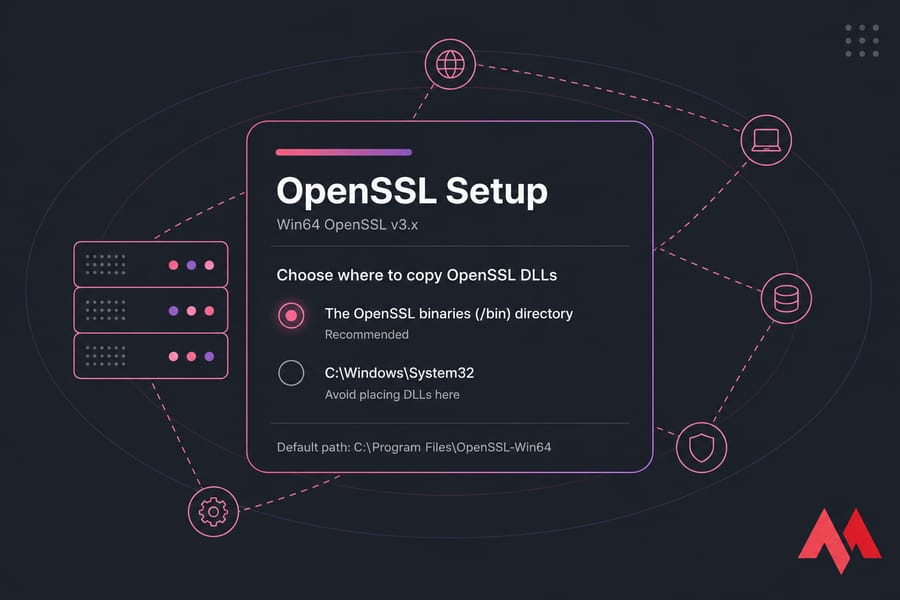
C:\Program Files\OpenSSL-Win64Step 3: Where to Copy the DLLs
When asked where to copy the DLLs, pick The OpenSSL binaries (/bin) directory. Don't dump them into C:\Windows\System32 — that's how you break other apps.
Step 4: Finish Installation
Click Install, wait for completion, and then click Finish. Congratulations, you've completed the basic portion of the Windows OpenSSL setup guide.
📦 Installing with Chocolatey or Scoop
choco install openssl
choco upgrade openssl
choco uninstall openssl

scoop install openssl
scoop update openssl
scoop uninstall openssl
Both handle PATH for you. Run openssl version in a fresh terminal to confirm. Chocolatey needs an elevated shell; Scoop installs per-user and doesn't.
🔧 How to Add OpenSSL to PATH on Windows
This is the step people skip. Then they wonder why nothing works.
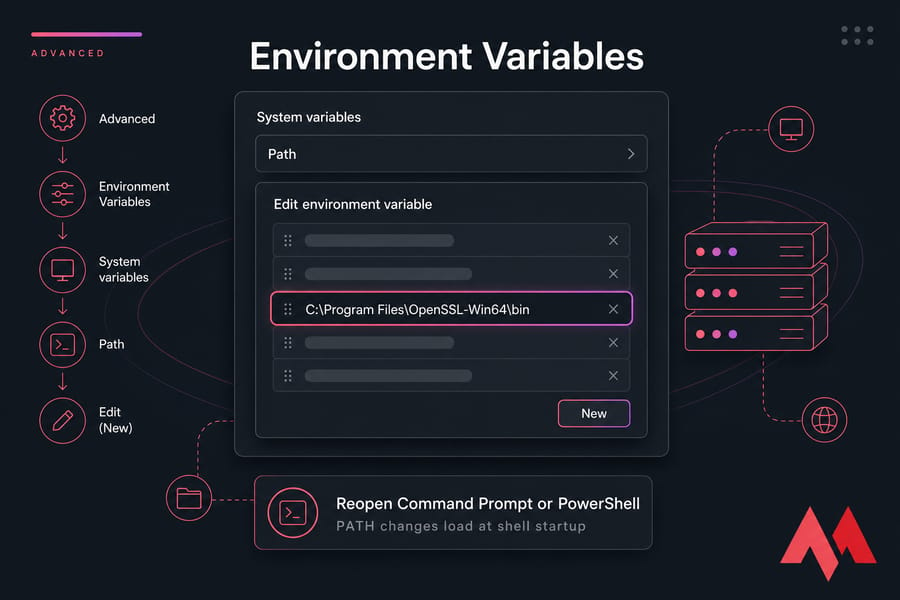
- Press Win + R, type
sysdm.cpl, hit Enter. - Go to Advanced → Environment Variables.
- Under System variables, select Path and click Edit.
- Click New and add
C:\Program Files\OpenSSL-Win64\bin. - OK your way out, then close and reopen Command Prompt or PowerShell.
Environment variables load at shell startup. An already-open terminal won't see the change — that alone explains half the "it didn't work" reports I get.
📝 How to Set OPENSSL_CONF
Windows builds usually ship the config as openssl.cfg, while nearly every tutorial online references openssl.cnf. Same file, different extension. That mismatch produces the classic unable to load config info from /usr/local/ssl/openssl.cnf error.
Fix it by pointing the variable at the real file:
setx OPENSSL_CONF "C:\Program Files\OpenSSL-Win64\bin\openssl.cfg"Check the bin folder first — some builds place it there, others in the install root. Then reopen your shell and run openssl version -a; the OPENSSLDIR line tells you what OpenSSL thinks its config path is.
✅ Verifying Your OpenSSL Installation
To confirm everything is working:
openssl version
openssl version -a
where openssl
If installed correctly, you should see something like:
OpenSSL 3.2.1 07 Feb 2025where openssl ensures your PATH is set properly and points to the right install — not Git's bundled copy.
💻 Commands You'll Actually Use
REM Private key
openssl genrsa -out example.key 2048

REM CSR
openssl req -new -key example.key -out example.csr

REM Self-signed cert, 365 days
openssl req -x509 -new -key example.key -days 365 -out example.crt

REM Inspect a certificate
openssl x509 -in example.crt -noout -text

REM Expiration date only
openssl x509 -in example.crt -noout -enddate

REM Confirm key and cert match (hashes must be identical)
openssl rsa -noout -modulus -in example.key | openssl md5
openssl x509 -noout -modulus -in example.crt | openssl md5

REM Test a live TLS endpoint
openssl s_client -connect example.com:443 -servername example.com
In the s_client output, look at three things: the certificate chain (does it resolve to a trusted root?), the negotiated protocol and cipher, and Verify return code: 0 (ok). Anything other than 0 means a chain or trust problem. If the handshake fails entirely, here's how to fix SSL handshake failed errors. Need the full walkthrough? See our guide on how to generate a CSR.
SAN CSRs
Common Name alone is dead — browsers require Subject Alternative Names. Create san.cnf:
[req]
distinguished_name = dn
req_extensions = ext
prompt = no

[dn]
CN = example.com
O = My Company
C = US

[ext]
subjectAltName = DNS:example.com, DNS:www.example.com
openssl req -new -key example.key -out example.csr -config san.cnf🔐 Creating a PFX File for IIS
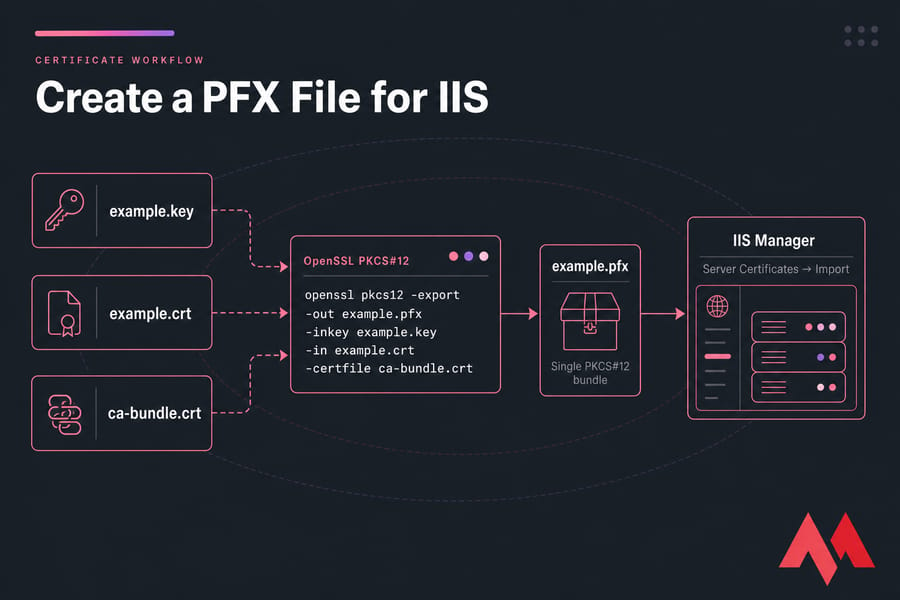
IIS wants a single PKCS#12 bundle, not separate PEM files. Combine them:
openssl pkcs12 -export -out example.pfx -inkey example.key -in example.crt -certfile ca-bundle.crtSet a strong export password. Then import via IIS Manager → Server Certificates → Import, If you're running this on a Windows VPS, do the key generation on the server itself so the private key never travels. Not on IIS? Here's how to install Sectigo SSL on cPanel instead.
⚠️ Troubleshooting Common OpenSSL Installation Issues

- "openssl is not recognized" — PATH missing or shell not restarted. Add the
binfolder, open a new terminal. - Missing DLL (libssl / libcrypto) — install the Visual C++ Redistributable, or reinstall and copy DLLs to the
/bindirectory. - "Unable to load config info" — set
OPENSSL_CONFas shown above. - Old version still reported — an earlier PATH entry (usually Git's) wins. Run
where openssl, then move your OpenSSL entry higher or remove the stale one. - Works in CMD, not PowerShell — PowerShell caches the environment per session. Close it fully; don't just open a new tab.
- Access denied writing keys — you're inside Program Files. Work from
C:\certsor your user folder instead.
🔄 Updating OpenSSL on Windows
Unlike Linux, OpenSSL does not update automatically on Windows. You must update manually, but it's easy.
- Download the Latest Build: Perform a new OpenSSL Windows download from a trusted provider.
- Uninstall the Old Version: Go to Control Panel > Programs and Features, then uninstall OpenSSL-Win64 or OpenSSL-Win32.
- Install the New Version: Follow the same steps from the Windows OpenSSL setup guide.
- Verify Version: Run
openssl version.
🗑️ How to Uninstall OpenSSL on Windows
- Uninstall via Control Panel: Programs and Features → OpenSSL → Uninstall.
- Remove Environment Variables: Remove
C:\Program Files\OpenSSL-Win64\binfrom PATH and delete the OPENSSL_CONF variable. - Delete Remaining Files: Remove leftover folders
C:\Program Files\OpenSSL-Win64andC:\OpenSSL.
🛡️ Security Practices Worth Keeping
Private keys are the whole ballgame. Store them outside shared folders, outside OneDrive sync, and outside version control. Keep OpenSSL patched — 3.x releases ship security fixes regularly, and an unpatched crypto library is worse than none. Run elevated shells only when installing, never for daily certificate work. And once you've got certs generated, whether you buy an SSL certificate or use a free one, the deployment guide for your platform is the next stop.
🎯 Conclusion
You now have everything you need to confidently install OpenSSL on Windows, configure your environment variables, and begin using essential commands professionals rely on. Whether you're generating CSRs, securing servers, or learning cryptography, OpenSSL is an essential tool that works flawlessly on Windows when set up correctly.
If you plan to secure a live website, remember — you can always Buy SSL Certification through MonoVM for maximum security and global trust.


I'm fascinated by the IT world and how the 1's and 0's work. While I venture into the world of Technology, I try to share what I know in the simplest way with you. Not a fan of coffee, a travel addict, and a self-accredited 'master chef'.