If you are planning to build your own website, there are abundant technicalities to handle. Well, the panacea for all your worries is a wonderful and easy-to-learn tool, WordPress. Even if you do not belong to a technical background, you can work with it to build a professional website with super-ease.
We are here to provide you a complete walkthrough of one of the best platforms available - WordPress! Let’s begin.
What is WordPress?
WordPress is basically a CMS or a Content Management System which is a free-to-use open-source tool. You can develop your website without even being familiar with coding. Sounds great, right?
The popularity and the usage of WordPress is growing exponentially. The statistics say that approximately 30% of the internet is consumed by WordPress-powered websites. Isn’t that impressive?
Moving on, you may wonder what makes WordPress so popular? The important key points are:
- Free open-source
- Ease-of-use
- Flexible
- Plugins
- Themes
Now, let us tell you about how to use WordPress in a step-by-step fashion.
How to use WordPress?
There are several subparts to this topic. Take a look.
- How to get wordpress hosting and domain name?
- Steps to install WordPress?
- How to log in to WordPress?
- How to use the dashboard in WordPress?
- How to install a WordPress theme?
- How to add plugins in WordPress?
- How to customize the WordPress theme?
- How to create Menus in WordPress?
- How to publish a website on WordPress?
Let’s start!
How to get hosting and domain name?
A domain name is simply the web address that you enter to visit any website. For instance, www.google.com. Moreover, when we talk about hosting, it is the space that you buy from the internet for your website.
There are various platforms from where you can easily avail both the domain and the hosting. We ourselves offer these services and they can be found at our Linux Web Hosting and Domain Name Registration pages.
Now, moving on, the next step is to install WordPress.
Best WordPress Hosting Providers
Looking for top-notch speed and reliability? Discover our picks for the Best WordPress Hosting Providers here!
Steps to install WordPress?
Here are some instructions regarding the installation process.
- The initial step is to download the WordPress package. Unzip it and build a database for your web server. You also need to create a MySQL user with the privileges to access the database.
- The next step is, to find a file named wp-config-sample.php and rename it to wp-config.php. Edit this file and later add this to the database. Although this step is completely optional, proceed as per your comfort.
- Now, move the WordPress files on your webserver to any location that you wish. Following are two possible alternatives for you.
- The first option is, to integrate your WordPress with the root domain. In this case, you can simply move the entire content to the web server’s root directory from the unzipped WordPress directory.
- Next, if you wish to install WordPress in the WordPress blog subdirectory, follow these steps; To start with, you have to create the blog directory on the server. Subsequently, upload the overall data belonging to the same unzipped WordPress directory to the directory through FTP.
- The last step is to run the installed WordPress script on your system. Go to your web browser and use the URL that you had set to upload the WordPress files previously.
- If you have installed the WordPress in the blog subdirectory, you should type the URL in this fashion, https://example.com/blog/
- Whereas, if the installed WordPress is located in your root directory, use this format of URL, http://example.com/ .
Congratulations! You have installed WordPress in your system successfully. Let us now enter into the world of WordPress by logging in to it.
How to log in to WordPress?
Now that you have successfully set up the domain name, hosting and installed WordPress, the next step is to start using WordPress.
First of all, visit your web browser and enter the domain name in the URL. For instance, if your domain name is www.hello world.com, then type helloworld.com/wp-admin.
In short, just add wp-admin at the end of your domain name and press Enter. The URL redirects you to the login page of WordPress, just like the snapshot shown below.
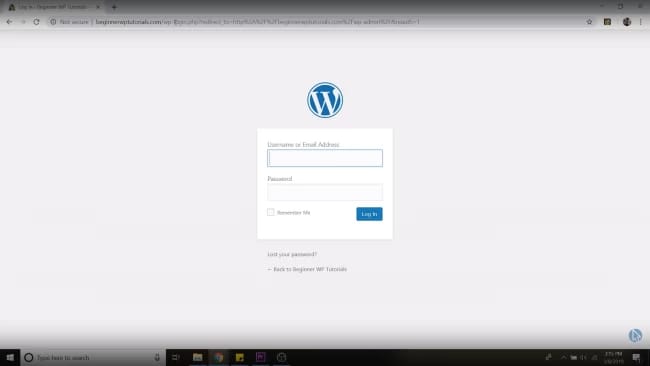
Here, enter the username and the password in the respective text boxes.
As soon as you press Enter, you are redirected to the dashboard. You get several options to use while building the website. It may be confusing at first, but slowly and steadily you get a hang of it.
This is how the dashboard looks.

Now, the next question is, how to use the dashboard and get your work done!
How to use the dashboard in WordPress?
WordPress dashboard consists of ample features and tools for you to build a website. It is only accessible by the users who have made their respective accounts on WordPress.
First of all, take a look at the top left corner, you see your website’s name. Hover on it and choose the Visit site option to check how your website looks.
Additionally, the black bar on the left is inclusive of the most pivotal and impressive features of WordPress. Here is a list of the options that you see along with their usage:
- Updates: You get WordPress updates very often imbibed with new features or better functionalities. All the notifications including updates related to themes and plugins are also received here.
- Posts: If you are looking to create a new blog post, click on Posts, and then Add New Post. A blank page appears in front of you, you can write your content here. Moreover, you can also update or edit the already uploaded blog posts by selecting the desired topic and clicking on Edit.
- Media: Here you can easily add images, files, or pictures as per your requirements
- Pages: There is a distinction between posts and pages. Pages are exclusive of the blogs. They are used to add or update additional pages on your website. For instance, the Contact Us page or the About Us page.
- Comments: You must have seen the comments section below a blog post or on many other pages of a website. This is the section from where you can permit, delete, or add a comment to your site.
- Appearance: Under this segment, there are tons of options available for you. You can install any theme you like for your website. It is easy to manage widgets, menus, fonts, styles, and much more.
- Plugins: Plugins make your life easier. They are basically a software component, a set of code, designed to add better functionality and features to the website.
- Users: In this section, you can change the name of your WordPress profile as well as the password. There are many other options too. Besides, you can also create or update the accounts for other people.
- Tools: You can import or export the blog content or plugins as well as several other options.
- Settings: There are a lot of different options available for you to make several changes in the settings related to blog posts, comments, media, or permalinks.
Now that you have attained a decent grip over some of the tools of WordPress, our next segment guides you about installing the WordPress theme.
How to install a WordPress theme?
Not everyone is technically sound to build a website via coding, right? In WordPress, you have the option to choose any desired theme that already has inbuilt designs and styles. Themes are nothing but templates that are extremely easy, quick to install and work with.
Here is the process of installation:
Firstly, go to the main Dashboard and hover on Appearance. Now, select Themes. The default theme of WordPress is installed at the moment, known as, Twenty Nineteen.
To add any other theme, just click on Add new theme option. You can see a list of several other themes in front of you. Select whichever appeals to you the best.
After you have selected the theme, tap on the Install button right in the bottom left. In a few seconds, you will see Activate in place of Install. Click on that and that’s it. When you go back, a congratulatory message pops up on your screen.
Previously, we talked about plugins, so our next segment is all about them. Let us now hop onto understanding how to add plugins in WordPress!
How to add plugins to WordPress?
Now that you have successfully installed a theme, the next move is the installation of Plugins. The main objective of plugins is to enhance the functionalities and features of your website.
For better clarity, here are a few examples of widely used plugins. Google Analytics, Google site kit, are some of the best plugins to track the insights of your website. It tells you about the number of impressions made on your website, website traffic, and much more.
To add a new plugin, hover on the Plugins tab located on the main menu. Select Add new. You get a plethora of choices. Select whichever suits you the best.
Moving on, it is important to customize your website by using the newly installed theme to provide a more appealing look to the site.
How to customize the WordPress theme?
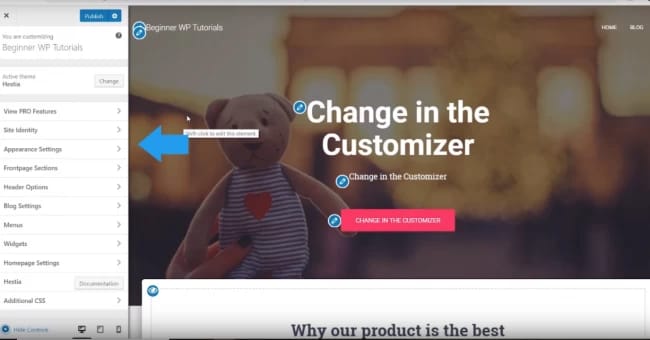
The first step is to over on the top left corner of your website’s name and tap on the Visit site option. You will see the Customise option located at the top right.
As soon as you click on it, you will see tons of features and tools in order to make significant changes. For instance, you can change your header and footer designs, font styles, size, design, front-page settings, and much more.
On the right side of your screen, you can see the changes you make immediately as shown in the snapshot below.
The next segment is to tell you about creating several pages on WordPress.
How to create pages in WordPress?
As mentioned before, Pages are different from Posts. For instance, About us or Contact us are Pages. Adding a page to your website is pretty simple. Go to your Dashboard, and find Pages as shown in the snapshot below.
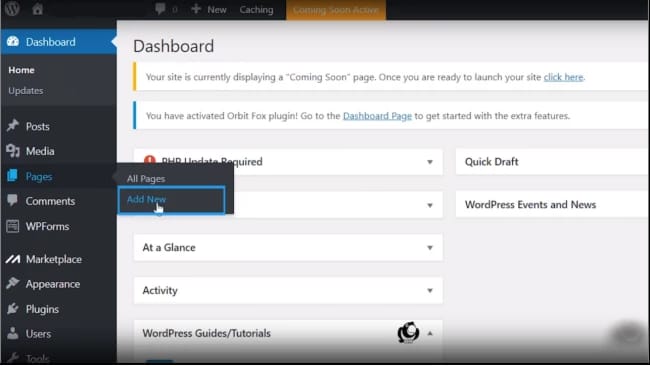
Hover on it, and select Add new. A new page appears in front of you where you can create or edit the content as per your wish. There are plenty of tools with which you can format your content. Make changes with the font style, heading, add images, audios, videos, and a lot more.
To save the work you have done, click on the Save draft option located at the top of the page. There is a Preview option too, in order to check your output. Once you finalize the content, press Publish.
Congratulations! The pages will now be added to your website. Next up is a mini-guide to introduce you to Menus.
How to create Menus in WordPress?
Firstly, why do we use Menus? If you want anything to reflect on the header page you have to add the page to the website's menu.
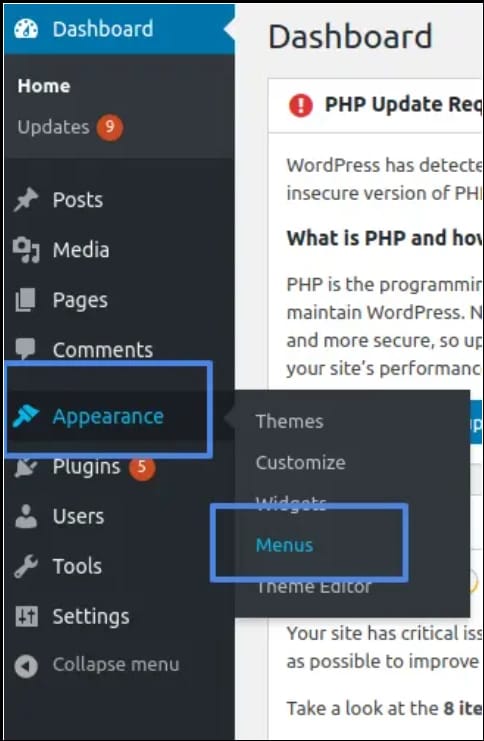
To accomplish that, go to your Dashboard and hover on Appearance. After that, click on Menus as shown below.
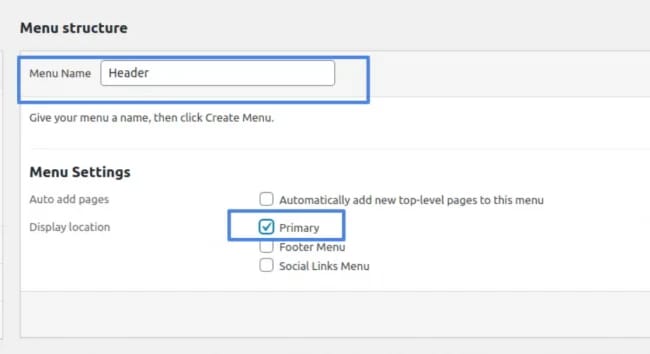
Enter any desired name for your Menu in front of the Menu Name textbox. Then, click on the Primary option. Now, simply click on Create Menu.
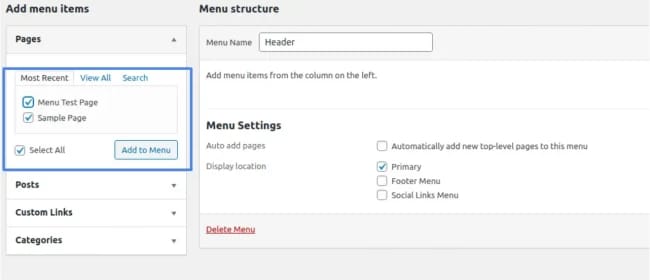
WordPress redirects you to the Add menu items page. Here, you have to select all the pages that you wish to showcase on your website. Once you are done, hit on Add to Menu.
Finally, select Save Menu, and you are done. Your website now displays all the pages that you wanted.
Now, we head towards the last segment of the tutorial. The final move is to understand the process to publish the WordPress website.
How to publish the website on WordPress?
Hop on to the dashboard. You will see a message popping on the screen that says: Your site is currently displaying a Coming soon page. Once you are ready to launch your site, click here.
That’s it. Just tap on click here and you are done. Your website is successfully live on the web.
Conclusion
As you have seen, WordPress is an incredible software to build your website. It is easy and free to use. Get your hands on this tool and build your own website! We hope that this article helps you to understand the basics of WordPress. If you have any further questions on how to use WordPress, please leave a comment in the comment section below. Keep learning, keep exploring!
