The virtual nature of the Windows server does not allow you to play any audio by default. If you are thinking of connecting additional speakers to fulfill your purpose, then we are sorry to disappoint, but that won’t be helpful. To accomplish this task, proceed further to the article to enable audio over RDP on the Windows Server.
You can redirect your VPS audio to your local computer system with the help of Remote Desktop Protocol. Now, let us move towards understanding the process of how to enable audio on Windows VPS Server.
How to enable audio in Windows Server via remote desktop protocol?
Let us dive into implementing them on Windows Server 2016. To redirect your VPS audio to your local system, having a running Windows Audio Service is mandatory. The Desktop Experience feature imbibes Windows Audio service.
Now, there is no pre-installed Desktop Experience in the Windows servers. Therefore, to avail the benefit of audio service, install the Desktop Experience feature in your system. Take a look at the following steps to achieve your desired goal:
Step 1: Go to your Server Manager.
Step 2: On the left side, hit Features. Then click on Add Features.
Step 3: A Select Features window pops up, click on Feature Summary and then Add Features.
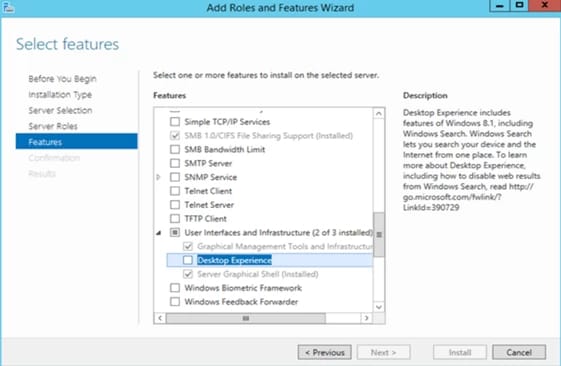
Step 4: In the Features list, you will see the option, Desktop Experience, select install.
Check out the snapshot for some visual aids.
Now that your system is endowed with the Desktop Experience feature, let us configure the audio in the Windows server.
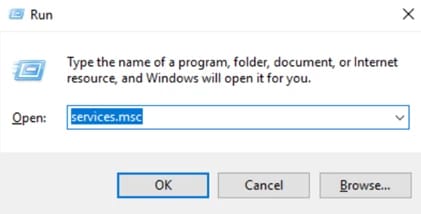
Step 5: After logging into the remote machine through your Remote Desktop, hit the Windows key + R to initialize the Run menu.
Step 6: Type services.msc in the text box and press enter as shown below.
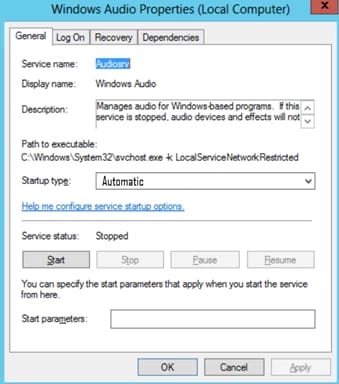
Step 7: You will see the Service window on your screen, here you have to search for Windows Audio.
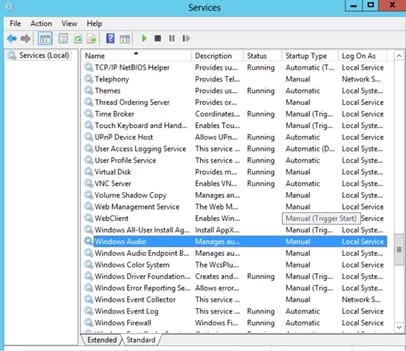
Step 8: Now, click right on it and then select Properties. The Windows Audio Properties page appears in front of you. Select Automatic in front of the Startup type text box. Then hit start and then subsequently press apply.
Now, you have successfully enabled the audio service. After that, just follow these next steps to redirect sounds in the Group policy.
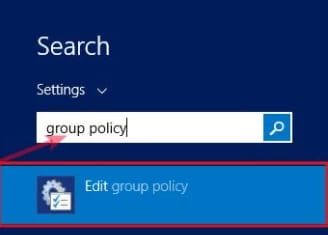
Step 9: After you have configured the Windows Audio service, allow sound and audio redirection in the group policy. Simply write group policy in the search bar as shown below. Once you finish typing, tap on the Edit group policy option.
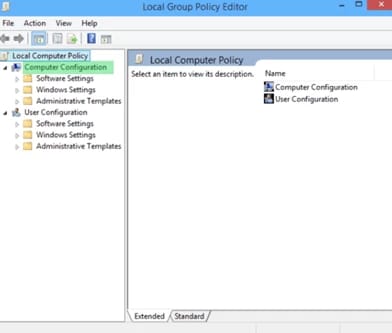
Step 10: Next window, Local Group Policy Editor pops up.
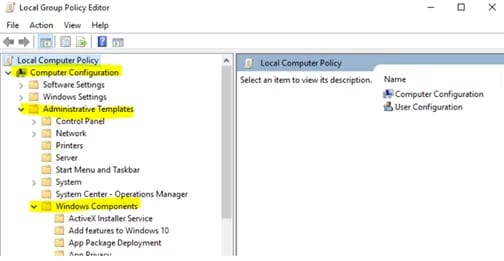
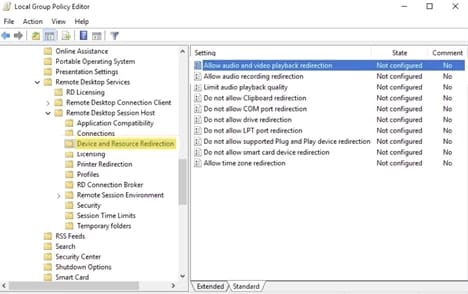
Step 11: Now, click on Configuration, then Administrative Templates, and finally Windows Components. Take a look.
Step 12: Next, you have to tap on Remote Desktop Services. After that, click on Remote Desktop Session Host and lastly on Device and Resource Redirection. Tap on the first option stating, Allow audio and video playback redirection.
Step 13: The Allow audio and video playback redirection wizard box appears, click on Enabled, as shown below.
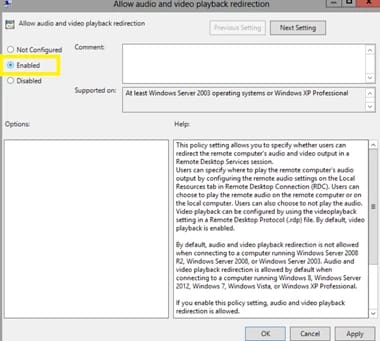
Step 14: Click on OK and then Apply.
Step 15: Now, simply reboot your server and when you come back, check your notification bar. You will see the sound option. You have completed the server settings. The last step is to check if the RDP client allows the sound playback option or not.
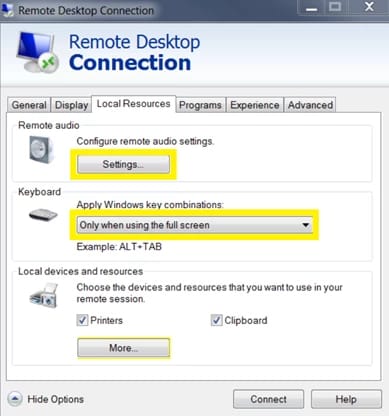
Step 16: For that, open your Remote desktop client. Tap on Local resources. After that, under the apply Windows key combination, do not forget to select the option stating, Only when using the full screen. Now, tap on Settings.
Step 17: Now, simply click on the option, Play on this computer.
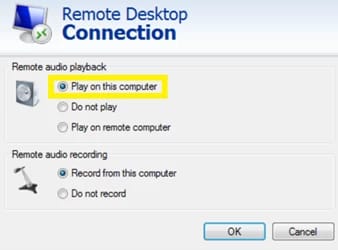
That’s it! Congratulations, your work is done here. The Windows server sounds will play on your local computer through the established RDP connection now.
Conclusion:
We hope that this step-by-step guide will help you to enable audio on your Windows server via a remote desktop connection. Also if do you think you need a Remote Desktop Server then you buy RDP with us with a cool discount offer.
Further, you can also suggest to us via the listed comment section if there is any other setup and configuration that we missed during the article.
