List of content you will read in this article:
PowerShell (PS), Microsoft's powerful task automation and configuration management framework, offers a robust set of tools to streamline user management tasks. With PowerShell add user to group, you can effortlessly add users to local groups on Windows systems, enabling you to enhance security, delegate privileges, and automate routine administrative tasks. From the basics of working with PowerShell add user to local group to advanced scripting techniques, in this blog post we'll provide you with step-by-step instructions and practical examples to help you master this essential skill.
Managing Local User Accounts with PowerShell
Managing local user accounts with PowerShell is an easy approach to automate user management chores on Windows systems. Here's how you can conduct various tasks on local user accounts using PowerShell:
Listing Users and Their Properties with PowerShell
To list all properties for an Active Directory user in PowerShell, follow these steps:
- Open a PowerShell terminal.
- Enter the following command and press Enter:
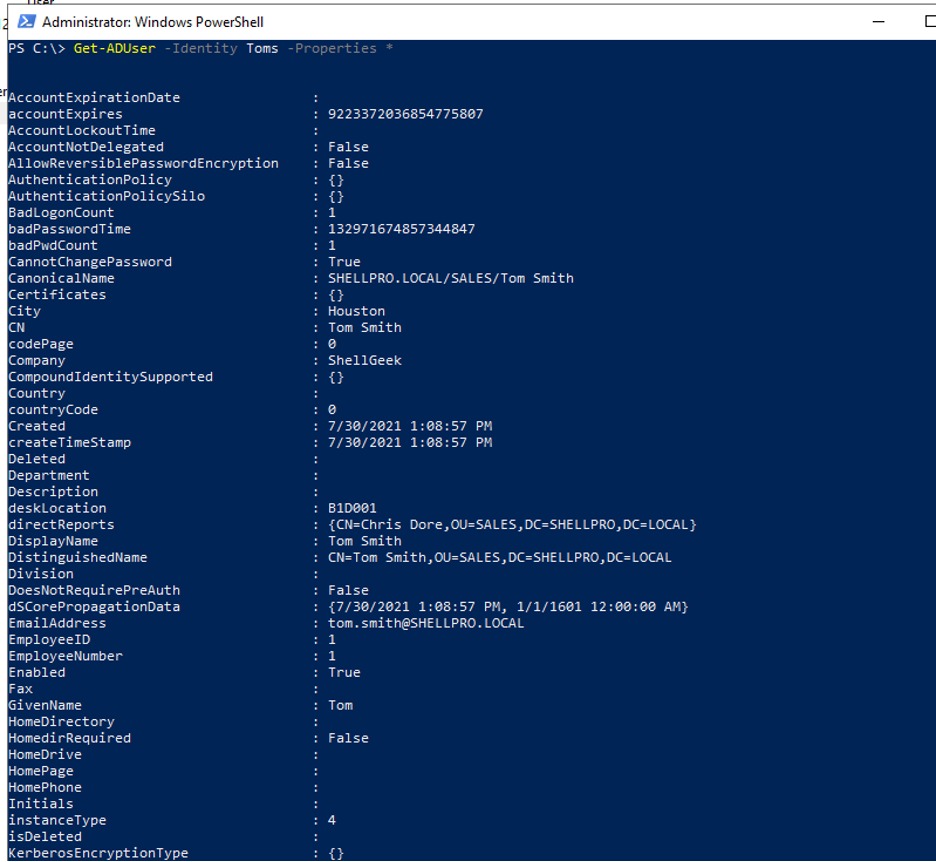
Get-ADUser -Identity Toms -Properties
In the provided PowerShell script, the Get-AdUser cmdlet utilizes the Identity parameter to specify the AD user "Toms" and the Properties * parameter to fetch all available properties for the specified user.
The output of the PowerShell script will present a comprehensive list of all properties associated with the user account.
Creating a local user with PowerShell
To establish a new local user, the PowerShell cmdlet New-LocalUser will be employed. This cmdlet provides the flexibility to either set a password for the account or create an account without a password.
There are some other relevant parameters that we can use:
|
Parameter |
Description |
|
Name |
Specifies the login name for the account, with a maximum limit of 20 characters. |
|
Password |
Requires a secure string input, serving as the password for the account. |
|
Description |
Provides a description for the account. |
|
AccountExpires |
Accepts a DateTime object to set the expiration date for the account. |
|
Disabled |
Creates the account in a disabled state. |
|
FullName |
Sets the display name for the account. |
|
PasswordNeverExpires |
Ensures that the password for the account does not expire. |
|
UserMayNotChangePassword |
Restricts the user from changing the account password. |
|
AccountNeverExpires |
Configures the account to never expire. |
To quickly create a local user account with PowerShell, we can perform the following.
$password = Read-Host -AsSecureString
New-LocalUser -Name "LazyUser" -Password $password -FullName "Lazy User" -Description "Test user"

Note: Running PowerShell commands may require elevated privileges. Run PowerShell as an administrator to ensure the necessary permissions for creating local users.
Changing a local user's password or password properties with PowerShell
To change a local user's password or password properties with PowerShell, you can use the `Set-LocalUser` cmdlet. Here are examples of how you can change a local user's password and password properties:
Change Password
Specify the username and new password
$userName = "ExistingUser"
$newPassword = ConvertTo-SecureString "NewPassword123!" -AsPlainText -Force
Change the user's password
Set-LocalUser -Name $userName -Password $newPassword
Replace "ExistingUser" with the username of the local user, and "NewPassword123!" with the desired new password.
🔒 Ready to boost your online security? Dive deeper into the art of password protection by checking out our comprehensive guide on "How to Choose a Strong Password." 💪💻
Change Password Properties
Specify the username and update password properties
$userName = "ExistingUser"
Set password properties
Set-LocalUser -Name $userName -PasswordNeverExpires $true -UserMayNotChangePassword $true
This example configures the password properties to ensure that the password never expires and that the user cannot change the password. Set the parameters based on your specific needs.
Note 1: Run PowerShell with elevated privileges (Run as Administrator) when changing user properties.
Note 2: Always follow best security practices and ensure that you have the necessary permissions to modify local user accounts.
Deleting a local user account with PowerShell
To delete a local user account with PowerShell, you can use the `Remove-LocalUser` cmdlet. Here's an example:
Specify the username of the account to be deleted
$userName = "UserToDelete"
Remove the local user account
Remove-LocalUser -Name $userName
Replace "UserToDelete" with the username of the local user account you want to delete.
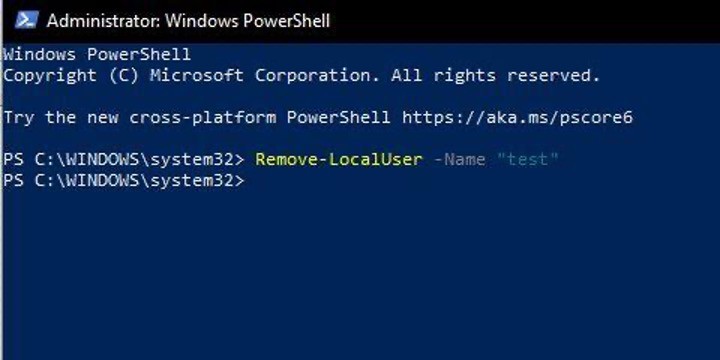
To delete local user accounts, ensure that you are running PowerShell with elevated rights (Run as Administrator).
Double-check the account you're deleting to avoid accidentally removing vital accounts. When you delete a user account, the related user profile data is also removed, so proceed with caution.
Managing Local Groups with PowerShell
The instructions below address a variety of tasks related to PowerShell add local group members remote computer. Customize them to meet your individual needs, and verify that these commands are executed with the correct permissions. Also, for remote management, make sure that PowerShell remoting is enabled on the target machine.
🔗 Explore the Benefits of Remote Desktop Connection: Learn more about "What is Remote Desktop Connection" and discover how this powerful tool can enhance your remote work experience. 🚀
Let`s take a look:
Reviewing local groups with PowerShell
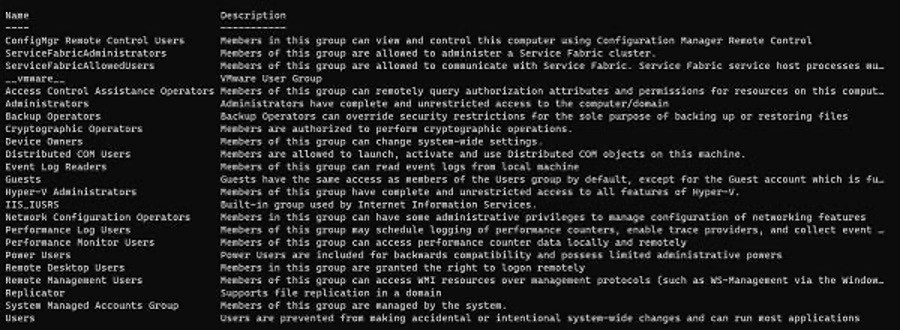
To retrieve the local groups on a Windows system using PowerShell, you can employ the following command:
Get-LocalGroup
Now, all the local groups will be listed as the following picture shows:
Adding a local group with PowerShell
This instruction is utilized to include users or groups within a local security group. All privileges and permissions associated with a group extend to all its members. Use the following command:
New-LocalGroup -Name "NewGroup" -Description "Description of the new group
Individuals within the Administrators group on a local computer possess Full Control permissions for that specific computer. It is advisable to manage the count of users within the Administrators group.
If the computer is integrated into a domain, the ability exists to add user accounts, computer accounts, and group accounts from both the local domain and trusted domains to a local group.
Adding users to a local group with PowerShell
The preceding PowerShell add user to local group command will include TestUser in the local Administrators group. You have the flexibility to substitute any local group name and any local username in place of TestUser. The add user to local group PowerShell instruction is:
Add-LocalGroupMember -Group Administrators -Member TestUser -Verbose
Additionally, when using add user to local group PowerShell instruction, if the computer belongs to the same domain, you can include an Active Directory domain user in the Local Administrators group by specifying the domain name. For instance, we will include the Beta user from the AutomationLab domain, as demonstrated below. PowerShell add user to local group example will be like:
Add-LocalGroupMember -Group Administrators -Member AutomationLab\Beta
Viewing the membership of a particular group with PowerShell
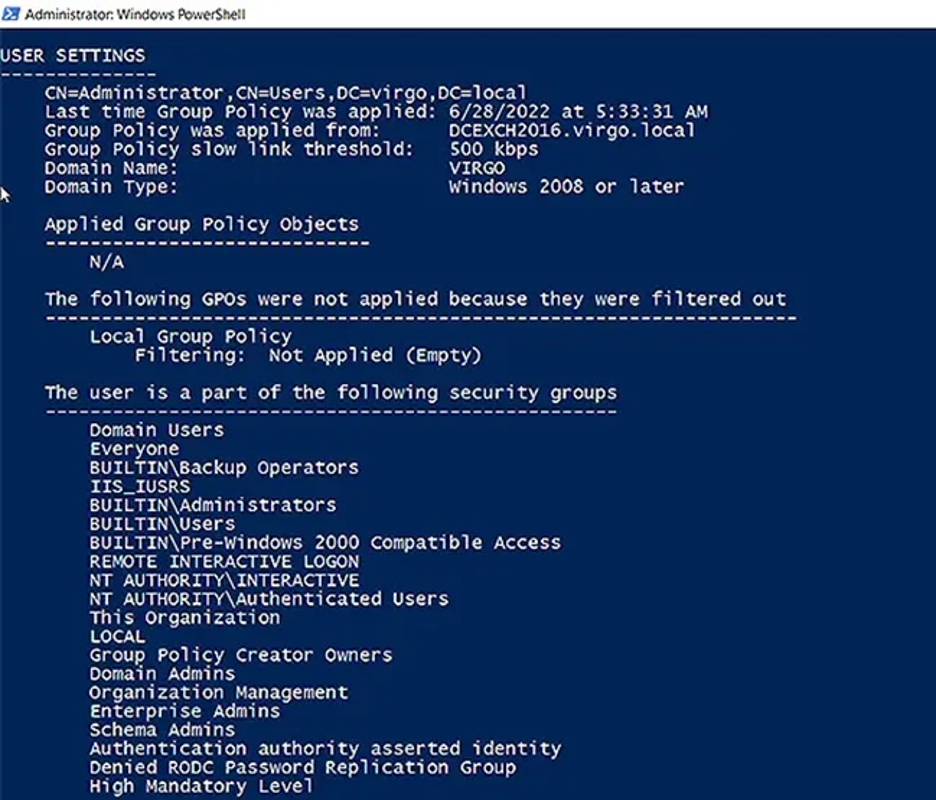
After PowerShell add user to group instruction, it`s time to take a look at another instruction. This instruction is primarily employed for examining Group Policy settings on a client or workstation. Additionally, it furnishes details regarding the group memberships of the user executing it. To utilize this functionality, open an elevated PowerShell command line, log in as the desired user, and execute the following command:
gpresult /R
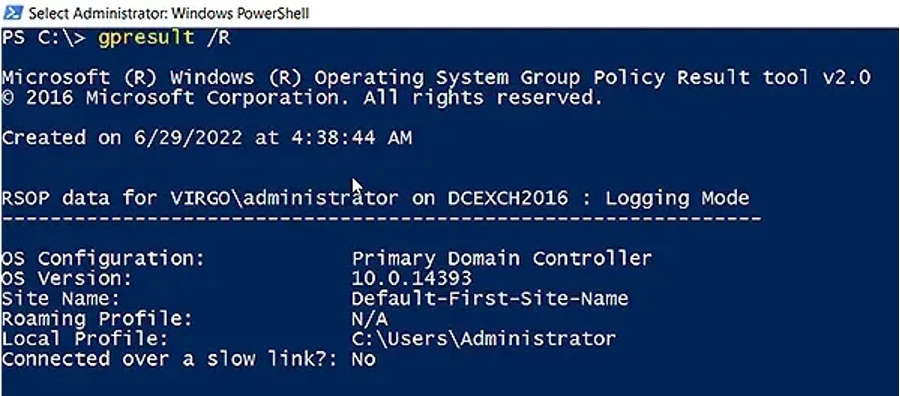
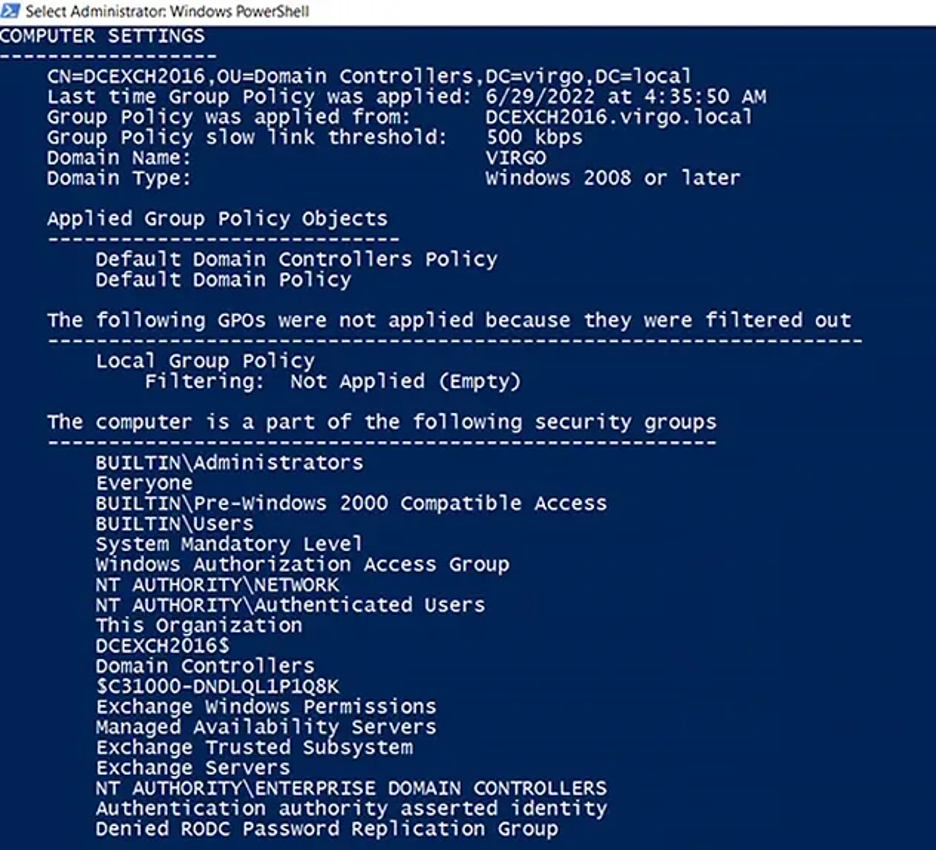
you can see the group membership under the user setting:
Viewing all groups that a user is a member of using PowerShell
To display all local groups that a user is a member of, use the following command:
Get-LocalUser "UserName" | Get-LocalGroup
Removing a local group with PowerShell
This cmdlet is designed to eliminate local security groups. It specifically targets the removal of local groups and does not affect the deletion of user accounts, computer accounts, or group accounts associated with the group. It's important to note that once a group is deleted, recovery is not possible.
Remove-LocalGroup
If you subsequently create a new group with the same name after deleting the original group, it is necessary to establish fresh permissions for the newly created group. The permissions from the prior group are not automatically inherited by the new group.
Managing local users and groups remotely with PowerShell
First, you need to connect to a remote computer:
$remoteSession = New-PSSession -ComputerName "RemoteComputer"
Execute commands on the remote computer using the following command:
Invoke-Command -Session $remoteSession -ScriptBlock {
# Perform local group management tasks here
Disconnect from the remote session:
Remove-PSSession $remoteSession
👉 Want to explore more PowerShell tricks? Check out our guide on "Creating Local User Accounts with PowerShell" for in-depth instructions and additional tips! 🚀
Conclusion
Finally, PowerShell emerges as a valuable ally for both administrators and users, providing a comprehensive toolkit for effectively managing local users, groups, and group rules on Windows systems. PowerShell commands provide a streamlined and scriptable approach to administrative operations, including examining and updating local user attributes and effortlessly navigating Active Directory integrations.
One OF my major goals is getting new experiences about ICT and what’s more making progress through this field.