Setting up Titan Premium Email on Monovm
Step 1: Connect Domain to Titan Mail
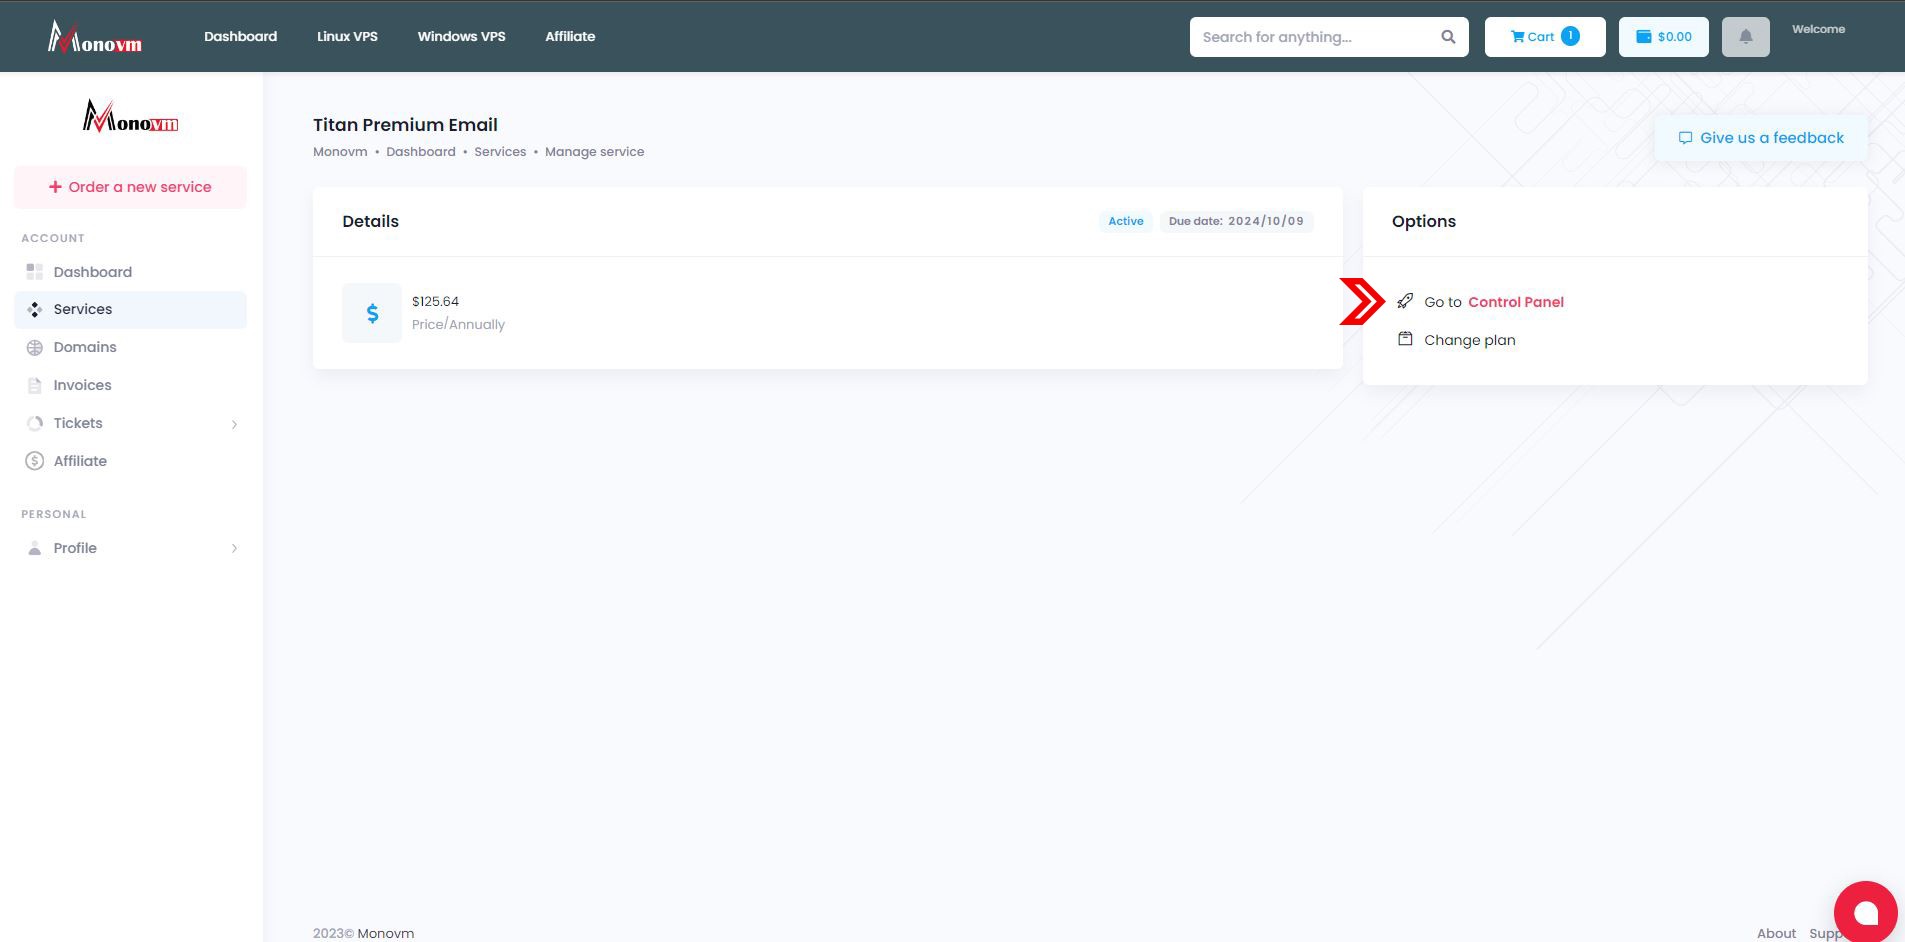
- After logging into your user account area in the MonoVM dashboard, find the Titan email service and click on it.
- On the opened page, to log into the control panel of the Titan email service, click on “Go to Control Panel.”
- Look for a warning prompting you to connect your domain to Titan Mail.
- Click on the "Connect Domain" card.
- Scroll down to Part 3, "Add a new MX record," and copy the provided "Value."
Step 2: Configure MX Records in the Domain Control Panel
Click here to enter Domain Control Panel
- Navigate to your domain's Admin area
- To manage DNS records through the domain’s control panel. Ensure the MonoVM public Name Servers are set on the domain and have propagated globally.
- ns1.1domainregistry.com
- ns2.1domainregistry.com
- ns3.1domainregistry.com
- ns4.1domainregistry.com
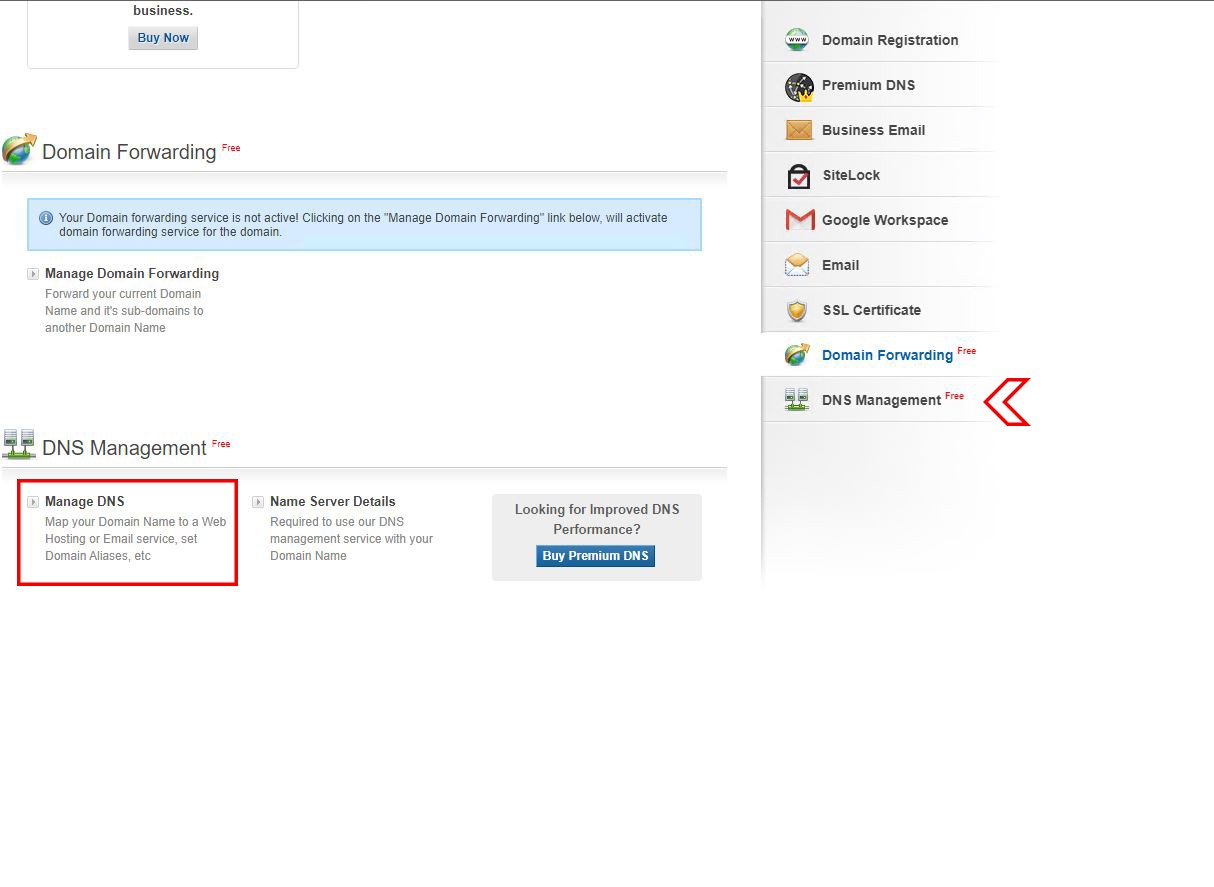
- Scroll down and click on "Manage DNS."
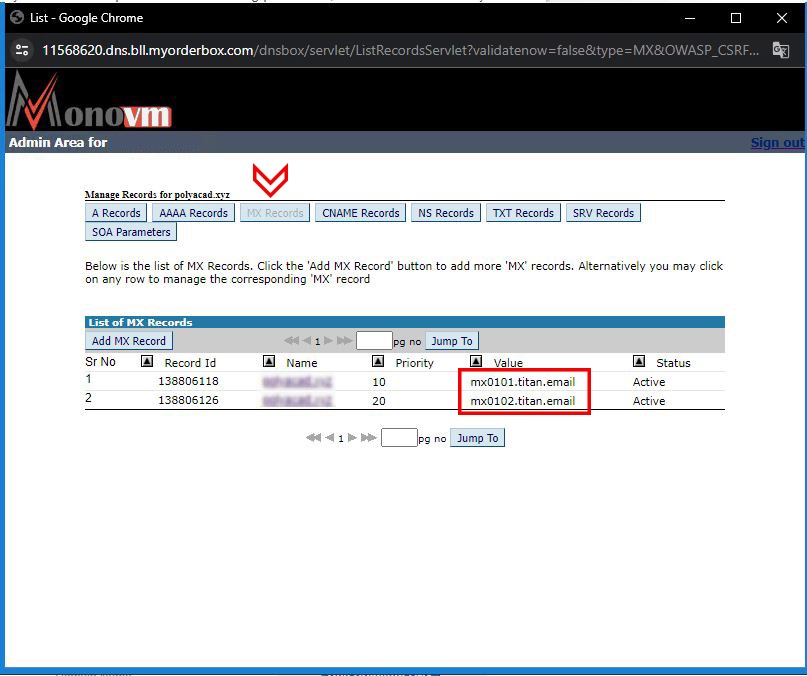
- go to the "MX records" tab in the opened window.
- Delete existing records one by one.
- Click on "Add MX record."
- Choose the second radio button in the value field, paste the copied value, and set:
- Zone: @
- Value: mx0101.titan.email
- MX Priority: 10
- click "Add Record."
- Return to the "Connect Domain" page and copy the new "Value" in Part 4.
- Add this second MX record with the copied value as before and add:
-
- Zone: @
- Value: mx0102.titan.email
- MX Priority: 20
- Click "Add Record."
Step 3: Email Reputation and TXT Records (Enhance Email Reputation with SPF and DKIM Records)
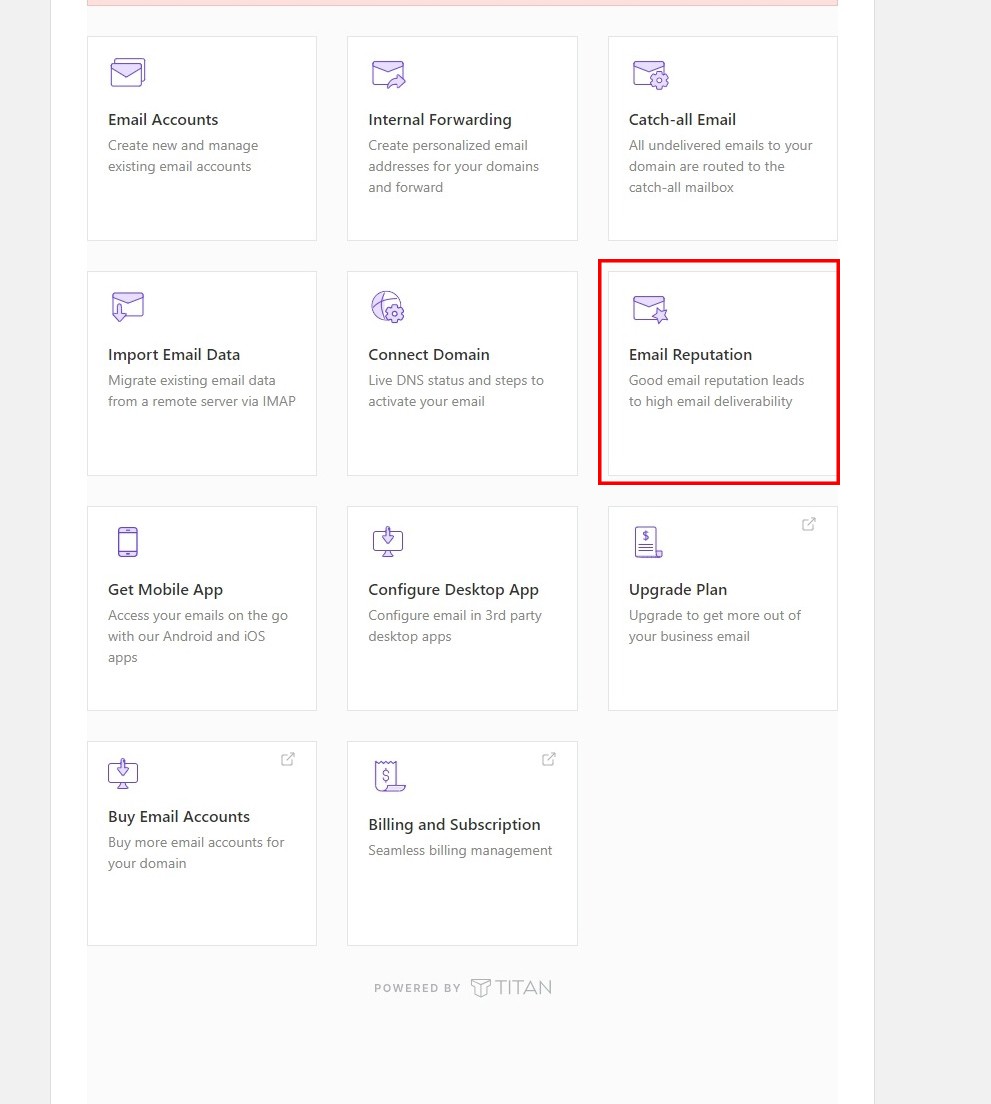
- In the Email Control Panel, go to "Email Reputation."
- Click "Add SPF record" and follow the provided information.
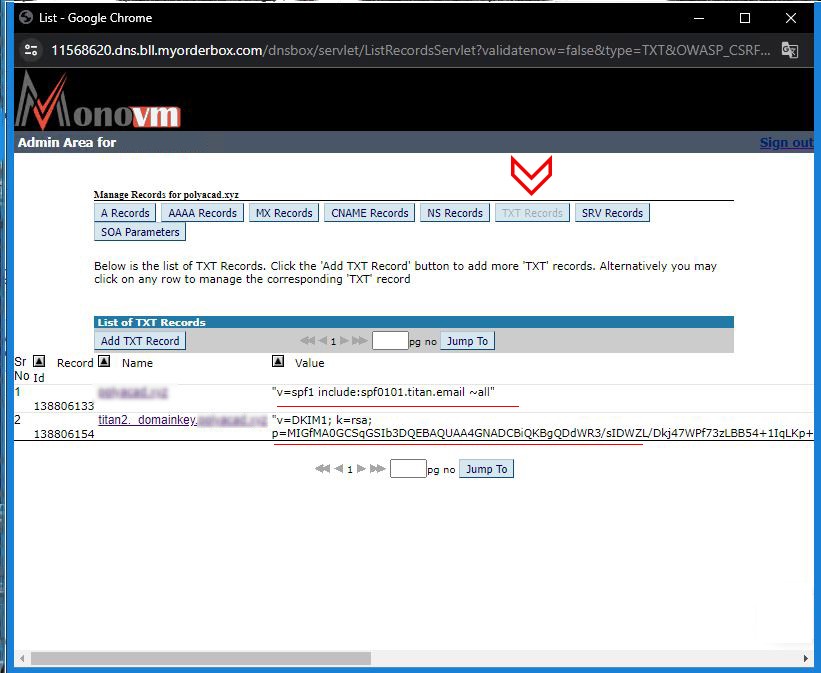
- Open the “Manage DNS” window and navigate to the "TXT Records" tab.
- Delete all existing records.
- Click on "Add TXT Record."
- Copy the value from Part 3 of TXT (SPF) records, set:
- Host Name: @
- Value: v=spf1 include:spf0101.titan.email ~all
- click "Add Record."
Step 4: Add DKIM Record
- In the “Email Reputation” section, click on "Add DKIM record."
- Copy the "DNS Host Name" from Part 3.
- Go back to the window and click "Add Record," paste it in the Host Name field.
- Copy and paste the corresponding value from the DKIM record section into the Value field.
- Click "Add Record."
Step 5: Verify Changes and DNS Check
- Close the add record window and go to the Manage Area of your domain.
- Check MX records and TXT records.
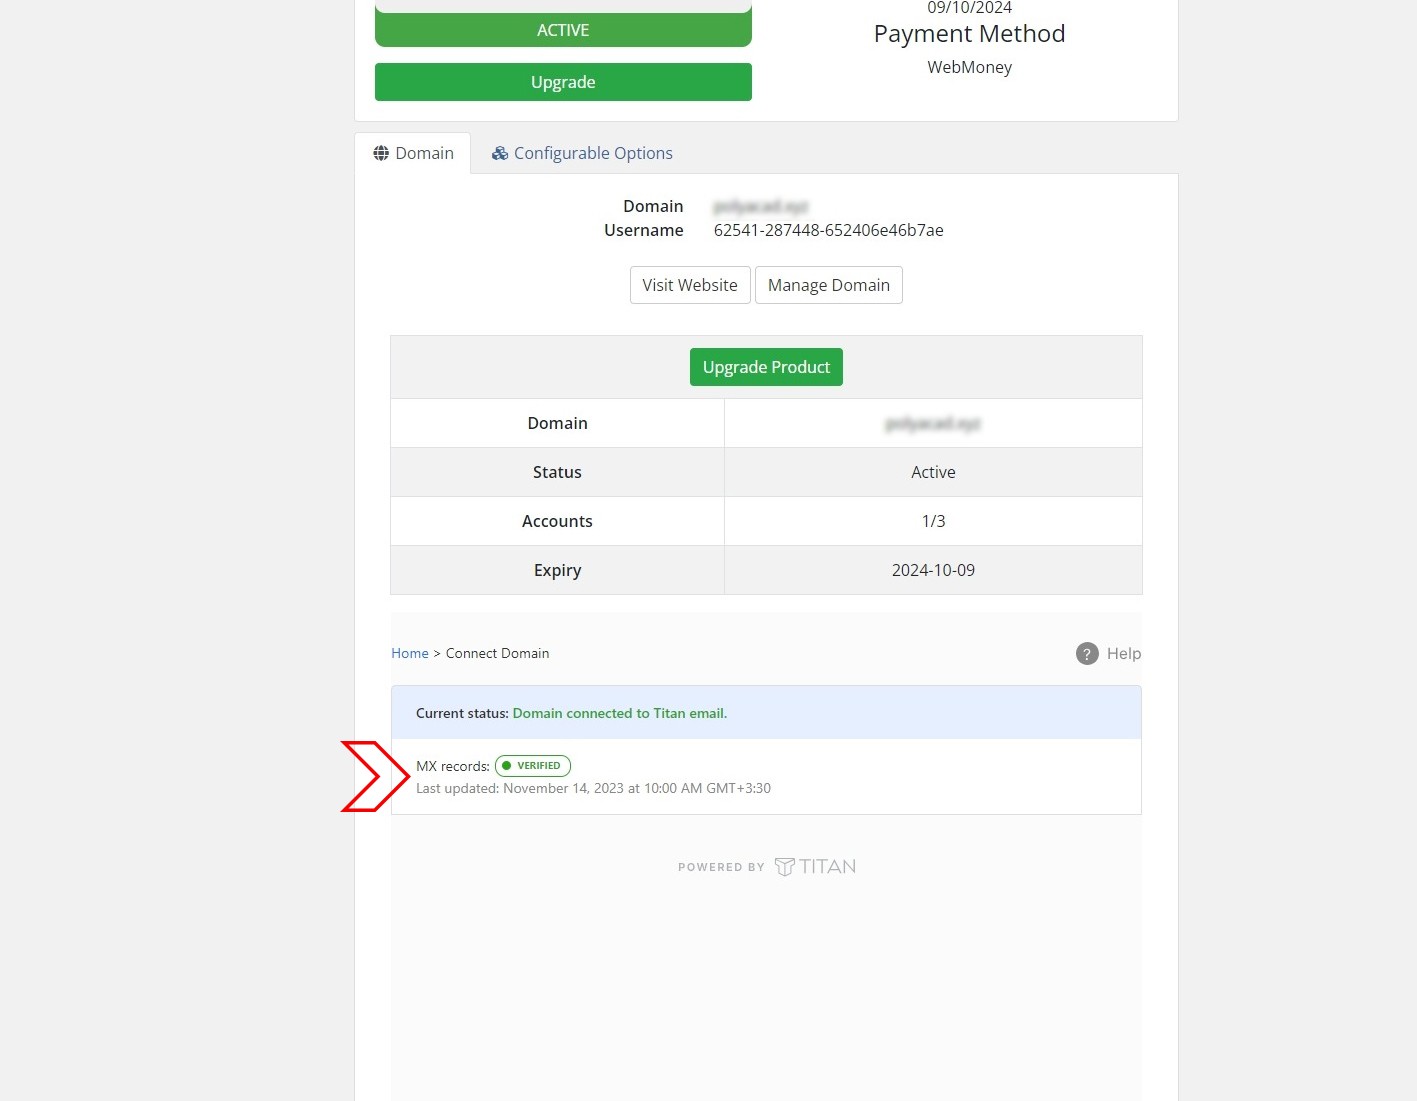
- Close the window, go to the client Area tab, and navigate to the Home page.
- Click on the "Connect Domain" card.
- Scroll down, check the checkbox, and click "Verify Changes."
- Sometimes, wait about 48 hours for the DNS setting process to complete.
Step 6: Creating Email Account(s)
- Access your Monovm client area.
- Click on the "Email Accounts" card.
- Choose "Create New Email Account."
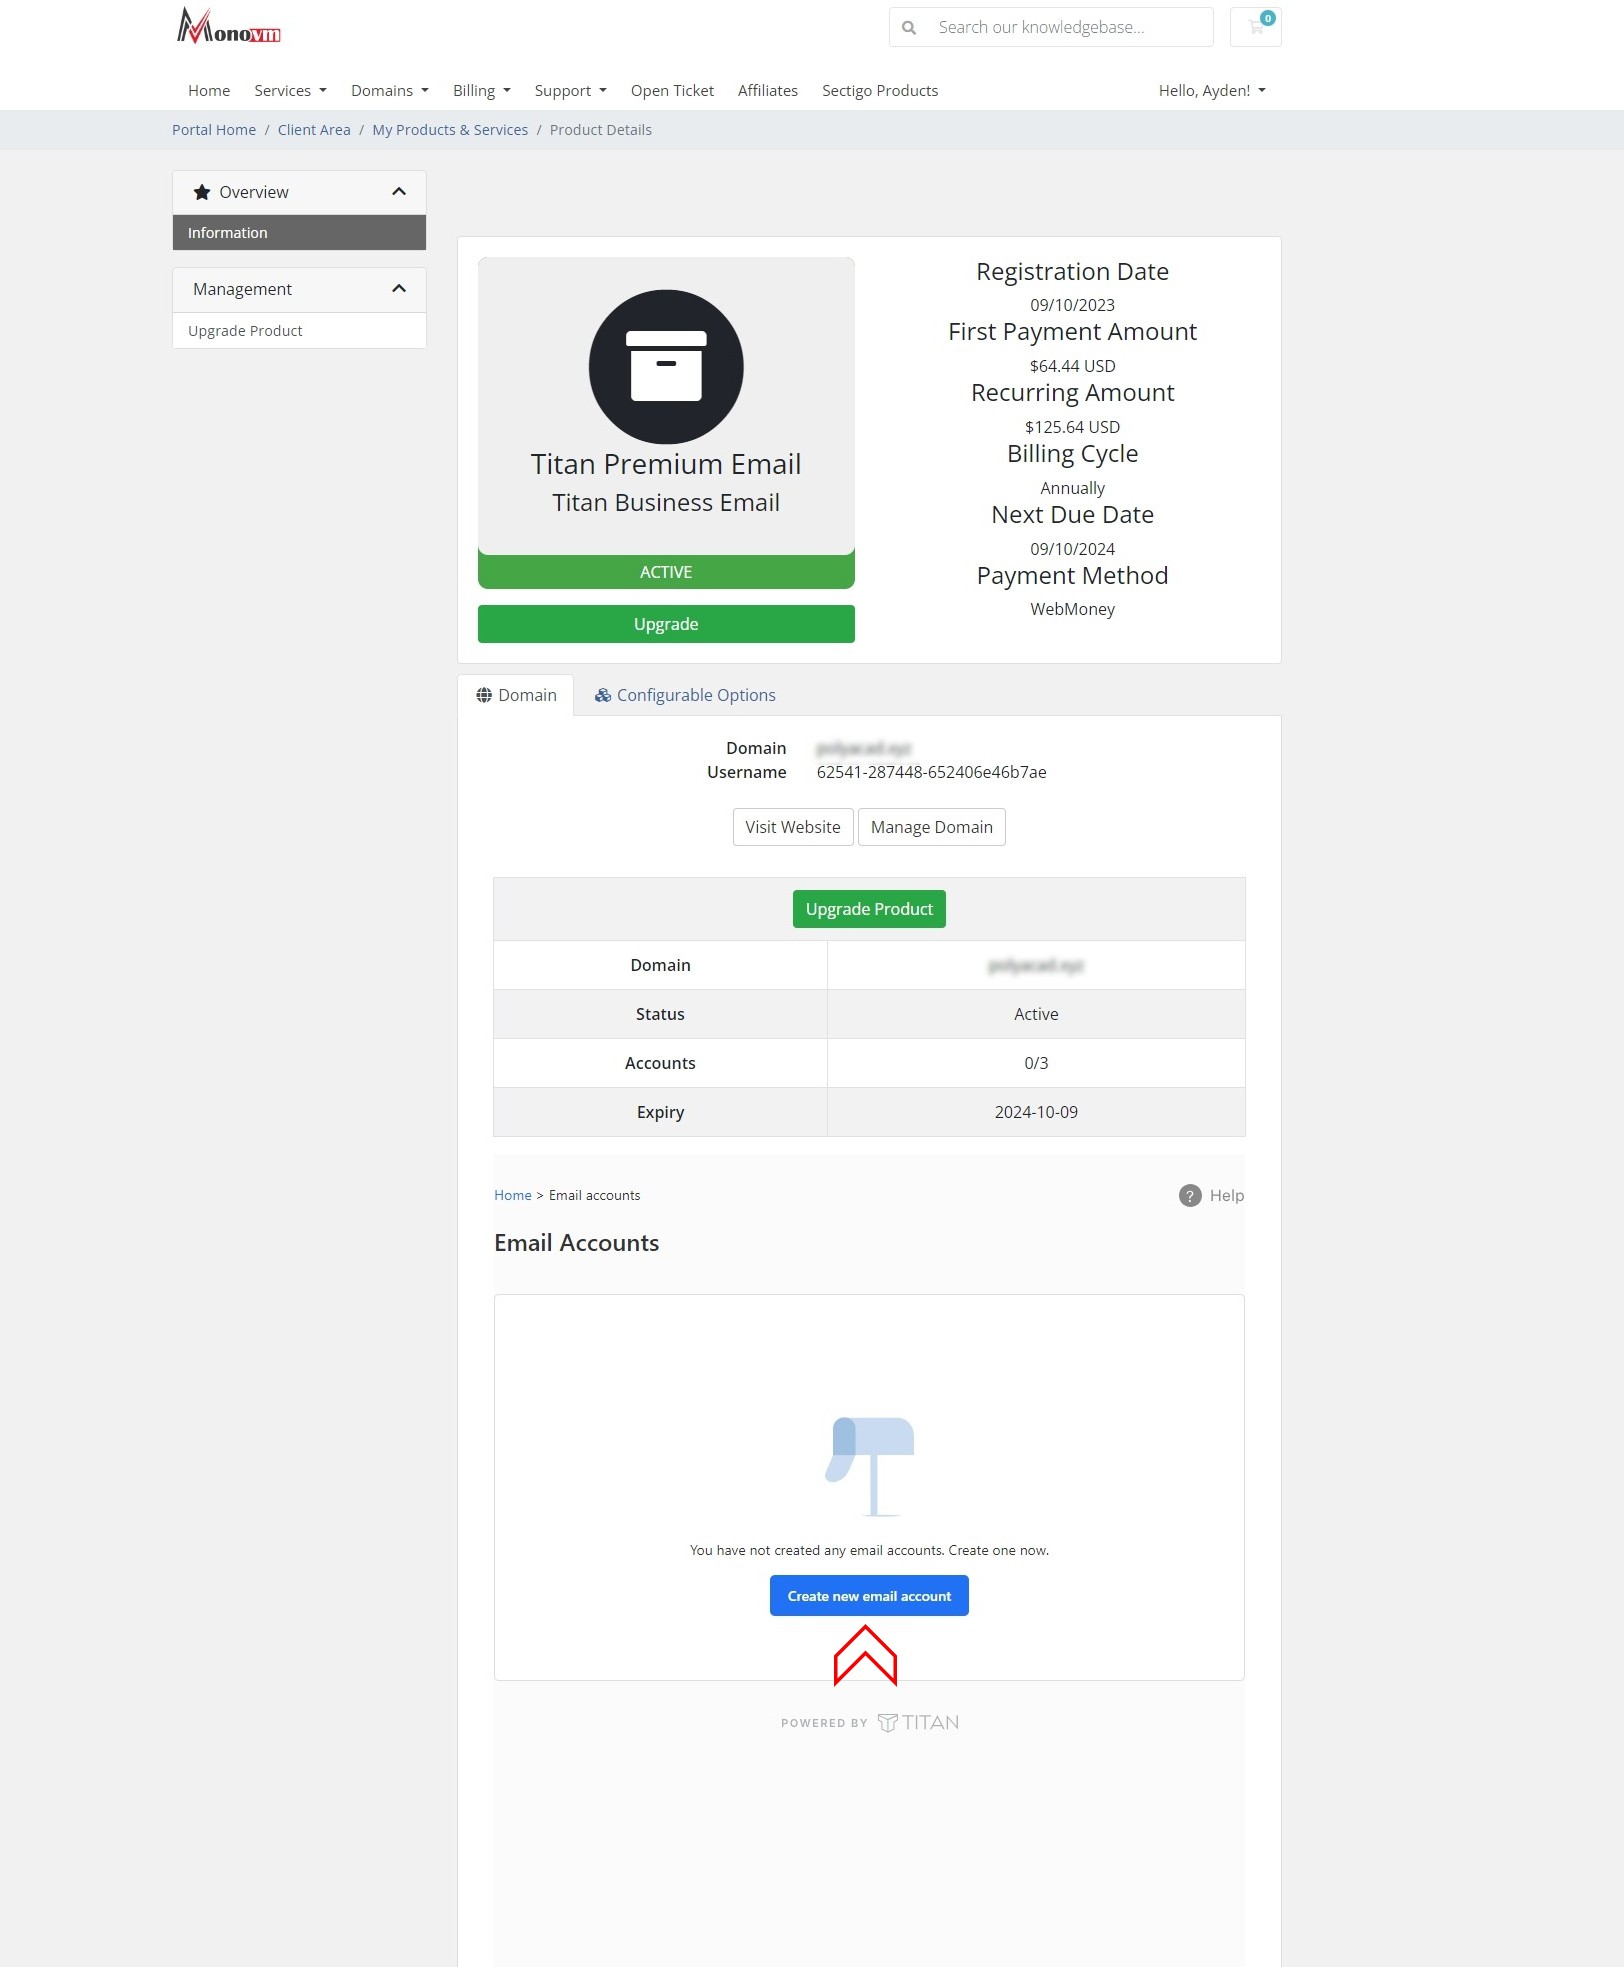
Creating the Email Account:
- Enter your preferred name in the Email field.
- Add a password or choose to generate one automatically.
- Include a "Password Recovery Email Address."
- Click on the "Create New Account" button.
Accessing Webmail:
- After creating the email account, click "Access Webmail."
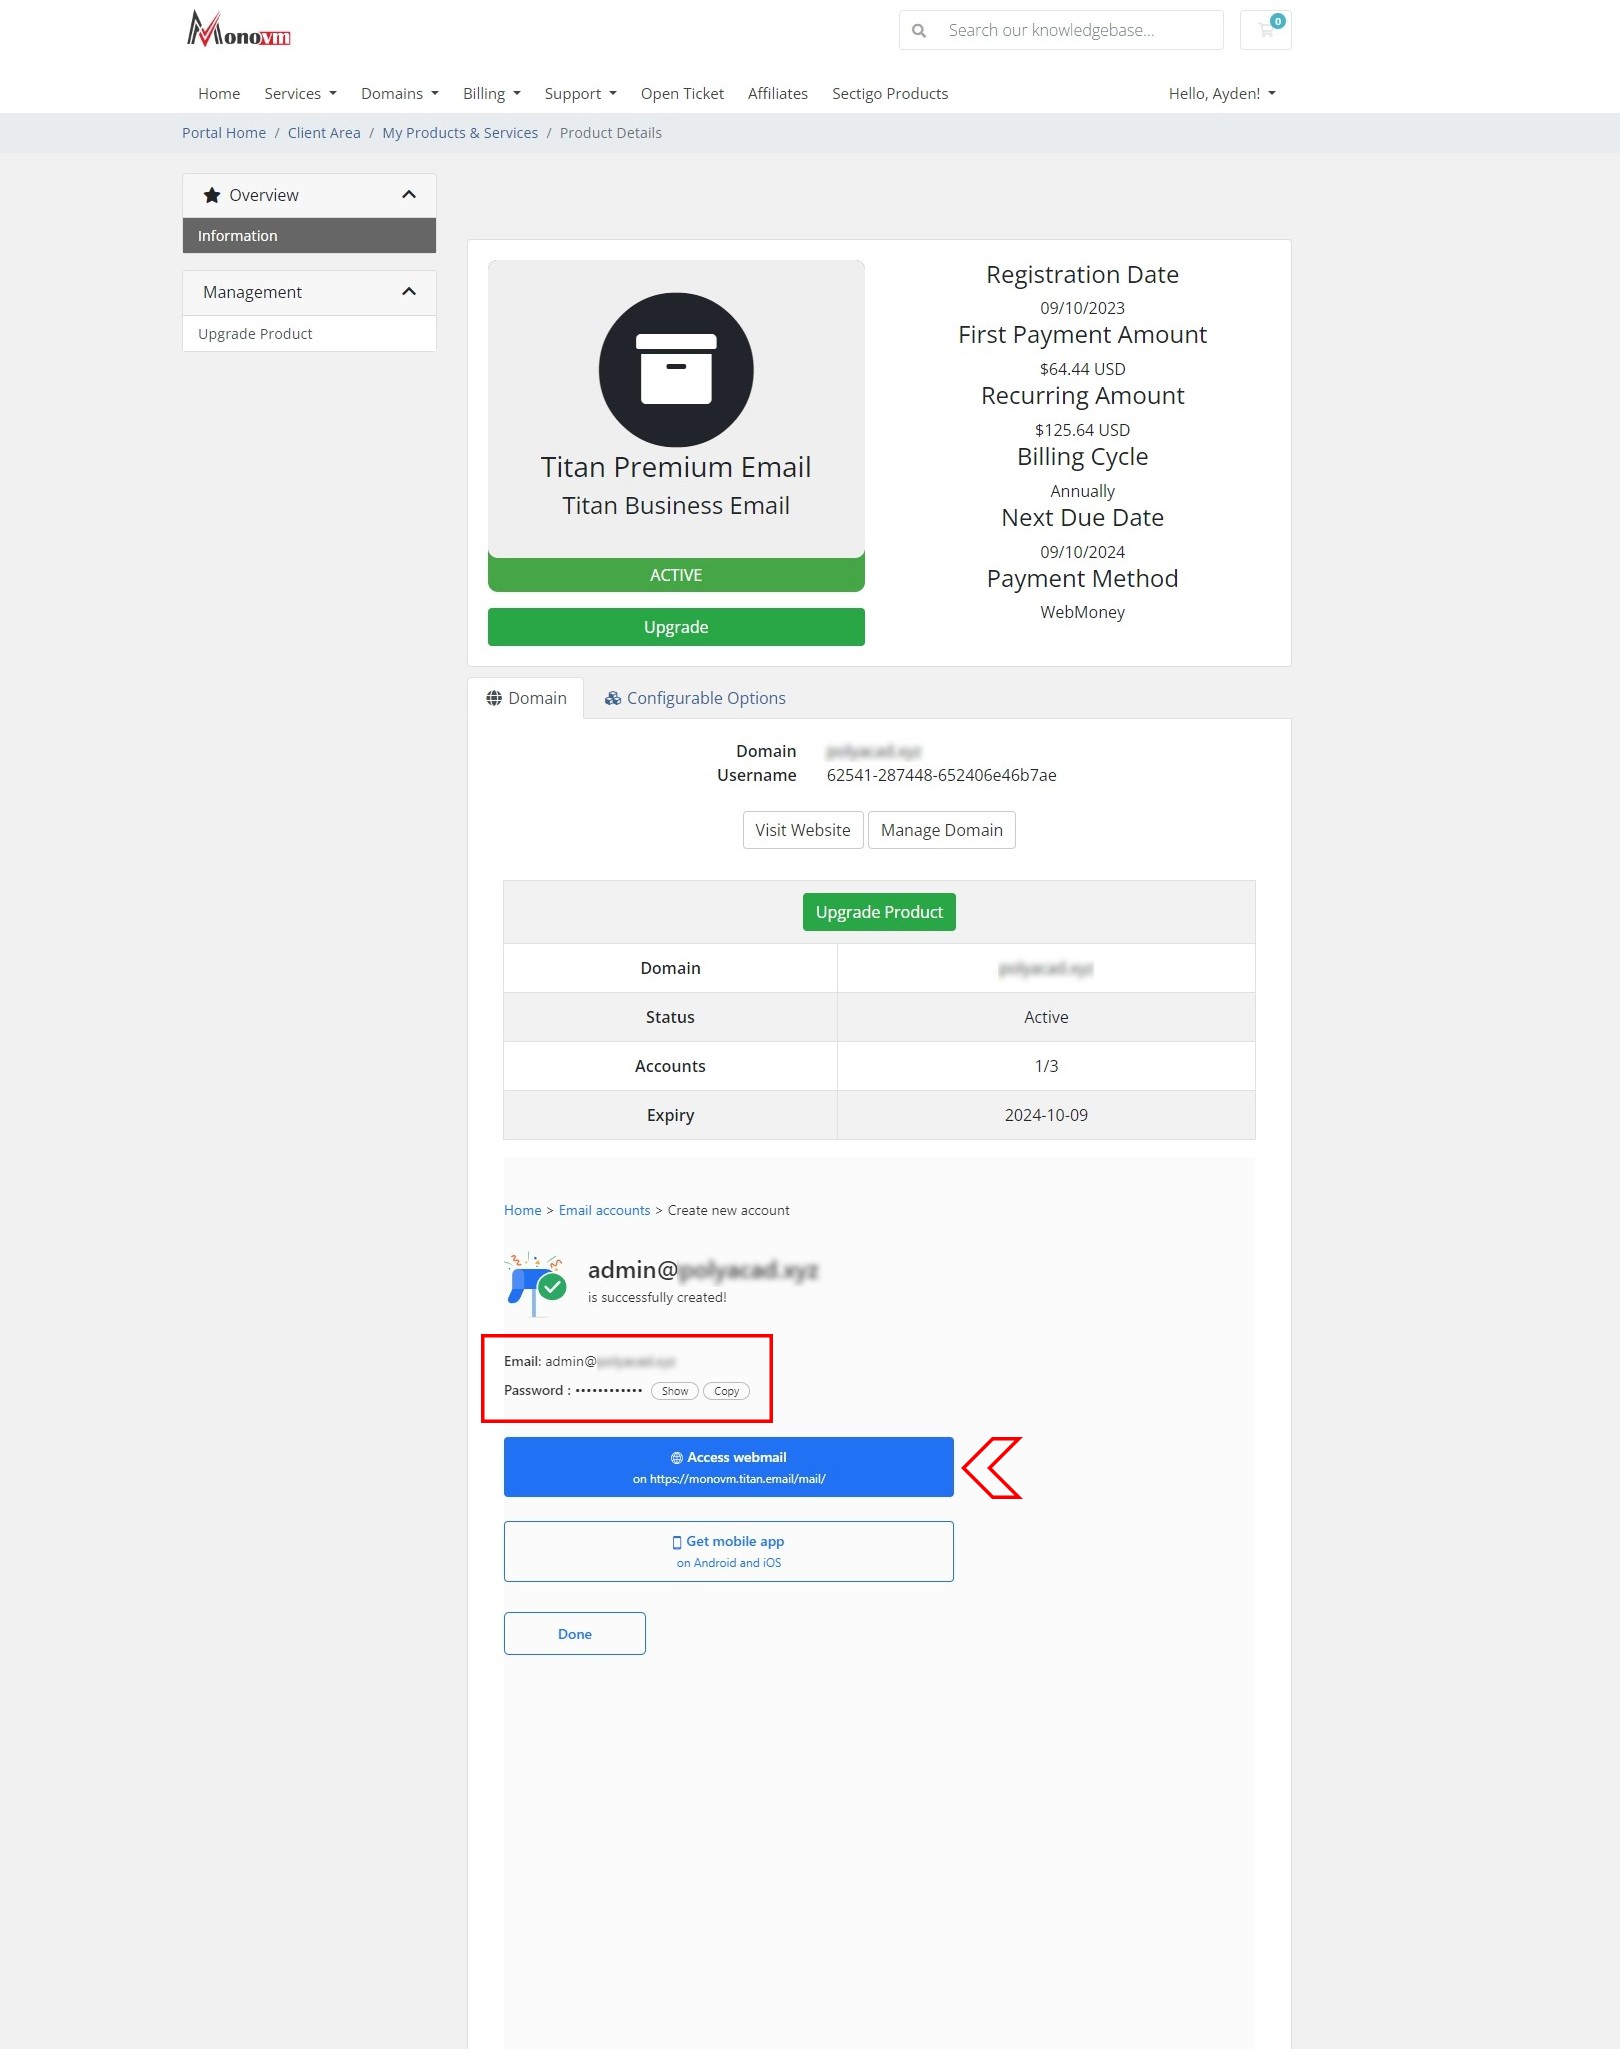
- You will be directed to the login page.
Logging In:
- Enter your Email address and password to log in.
Password Recovery:
- Confirm your password recovery email or postpone it for later.
Welcome to Your Professional Email:
- Congratulations! You are now in your new professional email dashboard.
Customizing Your Email:
- Explore customization options based on your preferences to make your email experience personalized and efficient.
Hello, everyone, my name is Lisa. I'm a passionate electrical engineering student with a keen interest in technology. I'm fascinated by the intersection of engineering principles and technological advancements, and I'm eager to contribute to the field by applying my knowledge and skills to solve real-world problems.