![How to unzip a file on Ubuntu? [Ubuntu Unzip Guide]](/wp-content/uploads/2023/01/how-to-unzip-a-zip-file-on-ubuntu-cover183-main.webp)
If you're working with compressed files on a Linux system, you'll likely need to know how to unzip files on Ubuntu. The process of extracting files from a zip archive is a fundamental task for many users, whether you're dealing with downloaded software packages, documents, or other compressed data. In this guide, we will walk you through the steps to easily and efficiently perform an Ubuntu unzip operation using both the command line and graphical interface. By the end of this tutorial, you'll be equipped with the knowledge to extract zip files like a pro on your Ubuntu system.
How to unzip a zip file on Ubuntu using the terminal?
- Open up your terminal window by pressing Ctrl + Alt + T or going to the command box at the left above the top of your screen and clicking on the “open in PuTTY” option.
- Once you have done that, you will be greeted with your user name, which you have entered into WinSCP to connect originally.
- Now you will need to put in your password. If you forget your password, you can easily find that by returning to your server details.
- Copy your password and go back to the terminal window.
- Right-click to paste the password and then hit Enter.
- Now, you will be logged in to your server via SSH.
- By default, the unzip command in Linux is installed on your system, but if it is not, then you can install it by the command below:
$ sudo apt install unzip
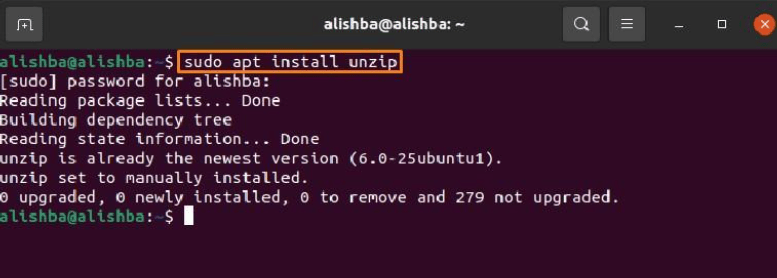
- Once you have typed that in, hit, Enter and your server will begin installing “unzip”.
- Once that has been installed, you are now ready to unzip your file by entering the following command:
$ unzip [FileName].zip
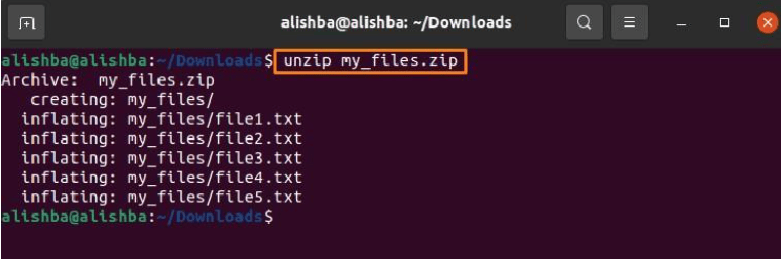
- Once you have entered the command and replaced “file name” with the name of your zip file, you can hit Enter, and your server will begin unzipping that.
- Now, check out if it has been completed or not.
- To do so, you will refresh your service directory and see all the files you have unzipped.
- Now You can change the directory and move the unzipped files by using the following command:
$ cd [Directory-Name]
How to extract a file in a different directory on your Ubuntu Linux system?
To unzip a file in a different directory, you should use the following syntax:
$ unzip [FileName].zip -d /[Directory-Path]
A zip file includes a set of files and their descriptions. When you unzip such a file, you will see all the information about each containment. To avoid this, you can use the “-q” flag in the above syntax:
$ unzip -q [FileName].zip
You can also extract only the files you need during the unzipping process and exclude the rest. To do this, you can use the “-x” flag in the above syntax while considering spaces between the file names:
$ unzip [FileName].zip -x “*Filename1*” “*Filename2*”
How to unzip a zip file without overwriting files on your system?
To avoid overwriting files that are already extracted, you should use “-n” flag in the command line:
$ unzip -n [FileName].zip
How to unzip multiple files in a directory?
To unzip multiple files in a directory, you should use the following command:
$ unzip ‘*.zip’
How to unzip a zip file on Ubuntu using GUI?
To unzip a file on the Ubuntu system, you do not always have to go to the terminal. If you are using the GNOME desktop, you can do this process through the graphical user interface (GUI) by following these steps:
- Open the file manager.
- Go to the folder where your zip file is stored.
- Right-click on the file.
- Select the “extract here” option.
- You can also see an “extract to” option, which helps specify the folder where you want to extract the files.
How to Unzip Multiple Zip Files?
When downloading large files from the internet, it is often convenient to compress them into a single zip file. However, after downloading, you may need to extract multiple zip files on Ubuntu. This tutorial will guide you through the process of unzipping multiple zip files on Ubuntu. Explore our comprehensive guide on using Unzip in Linux
- Open the terminal: Open the terminal by pressing Ctrl + Alt + T or by searching for “Terminal” in the Ubuntu dash.
- Navigate to the directory containing the zip files: Use the cd command to navigate to the directory where the zip files are located. For example, if the zip files are located in the “Downloads” directory, you would type the following command:
cd Downloads/
- Install the unzip utility: If you haven’t already, you’ll need to install the unzip utility by running the following command:
sudo apt-get install unzip
- Unzip the files: To unzip all the zip files in the directory, type the following command:
unzip '*.zip'
This will extract all the files from the zip files into the same directory. If you want to extract the files into a different directory, replace the “.” in the command with the path to the directory you want to extract the files to.
- Verify the extraction: Once the extraction is complete, verify that all the files have been extracted correctly by using the ls command to list the files in the directory.
ls
You should see a list of all the files that were extracted from the zip files.
How to Exclude Files When Unzipping a ZIP File?
When unzipping a zip file on Ubuntu, you may sometimes want to exclude certain files or directories from being extracted. Here's a step-by-step guide on how to exclude files when unzipping a ZIP file on Ubuntu:
- Open the Terminal application on your Ubuntu system.
- Navigate to the directory where the zip file you want to extract is located using the cd command. For example, if the zip file is located in the Downloads folder, type cd Downloads, and press Enter.
- To extract the contents of the zip file, use the following command:
unzip filename.zip
Replace filename.zip with the name of the zip file that you want to extract. Press Enter.
- To exclude specific files or directories from being extracted, use the -x option followed by the name of the file or directory you want to exclude. For example, if you want to exclude a file called example.txt and a directory called example_dir from being extracted, use the following command:
unzip filename.zip -x example.txt example_dir/
Press Enter.
Note: Make sure to specify the correct path to the file or directory you want to exclude. If the file or directory is located in a subdirectory of the zip file, you will need to include the path to the subdirectory as well.
- The extracted files will now appear in the same directory as the zip file. Any files or directories that were excluded will not be extracted.

I'm fascinated by the IT world and how the 1's and 0's work. While I venture into the world of Technology, I try to share what I know in the simplest way with you. Not a fan of coffee, a travel addict, and a self-accredited 'master chef'.