List of content you will read in this article:
IIS was developed by Microsoft and is the most used web server for Windows. By installing IIS on your Windows server you can use it as a webserver to host your websites or web-based applications. While it is possible to install IIS on different platforms like Linux and macOS, it will most likely be unstable. We created a simple tutorial so that you can set up an IIS server on Windows without any hiccups. In this article, we will explain how you can install IIS web server on Windows 2019, Windows 2016, Windows 2012, and Windows 10. Let’s get to it!
What is IIS?
Internet Information Services (IIS) is a flexible, general-purpose webserver from Microsoft that runs on Windows systems to serve requested HTML pages or files. An IIS web server runs on the Microsoft .NET platform on the Windows OS.
An IIS web server accepts requests from remote computers and in return responds with the appropriate response. This allows the web servers to share and deliver information across local networks and through the internet.
The information that is delivered to users is shown in several forms as static webpages, through file exchanges as downloads and uploads; and text documents, image files, and more. So how does IIS work?
IIS works with the help of standard protocols and programming languages. To create elements such as text, buttons, image placements, direct interactions/behaviors, and hyperlinks, IIS uses HTML. HTTP or the hypertext transfer protocol is used to exchange information between the web server and the user.
HTTPS -- HTTP over Secure Sockets Layer (SSL) uses Transport Layer Security or SSL to encrypt the communication for added data security. The File Transfer Protocol (FTP), or its secure variant, FTPS, can transfer files. Additional supported protocols include the Simple Mail Transfer Protocol (SMTP), to send and receive email. The aforementioned protocols plus other languages and protocols together make the perfect IIS package.
How to install IIS in Windows
Now that we know what exactly IIS is, let us give you a short step-by-step tutorial on how to install it on different versions of Windows OS.
Install IIS on Windows Server 2012
Note that this tutorial was based on Windows Server 2012. However, the process is similar to other Windows Server OS.
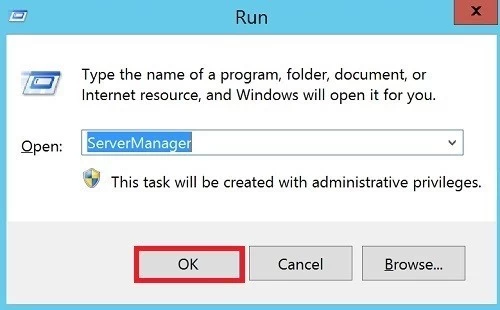
Step 1: To install IIS in Windows Server, first press the Windows + R keys to open Run.
Step 2: Type ServerManager in the run box and click on OK. This will open the Programs and features panel in Windows Server 2012.
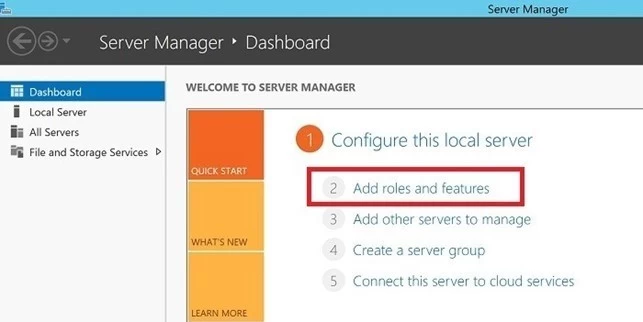
Step 3: Now click on “Add roles and features” in the newly appeared window.
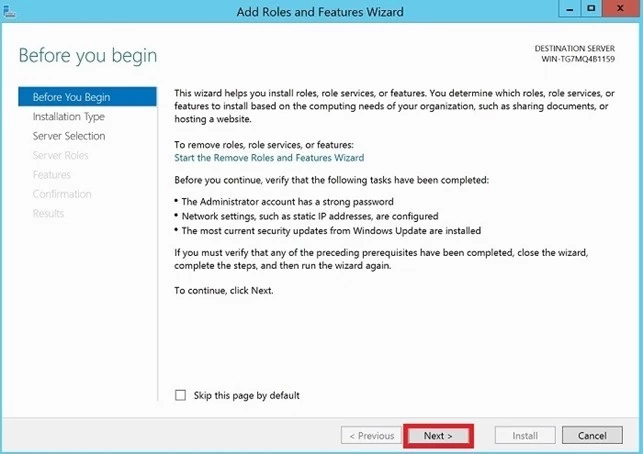
Step 4: Now, an installation Wizard will appear: Click on Next.
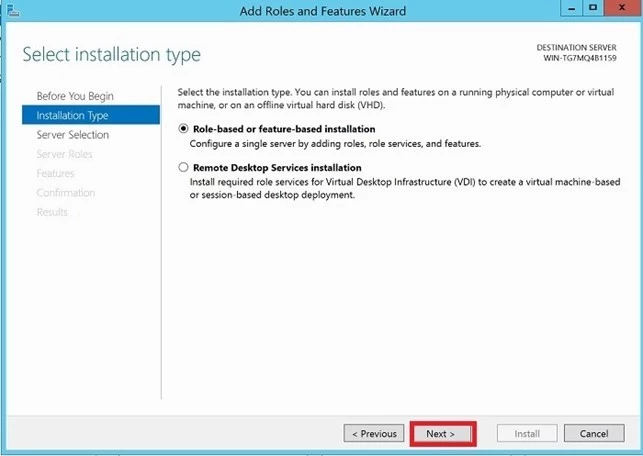
Step 5: Check the Role-based or feature-based installation and click on Next.
Step 6: Now, select the “Select a server from the server pool”. From the window select the Server and click on Next.
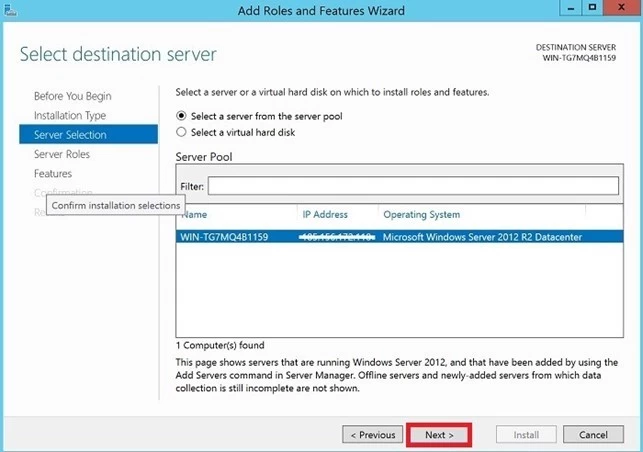
Step 7: When you come to the Server Roles section, scroll down on the list, and check the Web Server (IIS) check box and click Next.
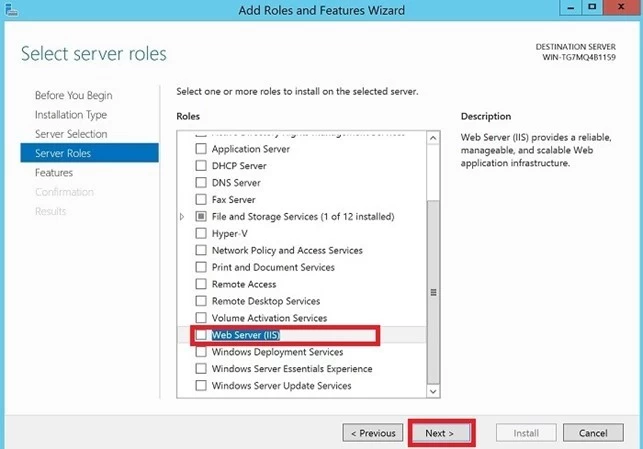
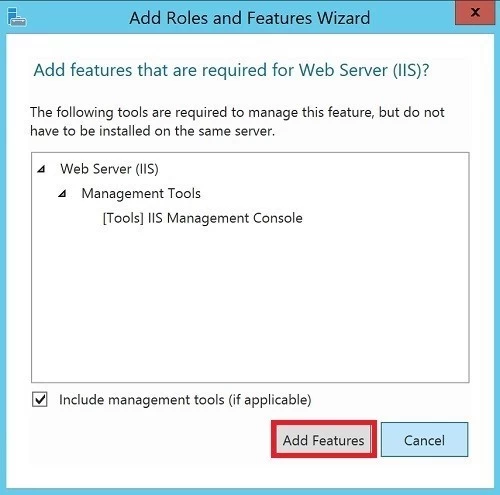
Step 8: Click on Add Features, don’t forget to have the checkbox clicked for “Include management tool (if applicable)”
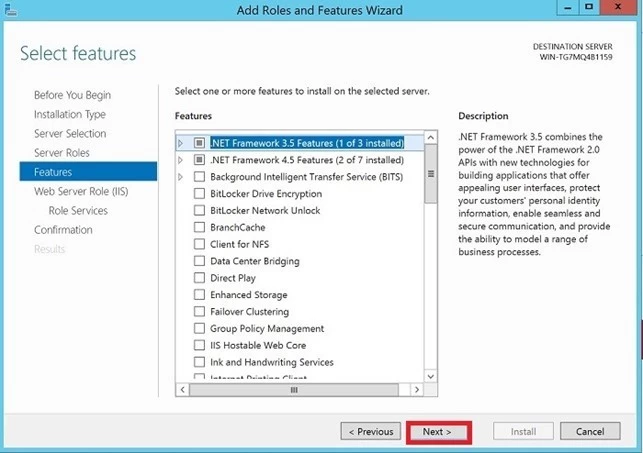
Step 9: Keep the default features as it is and click on Next.
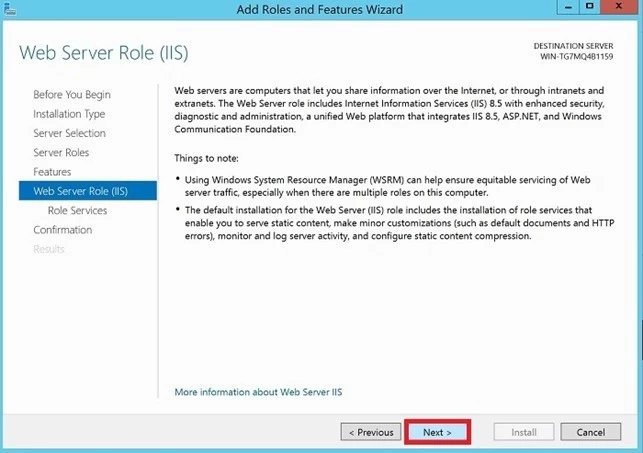
Step 10: Click Next after reading the Web Server Roles (IIS) text.
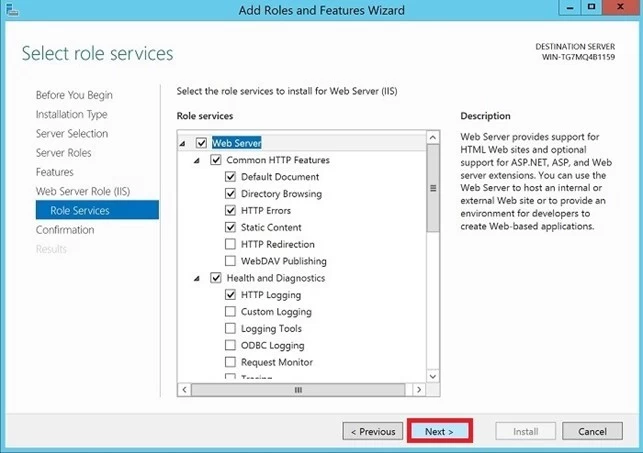
Step 11: Click Next after selecting the Web Server Roles as seen in the following picture.
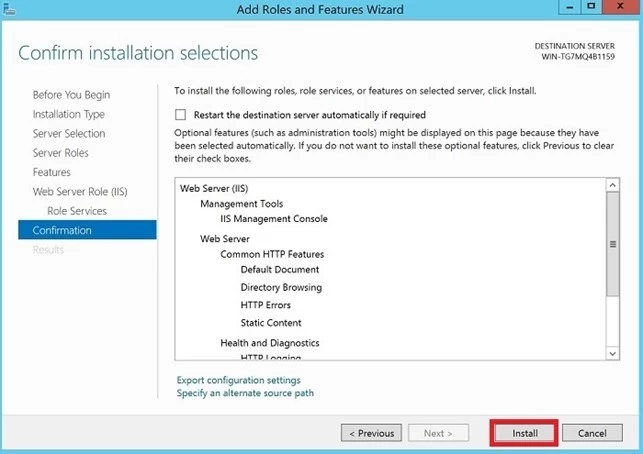
Step 12: Click on Install.
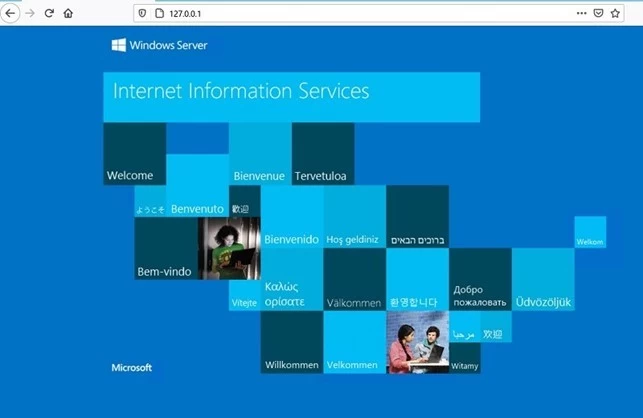
After the installation is complete, you can close the installation wizard. You will see the main interface of Internet Information Services (IIS) similar to the one shown below.
Please Note: Your IIS directory in your device is this C:\inetpub\wwwroot. You can copy and access your website files or any other files through the IIS web server using your browser.
Installing IIS in Windows 10
If you are using virtual machines like Windows VPS, you should connect to Windows with Remote Desktop.
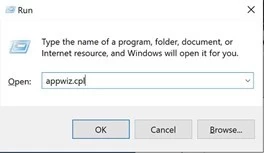
Step 1: Press Windows + R key to open the run box
Step 2: Then type appwiz.cpl in the text box and press Enter. This will open Programs and Features in Windows 10.
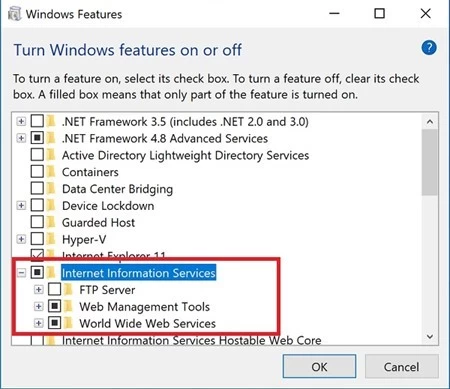
Step 3: In the programs and features page, click on Turn Windows features on or off.

Step 4: In the features list, search for Internet information service (IIS) and check the IIS services as per your needs and click on OK.
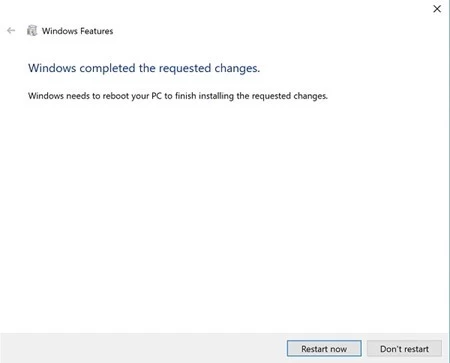
Step 5: After completing the installation, restart your computer to finish the installation.
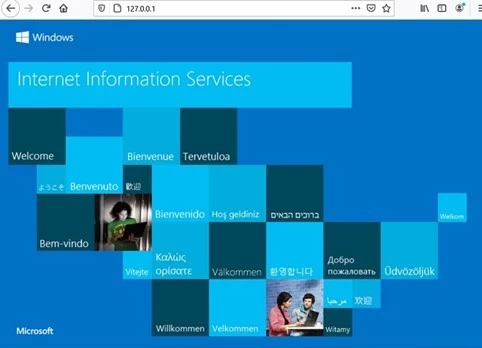
Now you can access IIS on your browser by using the address 127.0.01 on your local network. You can also access your IIS web server remotely by entering your server’s IP address through your browser. It looks something like this: 185.156.x.x
Please Note: Your IIS directory in your device is this: C:\inetpub\wwwroot. You can copy and access your website files or any other files through the IIS web server using your browser.
Conclusion
We hope that with the help of this article you were able to expand your knowledge about Microsoft’s IIS and to successfully install it on your Windows machine. If you run into any problems during the installation procedure or have any questions & suggestions, please leave them in the comment section below.

I'm fascinated by the IT world and how the 1's and 0's work. While I venture into the world of Technology, I try to share what I know in the simplest way with you. Not a fan of coffee, a travel addict, and a self-accredited 'master chef'.