List of content you will read in this article:
A few years ago, SSL certification was not as crucial as it is right now, thus many website owners overlooked it. Nowadays, however, not only is it an absolute necessity for search engine optimization, but most browsers will even display a warning page before allowing a user to access a website that does not have an SSL.
The downside is: purchasing an SSL is quite expensive. Luckily, however, there are a few trusted SSLs out there that are free of charge. Today we will show you how to install a free SSL on your shared hosting service. But first, let us delve into what exactly is an SSL.
What is SSL?
SSL stands for Secure Socket Layer and is the standard technology used for keeping an internet connection between a website and a user secure. It prevents cybercriminals from seeing or modifying any sensitive data sent between two systems. This is done using advanced encryption algorithms that scramble the data and make it unreadable while it is sent between the server and user. If you wish to learn more about SSL certification, check out this detailed blog.
How to Install the Free SSL
To start with, you will need a Linux web hosting account with cPanel to install the certificate.
Let’s Encrypt is a free SSL certificate provider and verifier. It is becoming more and more popular among small website owners. Even NASA is using it for some of its smaller sites (i.e. 3000 different sites) thus, you are in safe hands using them.
Step 1: Go to https://zerossl.com/free-ssl/#crt.
Step 2: Enter email address (for renewal reminders).
Step 3: On the right-hand side, you have a field called “Domains”, add your domain to this. Include mydomain.com and www.mydomain.com. (Don’t include http:// or https://).
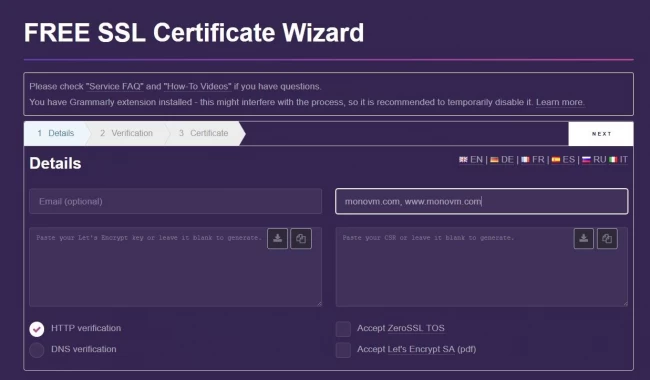
Step 4: Accept both terms via checkboxes at the bottom, then click “NEXT”.
Step 5: Once CSR is generated (it might take a minute), download a copy.
Step 6: Click “NEXT” again to generate the account key, then download a copy.
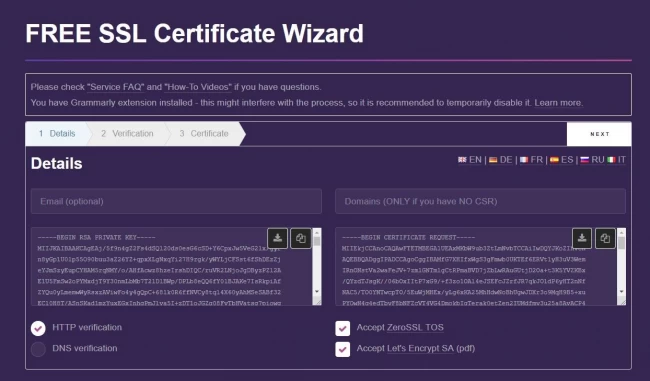
Step 7: Click “NEXT” to go to the Verification page.
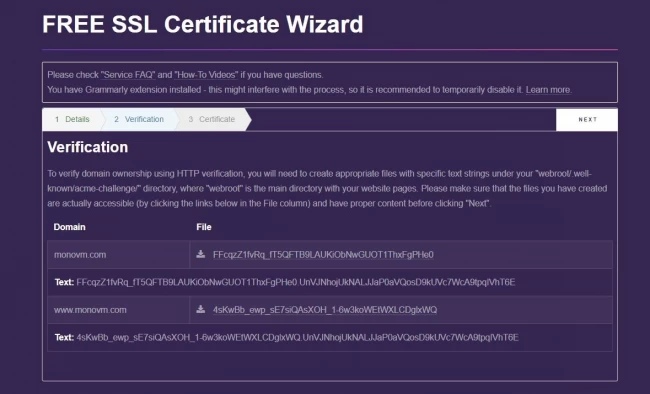
Step 8: Download the verification text files.
Step 9: Head to your cPanel and click on File Manager and go to your root folder. (If you are doing this for an addon domain, then just go to the root of that domain. TIP: it is wherever your index.html or index.php for that domain is).
Step 10: Go to webroot/.well-known directory, where webroot is the main directory with your website pages and create a folder named 'acme-challenge' in .well-known.
Step 11: Upload the verification text files to the webroot/.well-known/acme-challenge/ directory.
Step 12: Click “NEXT” to reach the “Your Certificate is Ready!” page.
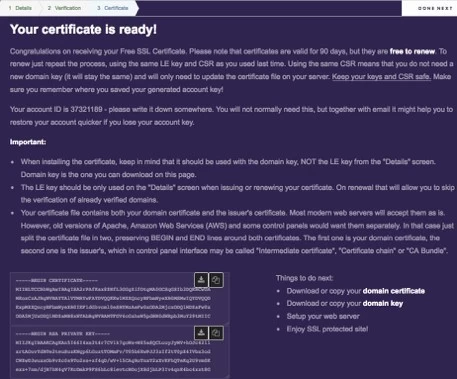
Step 13: Download backup copies of the two files.
Step 14: Go to cPanel, scroll down to SECURITY and click “SSL/TLS”.
Step 15: Scroll down and click “Manage SSL sites”.
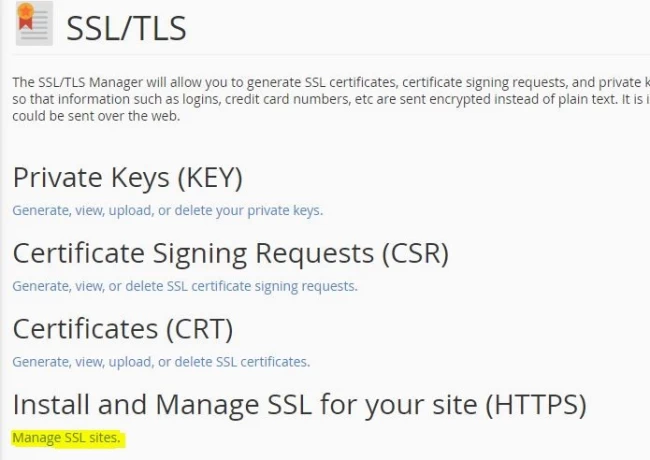
Step 16: Scroll down to “Install an SSL Website” and select the appropriate domain.
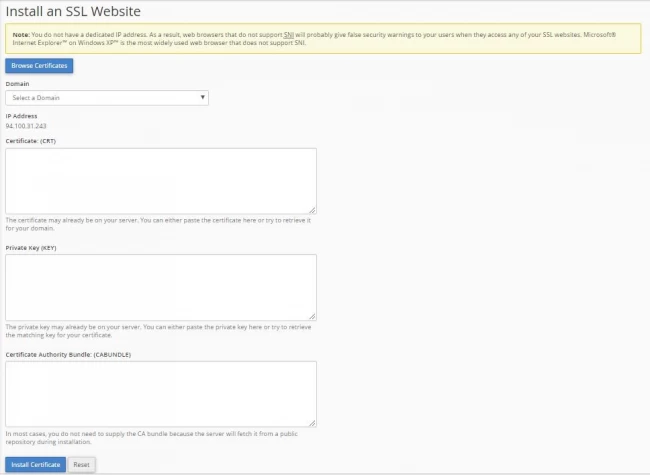
Step 17: Return to ZeroSSL, copy the top “Begin Certificate” and paste it on the Certificate: (CRT) field (first one).
Step 18: You just pasted TWO entries. Scroll to the bottom of what you pasted, select from the lowest “ — -END CERTIFICATE — -“ up to the lowest “ — -BEGIN CERTIFICATE — -“ and paste that “CABUNDLE” field.
Step 19: Copy the Private Key from the 2nd ZeroSSL field and paste it in the middle “Private Key” field.
Step 20: Click the “Install Certificate” button at the bottom.
Now, the installation of the certificate is complete, however, you will need to create a rule to redirect your site to https:// instead of http://. This is easily achieved by adding a bit of code into the .htaccess (Hypertext Access) file. Follow the simple steps outlined below:
Step 1: Go to cPanel and click on the file manager.
Step 2: On the root folder, create a new file called “.htaccess”. You might have this file already, in that case, edit that file.
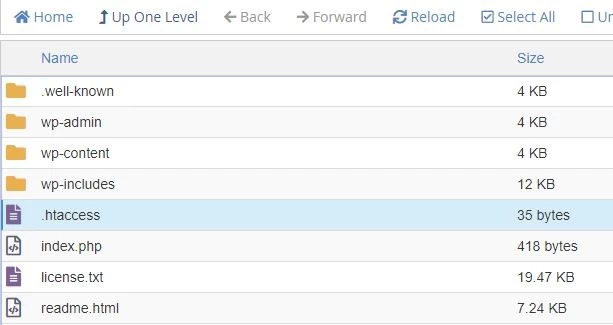
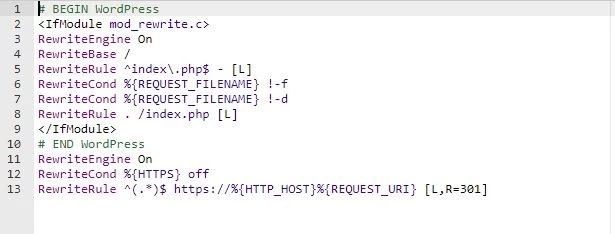
Step 3: Insert the following lines of code into the .htaccess file and save the changes.
RewriteEngine OnRewriteCond %{HTTPS} offRewriteRule ^(.*)$ https://%{HTTP_HOST}%{REQUEST_URI} [L,R=301]
Step 4: Test whether it worked by typing http://mydomain.com. It should change to https://mydomain.com automatically.
Important Note: Remember to update the SSL certificate every 90 days.
Conclusion
Hopefully, now you have a better understanding of the concept of an SSL and why it's important to have one on your site. By following the simple steps outlined in this tutorial you should also now be able to install a free SSL on your website, even if it uses shared hosting. If you run into any issues during the installation process or have any questions/suggestions, please leave them in the comment section below.

My name is Linda, I have Master degree in Information Technology Engineering. I have some experiences in working with Windows and Linux VPS and I have been working for 2 years on Virtualization and Hosting.