List of content you will read in this article:
- 1. Prerequisites
- 2. Method 1: Install Google Chrome on Ubuntu using the Terminal Interface
- 3. Method 2: Installing Google Chrome via the Command Line
- 4. Method 3: Install Google Chrome on Ubuntu using the GUI
- 5. How to Update Google Chrome in Ubuntu
- 6. Set Google Chrome as the Default Browser
- 7. Final Words
- 8. FAQ
Welcome to our guide on installing Google Chrome in Ubuntu using the terminal. Google Chrome is one of the most popular web browsers globally, known for its speed, versatility, and extensive library of extensions. While you can install Chrome through the graphical user interface, using the terminal provides a more efficient and controlled method, particularly for users who prefer command-line operations or need to automate the installation process.
In this step-by-step tutorial, we will walk you through the process of installing Google Chrome on your Ubuntu system using the command line. Whether you're a seasoned Linux user or a beginner looking to expand your knowledge, this guide will help you get Chrome up and running smoothly. So, let's dive in and explore the world of terminal-based installations.
Prerequisites
Before we proceed with the installation, make sure you have the following prerequisites in place:
- Ubuntu Operating System: This guide is specifically tailored for Ubuntu users. Ensure that you have Ubuntu installed on your system.
- Terminal Access: You should have access to a terminal window, which is readily available on any Ubuntu installation. You can typically open it by pressing `Ctrl+Alt+T` or by searching for "Terminal" in the application menu.
- Sudo Privileges: To install software on Ubuntu, you need administrative privileges. Ensure that your user account has sudo privileges, or you can log in as the root user.
Now, let's explore the first method for installing Google Chrome on Ubuntu using the terminal interface.
Method 1: Install Google Chrome on Ubuntu using the Terminal Interface
This method involves using the command line to download and install Google Chrome. It's a straightforward process that ensures you have the latest version of Chrome and allows for easy updates in the future.
Here are the steps:
- Open the Terminal: Launch the terminal on your Ubuntu system. You can do this by pressing `Ctrl+Alt+T` or searching for "Terminal" in the application menu.
- Update the Package List: Before installing any software, it's a good practice to update the package list to ensure you're getting the latest versions. Run the following command:
sudo apt update
- Download the Google Chrome Debian Package: You can use the `wget` command to download the Debian package for Google Chrome. Replace `<chrome_version>` with the appropriate version number:
wget https://dl.google.com/linux/direct/google-chrome-stable_current_amd64.deb
- Install Google Chrome: Once the download is complete, you can install Google Chrome using the `dpkg` command:
sudo dpkg -i google-chrome-stable_current_amd64.deb
- Resolve Dependencies: If there are any missing dependencies, you can run the following command to fix them:
sudo apt --fix-broken install
- Verify Installation: To confirm that Chrome has been successfully installed, run:
google-chrome --version
This command should display the installed Chrome version.
That's it! You've successfully installed Google Chrome on your Ubuntu system using the terminal. You can now launch Chrome from the application menu or by typing `google-chrome` in the terminal.
Method 2: Installing Google Chrome via the Command Line
In Method 1, we covered the installation of Google Chrome using a Debian package. However, an alternative method is to add the Google Chrome repository to your Ubuntu system and then install Chrome using the package manager. This method allows for seamless updates and integration with your system's package management tools.
Here's how you can install Google Chrome using this approach:
- Open the Terminal: If you haven't already, launch the terminal on your Ubuntu system by pressing `Ctrl+Alt+T` or searching for "Terminal" in the application menu.
- Add the Google Chrome Repository: Use the following command to add the Google Chrome repository to your system:
sudo sh -c 'echo "deb [arch=amd64] http://dl.google.com/linux/chrome/deb/ stable main" >> /etc/apt/sources.list.d/google-chrome.list'
This command adds the repository configuration to your system.
- Download and Import Google's Signing Key: Google signs its packages, and we need to import their signing key to ensure package authenticity. Run the following commands:
wget -q -O - https://dl-ssl.google.com/linux/linux_signing_key.pub | sudo apt-key add -
- Update the Package List: As always, update the package list to include the new repository:
sudo apt update
- Install Google Chrome: Now that the repository is added and updated, you can install Google Chrome using the package manager:
sudo apt install google-chrome-stable
- Start Google Chrome: Once the installation is complete, you can start Google Chrome by typing:
google-chrome
Chrome should launch, and you can begin using it.
- Verify Installation: To confirm that Chrome has been successfully installed, you can run:
google-chrome --version
This will display the installed Chrome version.
Congratulations! You've now installed Google Chrome on your Ubuntu system using the command line with the added benefit of automatic updates from the Google Chrome repository.
Method 3: Install Google Chrome on Ubuntu using the GUI
For many users, accomplishing tasks in a graphical environment offers a more user-friendly experience. This approach is particularly well-suited for individuals who find the terminal environment daunting or overly complex. To install the Chrome browser on Ubuntu using the graphical user interface (GUI), follow these steps:
- Launch Your Current Browser: Begin by opening your existing web browser.
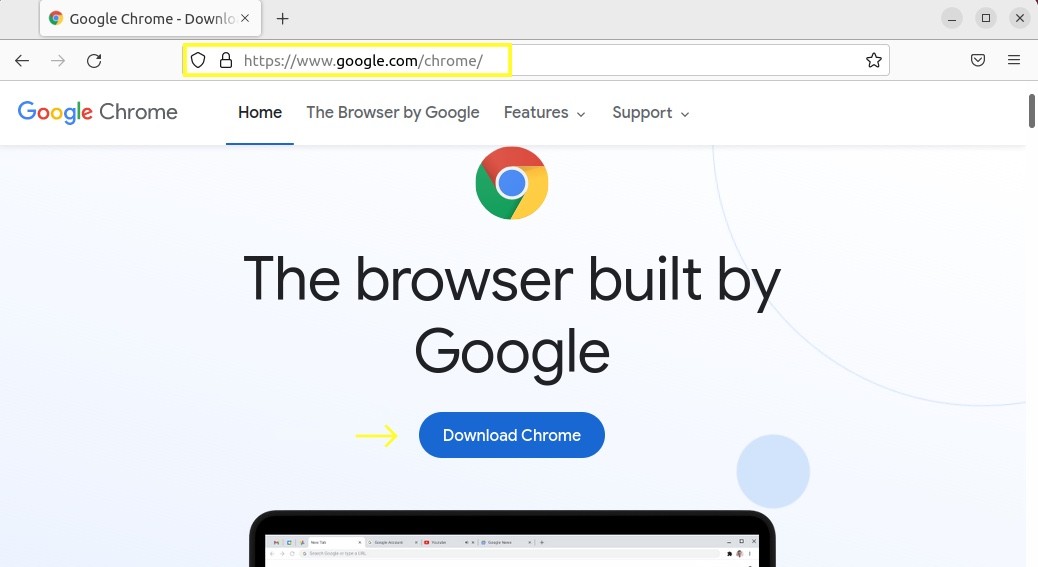
- Visit Google Chrome's Official Page: Navigate to the official Google Chrome page by clicking on the following URL:
https://www.google.com/chrome/
- Download Chrome: On the Google Chrome page, select the "Download" button, and choose your Linux distribution, specifically Ubuntu or linux mail server. Then, click on the "Accept and Install" option.

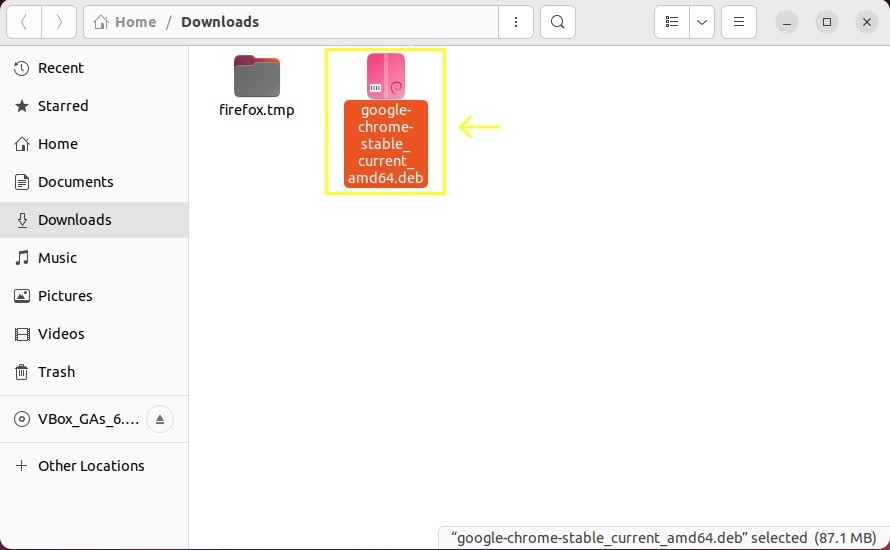
- Access the Download: Once the download is complete, locate the downloaded "stable-chrome" package. You can usually find it in your default download directory.

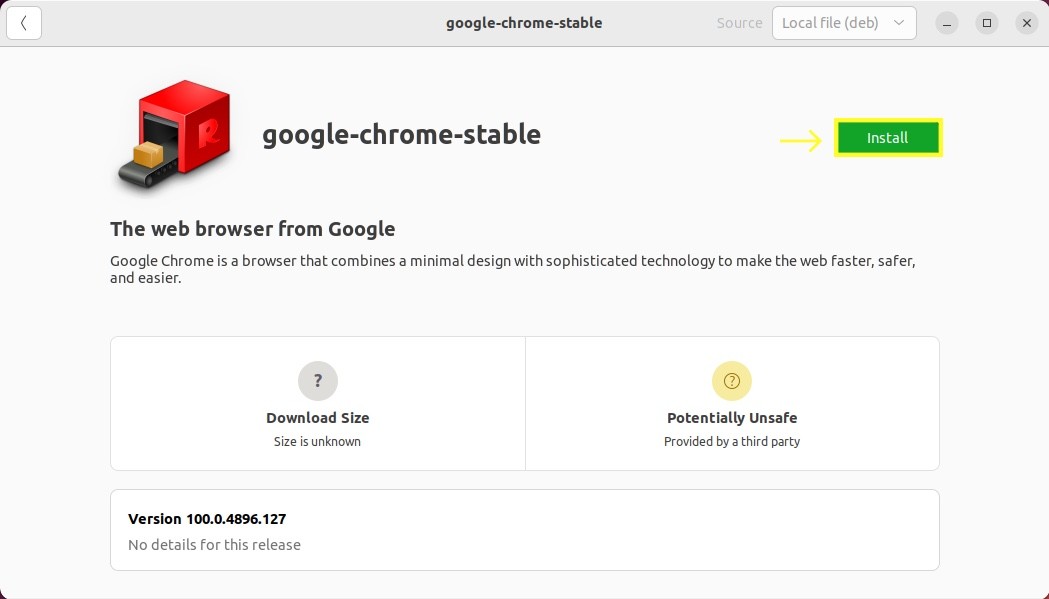
- Installation via Software Center: Double-click on the downloaded "stable-chrome" package. This action will trigger the Software Center to open, and you should proceed by selecting the "Install" button. Do you also know how to keep your Ubuntu system updated? Its helpfull for linux user.

- Completion: Congratulations, you have now successfully installed Google Chrome on your Ubuntu 22.04 system.
.jpeg)
- Launching Chrome: To access and run Google Chrome, navigate to the activities menu located on the left side of your screen.
By following these steps, you can easily install Google Chrome using the GUI, providing a user-friendly alternative for those who may be less comfortable with the terminal environment.
How to Update Google Chrome in Ubuntu
Keeping your software up to date is crucial for security and performance reasons. Fortunately, updating Google Chrome on your Ubuntu system is a straightforward process, whether you installed it through the terminal or the GUI. Here's how to ensure you have the latest version of Google Chrome:
Updating Google Chrome via the Terminal
If you installed Google Chrome using the terminal, you can easily update it through the command line. Follow these steps:
- Open the Terminal: Launch the terminal on your Ubuntu system if it's not already open by pressing `Ctrl+Alt+T` or searching for "Terminal" in the application menu.
- Update the Package List: To update Google Chrome, you first need to update the package list to check for available updates. Run the following command:
sudo apt update
- Upgrade Google Chrome: After updating the package list, you can upgrade Google Chrome to the latest version with the following command:
sudo apt upgrade google-chrome-stable
This command will download and install any available updates for Google Chrome.
- Verify the Update: To confirm that Google Chrome has been successfully updated, you can run:
google-chrome --version
This command should display the updated version number.
Set Google Chrome as the Default Browser
After installing Google Chrome on your Ubuntu system, you might want to make it your default web browser for a seamless browsing experience. Here's how to set Google Chrome as the default browser in Ubuntu:
- Open System Settings: Click on the system settings icon in your application menu or search for "Settings" in the Activities menu.
.jpeg)
- Navigate to Default Applications: In the System Settings window, look for the "Details" or "Default Applications" option (the exact wording may vary depending on your Ubuntu version) and click on it.
- Choose Google Chrome as the Default Web Browser: In the Default Applications settings, you'll find various categories such as "Web," "Email," and "Calendar." To set Google Chrome as your default web browser, click on the dropdown menu next to "Web" or "Web Browser" (the wording may vary), and a list of available web browsers will appear.
- Select Google Chrome: From the list of web browsers, select "Google Chrome." This will set Chrome as your default browser.
.jpeg)
- Confirm the Change: After selecting Google Chrome, the settings window should update to reflect your choice. Close the System Settings window.
Final Words
In this comprehensive guide, we've explored various methods to install, update, and set Google Chrome as the default web browser on your Ubuntu system. Whether you prefer the command-line efficiency, the user-friendly GUI, or both, you now have the tools to harness the power of Google Chrome for a seamless web browsing experience.
![How to install chrome in ubuntu using terminal[top 3 way]](/wp-content/uploads/2023/10/0b838c0d-6ea5-4cce-8c8f-b0e4101d3e51432-main.webp)
Hello, everyone, my name is Lisa. I'm a passionate electrical engineering student with a keen interest in technology. I'm fascinated by the intersection of engineering principles and technological advancements, and I'm eager to contribute to the field by applying my knowledge and skills to solve real-world problems.