LEMP is an abbreviation that foretells the configuration of a Linux OS accompanied with an Nginx (this is pronounced as engine-x) webserver. Additionally, the MySQL database stores the data and the content is processed by the programming language, PHP. Therefore, The acronym LEMP!
LEMP is commonly used to develop and deploy various web applications and programs. It originated after LAMP. The minute difference between the two is the replacement of A with E. A in LAMP represents Apache, whereas E in LEMP signifies Nginx. Nginx is much more powerful and lightweight as compared to Apache. It is best known for its rich features, stability, and extremely simple configuration.
Now, let us initiate our topic of discussion. Below given are the pointers to analyze. Have a look.
- System update along with changing the password
- Install PHP
- Install Nginx
- To start and configure Nginx OS
- Install the MariaDB server
Let’s begin!
System update along with changing the password
Before initiating the process, you have to clean up ‘yum’. After that, do check if the latest version of the OS is installed or not. If not, then install the latest version first, and then proceed.
Use the following commands to update the OS:
yum clean all
yum update
Now, when you use these commands, the below-shown window appears.

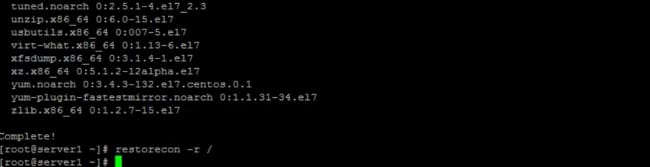
Moving further, do check the ‘Complete’ sign at the bottom. If you see it, step ahead. The next step is to follow this command:
restorecon -r /
The following window appears on your screen.
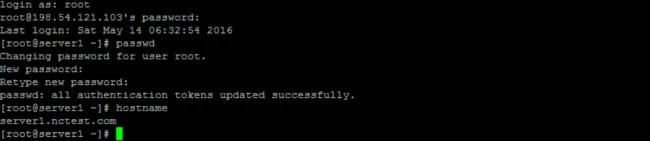
Now, you can modify the default password given to you by the hosting welcome mail. Keep a strong password for your personal safety and security. You can use the following command:
passwd
Additionally, you can also change the hostname anytime as per your convenience. As automatically the hostname set for you is server1.yourdomain.tld
Therefore, to change the hostname, simply type,
hostname
After entering this command, you see this window on your screen.
Now, reboot the server using this command.
reboot
![]()
Once the server reboots, check the upgraded version of your OS by typing the given command:
uname -r
cat /etc/redhat-release

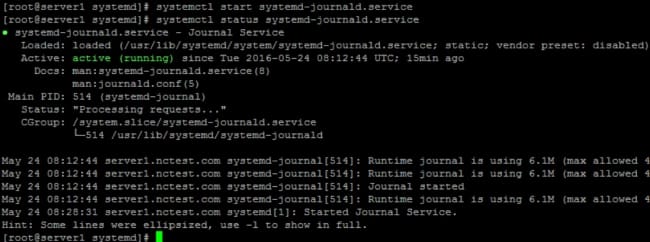
Furthermore, there is a possibility of occurrence of a minor bug. Fret not, it is not a serious concern. Just restart the service by using this command and you are good to go!
systemctl start systemd-journald.service
Moving forward, let us now discuss the process to install and configure PHP in your system. Here are some easy steps for you.
Install Nginx and PHP
We will focus on installing PHP with MySQL along with PHP-FPM support.
Now, the CentOS7 repository does not include Nginx. To solve this issue, you can install the Webtatic yum repository. This repository is basically a CentOS/RHEL repository. It contains extra as well as updated packages for EPEL or Enterprise Linux.
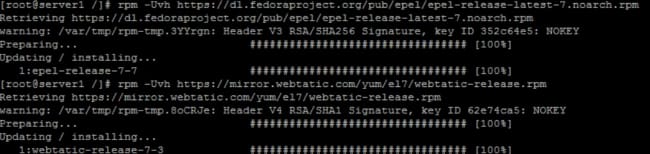
Besides, Webtatic is needed for PHP version support, whereas EPEL is required for Nginx. You can use the following commands to install the two:
rpm -Uvh https://dl.fedoraproject.org/pub/epel/epel-release-latest-7.noarch.rpm
rpm -Uvh https://mirror.webtatic.com/yum/el7/webtatic-release.rpm
Moving on, install Nginx by typing this command:
yum install nginx
Additionally, in order to fulfill the purpose of signing the packages, you have to install the CentOS RPM signing key. Just write ‘y’ as shown in the picture, and you’re done.
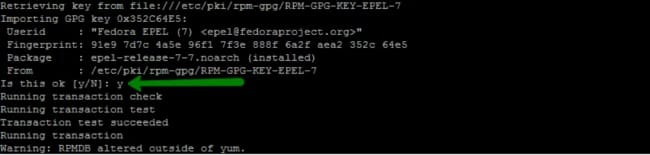
Once, you perform these above-listed steps, you see such a window on your respective screens. After it is visible, you can proceed to the next step.
Now, we will install PHP with MySQL.
The objective here is the installation of the latest version of PHP, which is, PHP 5.4.16. If your requirement becomes different over time, then do not worry. Simply use the following command:
yum install php php-mysql php-fpm
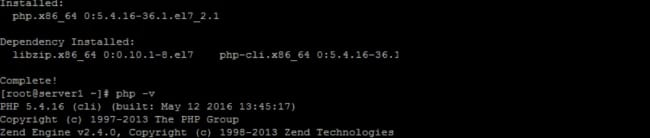
After you successfully complete the installation procedure, do check the latest version of PHP in your system now by using this command:
php -v
As soon as you enter this command, you will see the following window.
Let us now move forward to understand how to install additional PHP modules.
Firstly, check the list of modules available in your system. Use:
yum search php
This command presents you with a list of all the modules. Now, there are some instances where you notice that some of the modules are not present. To install them, just enter the following command:
yum install <php module>
Here, <php module> depicts whichever module you wish to install.
Moreover, if you wish to install multiple modules at once, use this command:
yum install php-cli.x86_64 php-common.x86_64 php-dba.x86_64
Moving on, as you understand that the Nginx and PHP are now installed in your systems. It's time to analyze how to configure and start Nginx.
How to configure and start using Nginx?
You need to carry out several modifications while establishing a connection with Nginx. The first step is to establish a connection between Niginx and FastCGI.
You need to open /etc/php.ini PHP main configuration file first. After that search for cgi.fix_pathinfo.
Now, the next step is file modification.
Use:
nano /etc/php.ini
Now simply modify,
cgi.fix_pathinfo=1 to cgi.fix_pathinfo=0

Now, what do these values signify here? It implies that the value of cgi.fix_pathinfo allows you to search for the respective file that you need. When the value is set to 0, it orders the PHP interpreter to terminate the process of scanning once the target file is found.
The next step is to go to the configuration file and open it.
Navigate through the given path:
nano /etc/nginx/nginx.conf
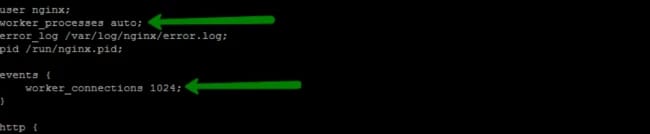
You must know that Nginx helps to run various processes at once, where every process is able to establish multiple connections. Usually, one worker process per CPU core offers smoother working. The recommended value is to set it to auto as shown below.
Also, the term, Worker_connections, comes into the picture. It is simply the maximum number of connections handled by every worker process. Sounds fine? Well, you can set the value between 512 and 1024. Take a look at the snapshot for more clarity.
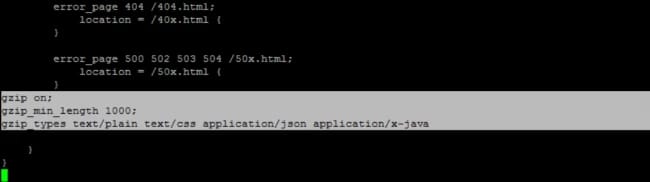
Next, to allow your browser to accept some compressed content, you need to search for the gzip line and copy the lines to the bottom of the file.
gzip on;
gzip_min_length 1000;
gzip_types text/plain text/css application/json application/x-javascript text/xml application/xml application/xml+rss text/javascript;
Now save it and press close.
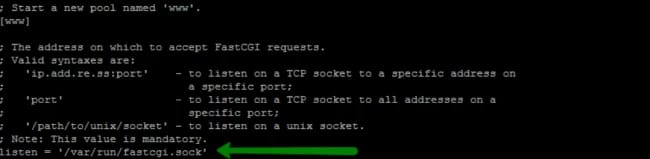
The next step is editing the php-fpm config file.
nano /etc/php-fpm.d/www.conf
After this, make these modifications to get your goal up and running.
Change listen 127.0.0.1:9000 to ‘/var/run/fastcgi.sock’. Look at the below snapshot.
Now, let’s set the Nginx user as well as the group. Both of them consist of Apache settings that are not required.
Additionally, set the permissions for the Unix socket.

After completing this step, save your respective file and terminate the window. Now that you are done with setting up the Nginx server along with php-fpm service, it’s time to start them. Use the below-mentioned command to achieve the task:
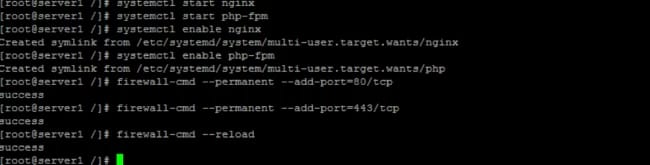
systemctl start nginx
systemctl start php-fpm
The next step is to auto-load both of these servers by typing this command:
systemctl enable nginx
systemctl enable php-fpm
Now, in order to implement some firewalls for the HTTP ports, use the mentioned commands:
firewall-cmd --permanent --add-port=80/tcp
firewall-cmd --permanent --add-port=443/tcp
firewall-cmd --reload
Well, that’s it. You have successfully installed and configured the Nginx server on your system. Our next segment is to install the MariaDB Server.
How to install the MariaDB Server?
Now, what is the need to install this server? Well, to sort out your ambiguities, here is a simple reason. When we use CentOS7, instead of using MySQL, it becomes much easier to carry out the installation of the MariaDB package.
MariaDB is undoubtedly studded with better performance and rich features. Use the following command to install the same:
yum install mariadb-server
After installing, simply start MariaDB by typing:
systemctl start mariadb
systemctl enable mariadb
![]()
Check the MySQL version now and initiate the MySQL service.
mysql -v
![]()
Moreover, when it comes to the root user, MariaDB has its own with a different password. Therefore, set the password of MySQL by using this command:
/usr/bin/mysql_secure_installation
The window asks for the current password before setting a new one. You see the below-shown screen on your system.
Type y when the window asks you, ‘Set root password? Y/N’.
The other set of question that you see on the screen are as follows with the appropriate solutions:
New password: ‘Enter your desired password here’
Re-enter new password:
Disallow root login remotely - Y/N
Remove anonymous users - Y/N
Reload privileges tables - Y/N
At the bottom of the window, you will see a message saying, ‘Thanks for using MariaDB’.

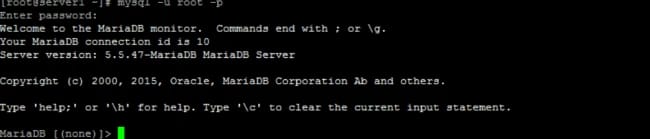
Now, to launch the MySQL command line, you can type:
mysql -u root -p
Enter the password that you had set a few minutes back.
Now you can create a database by typing:
create database database_name
The following snapshot shows the output of your command.

Now, the next step is to create a user and grant permissions.
GRANT ALL ON databasename.* TO user@localhost IDENTIFIED BY 'password'

The command includes GRANT ALL, this simply allocates the privileges to that particular user for the mentioned database. Privileges including reading data, deleting data, or adding the data.
Now, save the password as well as the username. You will require these credentials to establish a connection between the MySQL database and your website.
Moreover, if you wish to see the list of the databases you created, follow:
show databases;
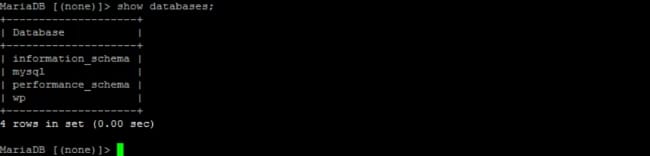
You can easily see the list of all the databases that you created. Enter quit and exit the console.
That’s it.
Now, it’s time to test the PHP configuration.
Type the following commands:
<php
phpinfo();
phpinfo(INFO_MODULES);
?>
Now, simply type
http://your_server_domain_or_IP/info.php
Now, if you see this window on your screen, that indicates that you have successfully set up PHP with Nginx.

If you previously built a test page then do not forget to delete the index.php file containing phpinfo(). As it can allow some unauthorized users to know about your configuration.
Conclusion
LEMP stack installation on Linux is not an easy task, however, we hope that this article assists you in successfully carrying out this process. If in any step throughout this installation you were faced with any issues, or have any questions regarding this topic, please leave a comment in the comment section below.
