
Windows Server is one of the most widely used operating systems in IT and networking, developed by Microsoft. It is available in two main editions: Core and GUI, each with its own advantages and disadvantages. In this article, we will focus on the Core edition. This version is designed to minimize resource usage and enhance security, and it comes without a graphical interface, allowing server administrators to manage servers using command-line tools and PowerShell scripts. Join us at MONOVM as we explore the nature of Windows Server Core, the latest features in the 2025 edition, and the details of installation, configuration, and management of Core servers.
What Is Windows Server Core?
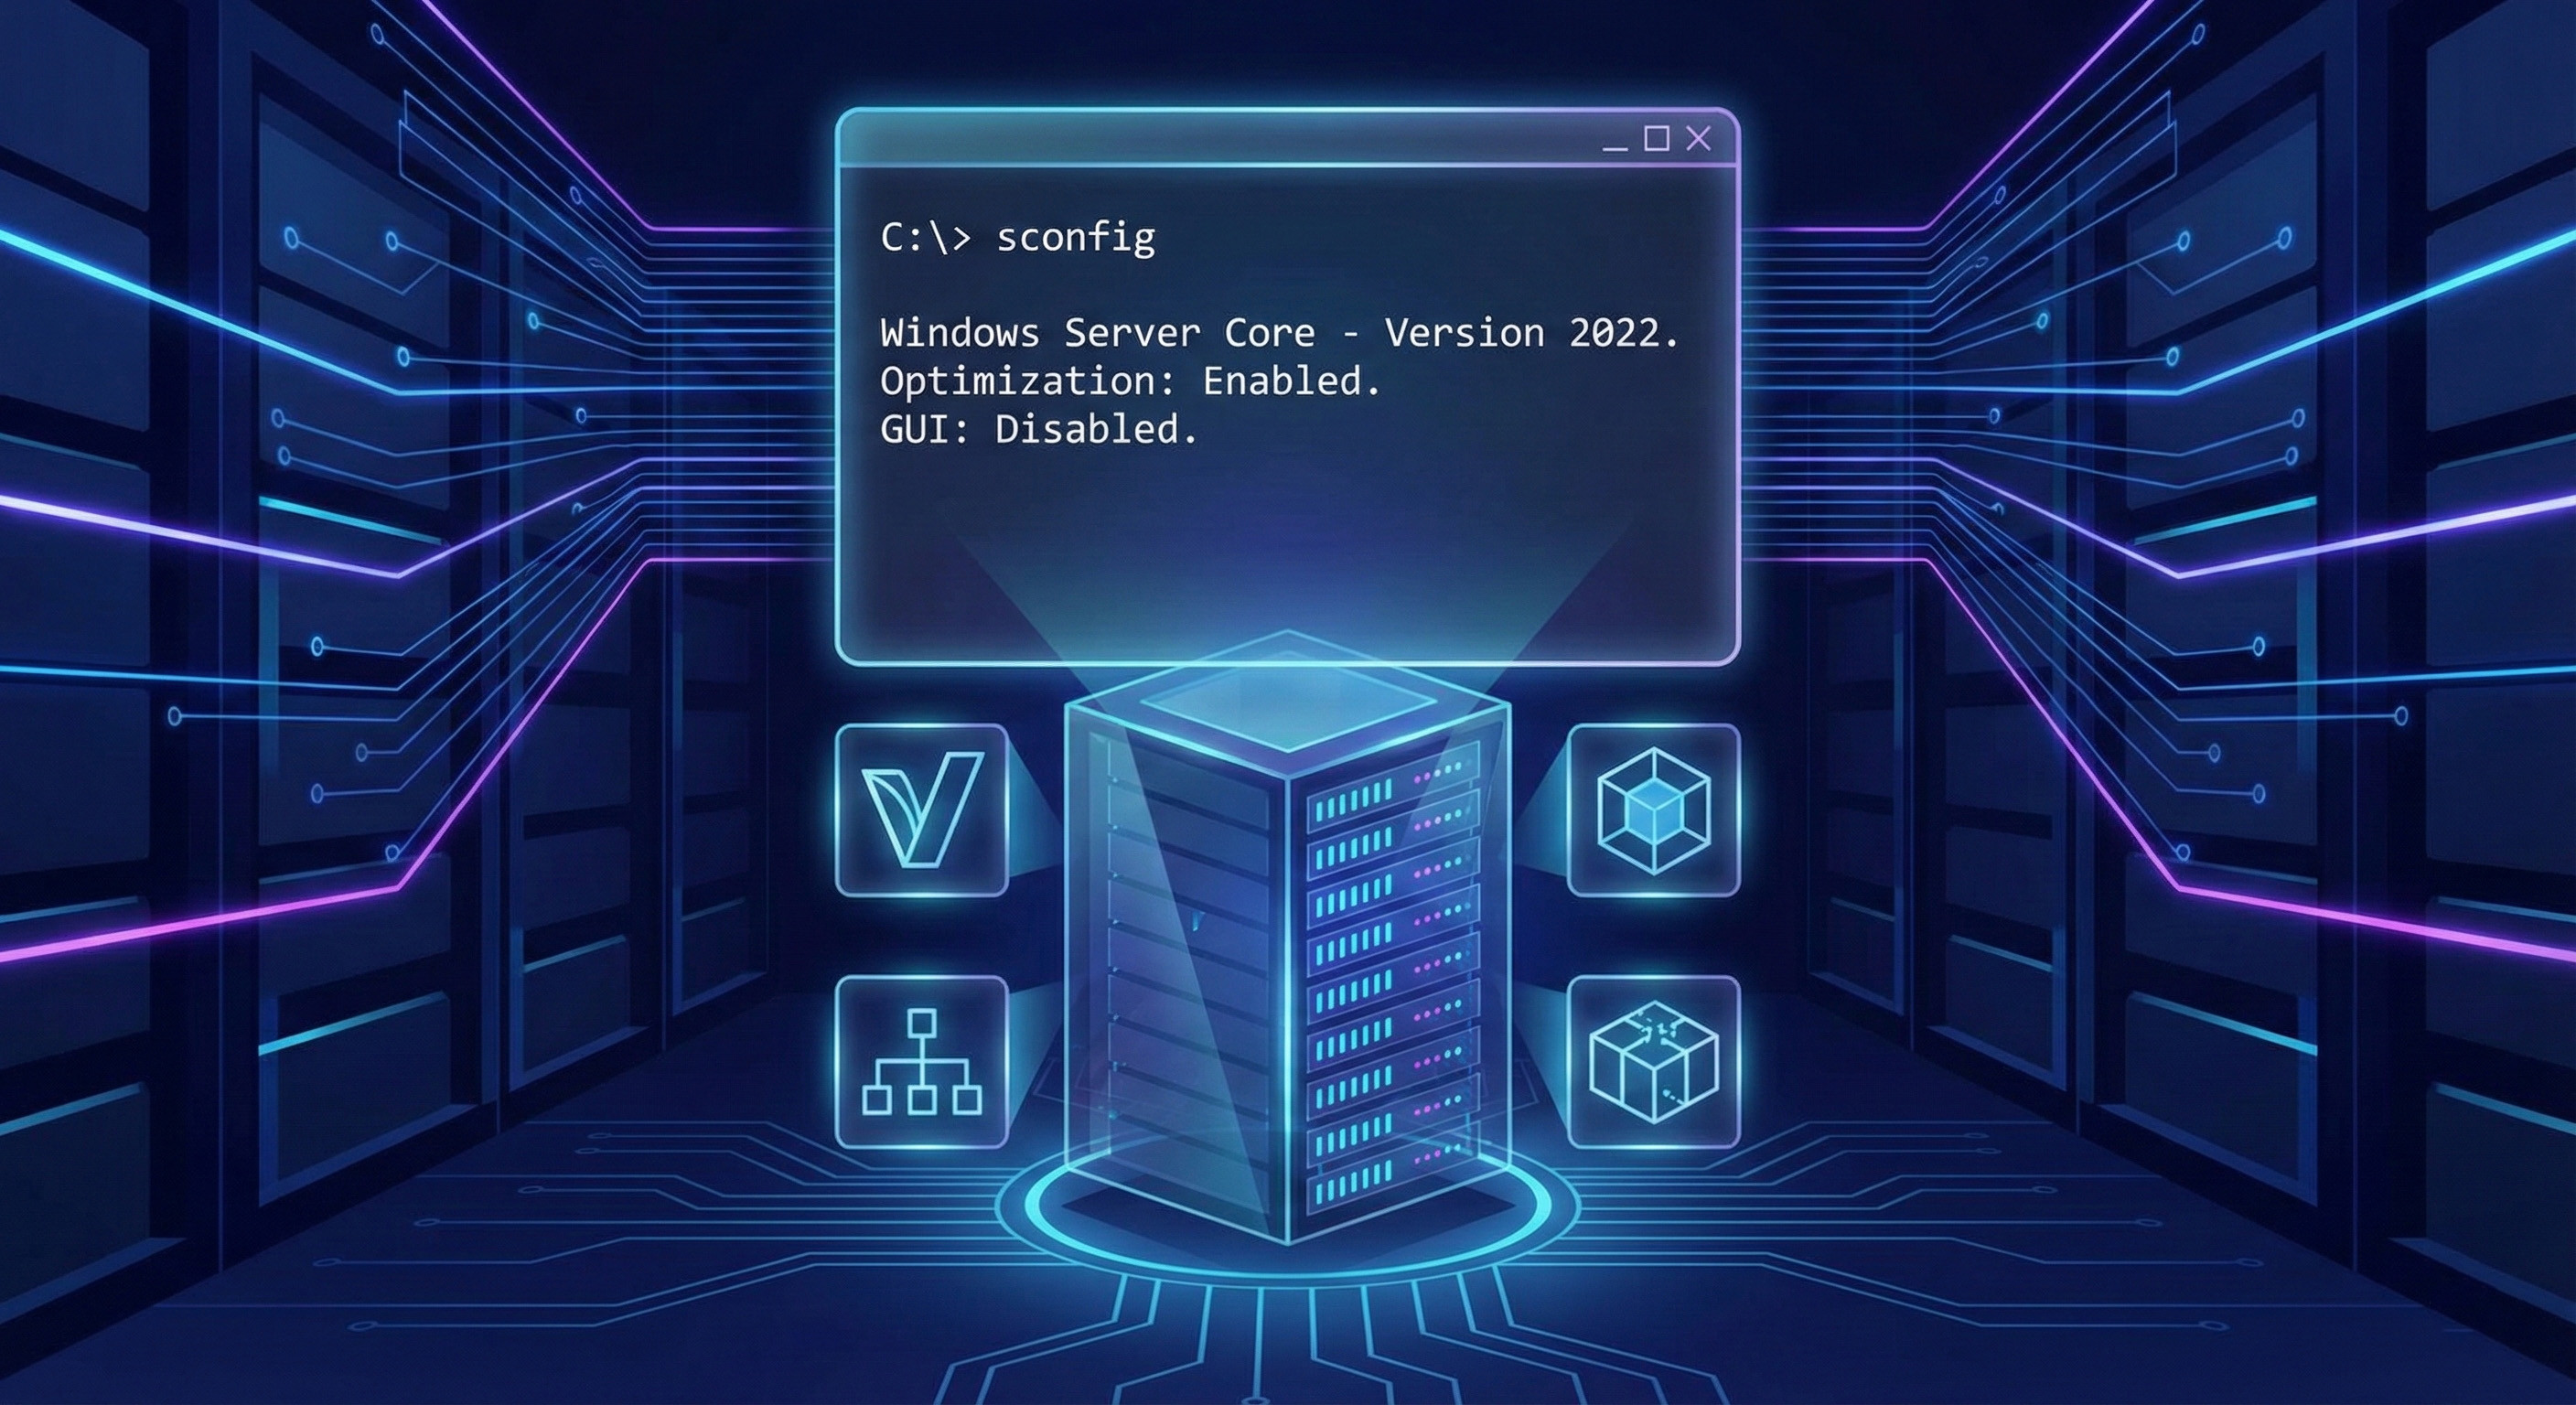
Windows Server Core is an installation option you can choose when deploying the Standard or Datacenter editions of Windows Server. It is essentially a streamlined and optimized execution mode of the Windows Server operating system that includes only the essential components required for running critical server infrastructure.
Microsoft designed Server Core with one main goal: removing all non-essential components, especially graphical user interfaces (GUI). This approach allows you to deploy your server in environments where local graphical access is unnecessary, such as Hyper-V hosts, Active Directory domain controllers, or Docker container hosts.
Minimal Footprint Architecture and Security Benefits
One of the most defining characteristics of the Windows Server Core base is its lightweight architecture and small footprint. This minimal design is the result of removing the main Windows graphical shell packages (such as the Microsoft Windows Server Shell Package). Eliminating these graphical components leads to several practical benefits, including reduced resource consumption, increased security, and improved system stability, among others, which we will discuss later.
Remember that Server Core has no traditional desktop, so all management must be done through text-based tools. windows server core command line or PowerShell serves as the main interface for installing roles, configuring networking, and handling daily tasks.
If you are not yet familiar with the general concept of Windows Server, read What is a Windows Server post.
Windows Server Core 2019, 2022 & 2025: Version Overview
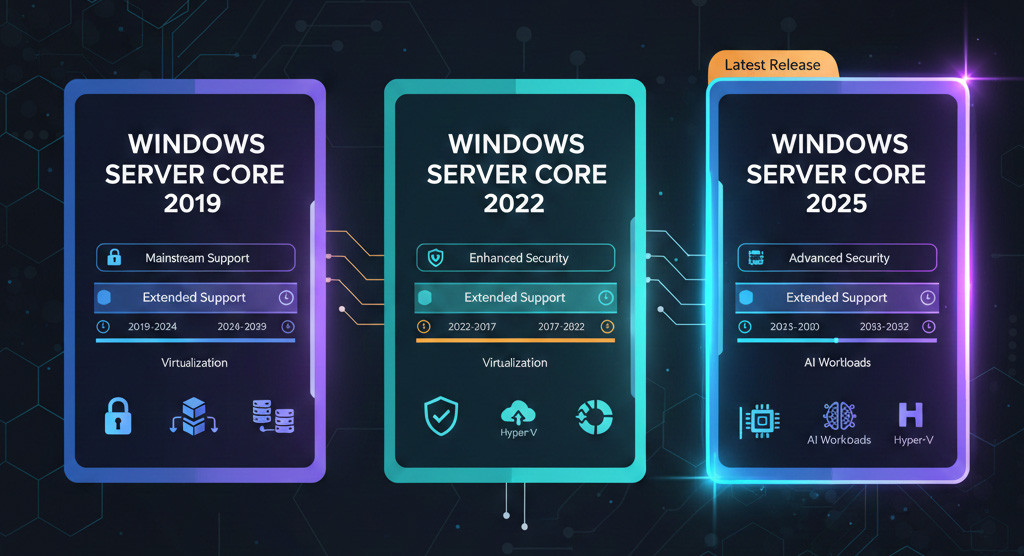
Windows Server Core is released as part of the Long-Term Servicing Channel (LTSC), which is designed for stability and long-term support, offering 5 years of mainstream support and 5 years of extended support.
- Windows Server Core 2019: Released in 2018, this version is still in use, but its mainstream support ended in January 2024. It is now in the extended support phase, which will continue until January 2029.
- Windows Server Core 2022: Released in 2021, this version introduced advanced multi-layered security, and its mainstream support remains active until October 2026.
- Windows Server Core 2025: The latest version, released in November 2024, will receive extended support until November 2034.
Windows Server Core 2025 delivers all the benefits of previous releases, along with significant improvements for high-demand workloads and hybrid environments. Hyper-V scalability has been dramatically increased, allowing servers to support up to 4 petabytes of host memory and 240 terabytes of RAM with 2048 virtual processors for Gen 2 virtual machines. In addition, GPU partitioning with live migration enables efficient execution of AI and edge inference workloads.
For a complete comparison of different versions of Windows Server and choosing the best version for you, you can refer to Best Windows Server Versions blog post.
Windows Server Core Features & Benefits
Why should you choose Server Core instead of the more convenient Desktop Experience option? In reality, the benefits of Core go far beyond saving disk space.
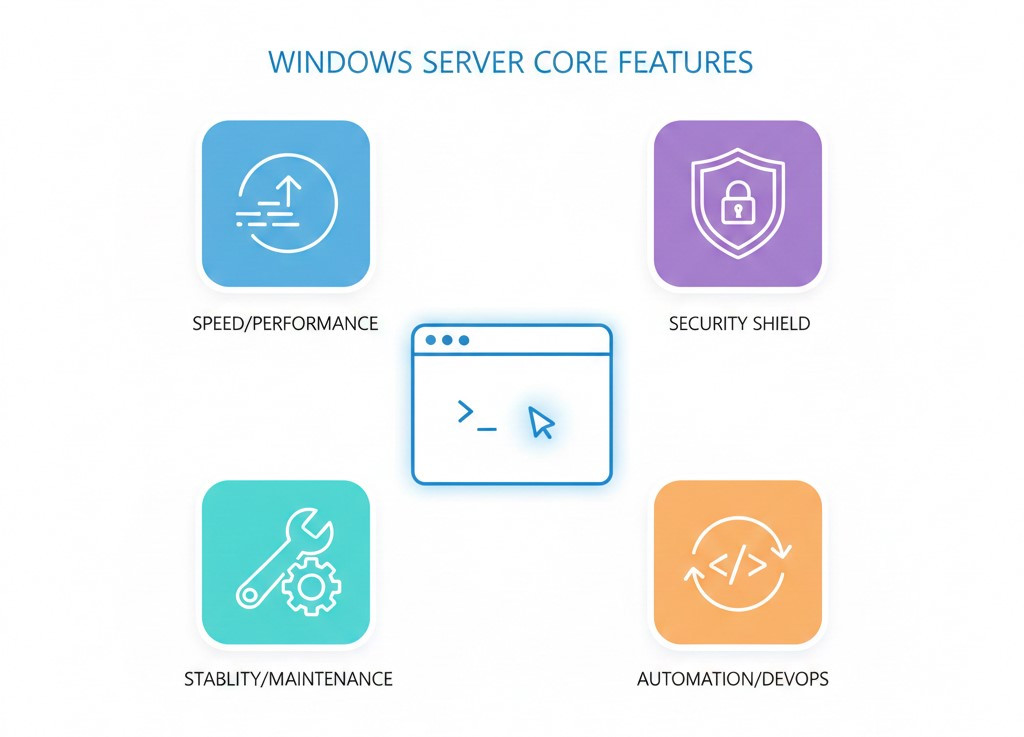
Outstanding Performance
By removing graphical components, Server Core significantly reduces operating system overhead. This means your server boots faster, reboots take less time, and the OS uses far fewer CPU and RAM resources, ensuring better performance for your primary applications.
Security Built Into the Architecture
A major advantage of Core is the drastic reduction of the attack surface. When an attacker attempts to compromise your server, potential entry points such as unnecessary services, graphical components, or even installed browsers are minimized. This built in hardening helps you meet strict compliance standards more easily.
Simplified Maintenance and Operational Stability
Core reduces the number of required patches. More importantly, without a graphical interface, operating system management is performed only through remote and automated tools such as PowerShell or Windows Admin Center WAC. This approach removes the tendency for administrators to log in locally, make manual changes, or install unauthorized software. This operational discipline ensures long term stability of your servers.
Automation and Alignment With DevOps
Server Core naturally promotes scripting and automation Infrastructure as Code. You can manage complete Core environments using PowerShell DSC, Terraform, or other automation tools. This capability is essential for scalable and modern infrastructures.
To better understand these benefits, we recommend reading the post Windows Server 2025 Features.
Windows Server Core vs Standard (Desktop Experience)
When you install Windows Server, you must decide upfront whether you want Core or Desktop Experience. Starting with Windows Server 2016, you cannot switch between these two modes later, so your initial choice matters.
|
Feature |
Windows Server Core |
Windows Server with Desktop Experience |
|
Local User Interface |
Command line with PowerShell and SConfig |
Full graphical interface with Desktop Shell and File Explorer |
|
Local Management Tools |
SConfig, PowerShell, CMD |
Server Manager and MMC tools |
|
Remote Management Tools |
WAC, RSAT, PowerShell Remoting |
RDP, Server Manager, WAC |
|
Minimum RAM (2025) |
2 GB |
2 GB, 4 GB recommended |
|
Attack Surface |
Very low |
Higher |
|
Overhead |
Lightweight |
Heavier with higher resource usage |
|
Use Cases |
Datacenters, containers, Hyper-V, DNS servers, DHCP servers |
General use and desktop-based applications |
These differences show you that each option serves a completely different purpose.
If you run infrastructure roles, Core gives you the best results. BUT, If you need to run applications that depend on a local graphical interface, then you should choose Desktop Experience
Important note: Since Windows Server 2016, you cannot move from Core to Desktop Experience. If you later decide that you need a GUI, you must reinstall the entire operating system.
Windows Server Core Licensing (2022/2025)
A major change in the latest versions of Windows Server is the move to CPU core-based licensing. Instead of licensing by the number of processors, you must license each physical core. Microsoft’s minimum licensing requirements specify that you must license at least 8 cores per processor and at least 16 cores per server, even if your server has fewer cores. In addition, licenses are sold in 2-core packs.
windows server core licensing calculator
For precise planning, you can use online license calculators. Tools such as the HPE Windows Server Core Licensing Calculator or Microsoft’s calculator ask you to enter the number of processors and the number of cores per processor, then calculate the total number of 2-core packs you need. For example, if you have a server with two 8-core processors, you must license at least 16 cores (8 × 2), which equals 8 two-core packs.
How to install and configure Windows Server Core
In this section, we will review how to install Windows Server Core from download to initial configuration.
1. Windows Server Core Download
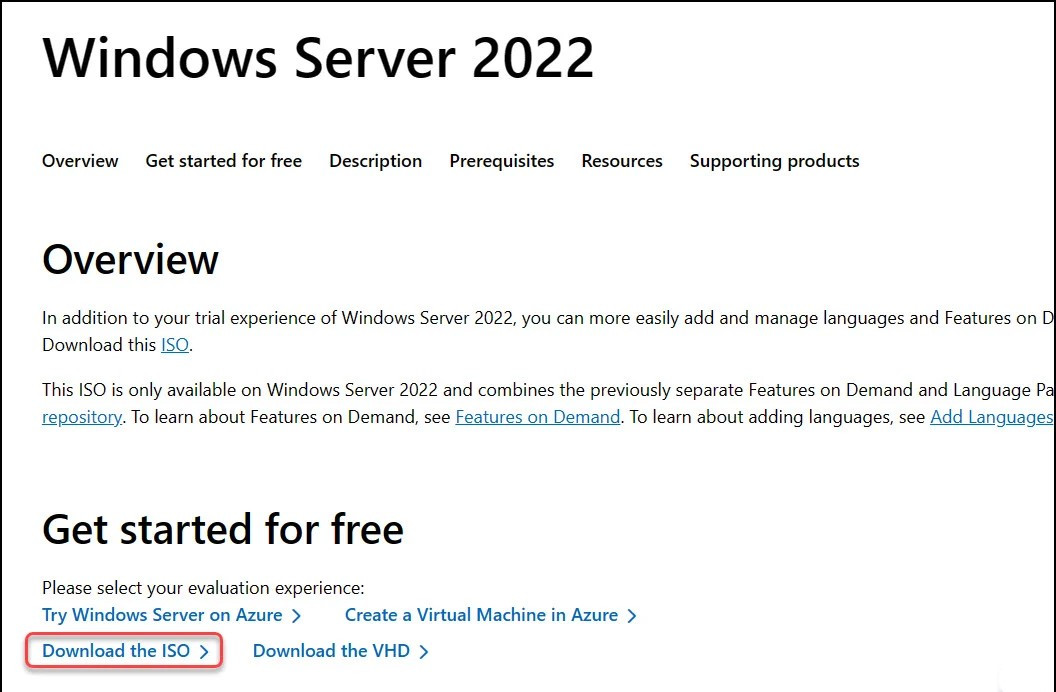
To get started with Server Core, you first need to obtain its installation media. To download the Windows Server Core ISO or VHD, you can use Microsoft’s official sources:
- Microsoft Evaluation Center: Provides 180-day evaluation editions that allow you to test both Standard and Datacenter Core versions.
- Volume Licensing Service Center (VLSC): For customers who have purchased licenses.
The installation file is typically provided as an ISO that includes both Core and Desktop Experience options for Standard and Datacenter editions. Supported platforms for LTSC Core releases (including 2025 and 2022) are focused on x64 architecture.
2. How to Install Windows Server Core (Step-by-Step Guide)
The installation process for Server Core is very similar to Desktop Experience, but you must pay close attention at one critical step. The boot and setup flow works as follows:
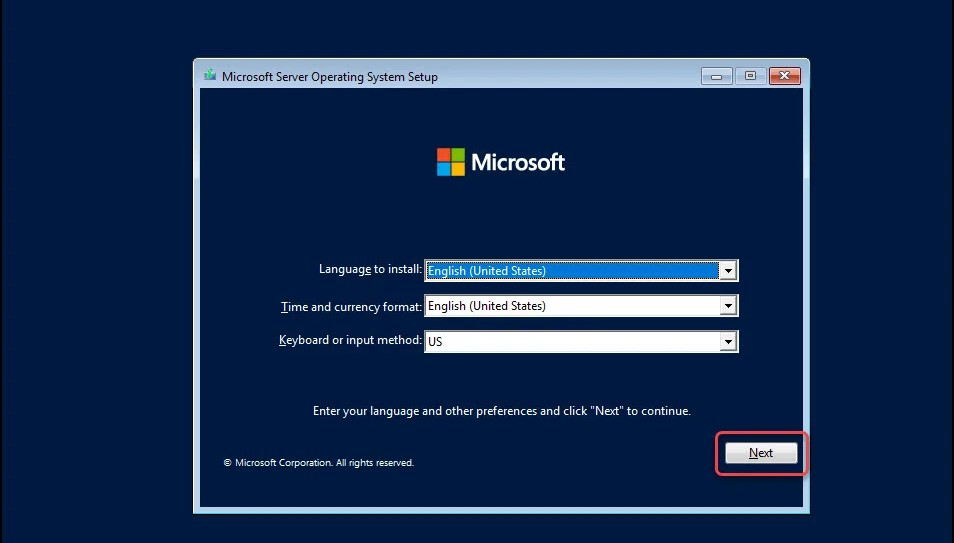
Step 1: Boot from installation media: Boot the system using the ISO or USB.
Step 2: Select language and region: Choose your locale settings.
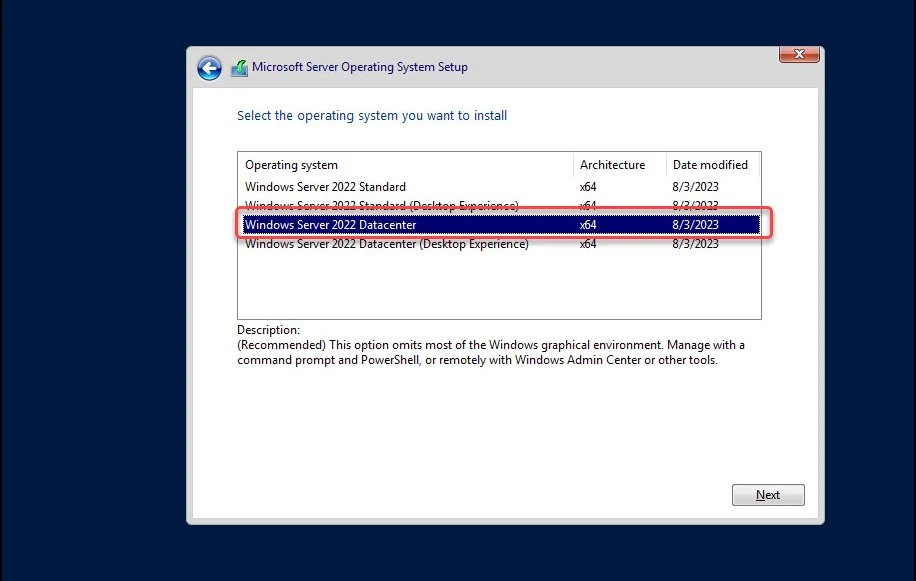
Step 3: Select the edition (Critical Step): On the edition selection screen, choose an option that does not contain “Server with Desktop Experience.” Core editions usually appear simply as Windows Server Standard or Windows Server Datacenter.
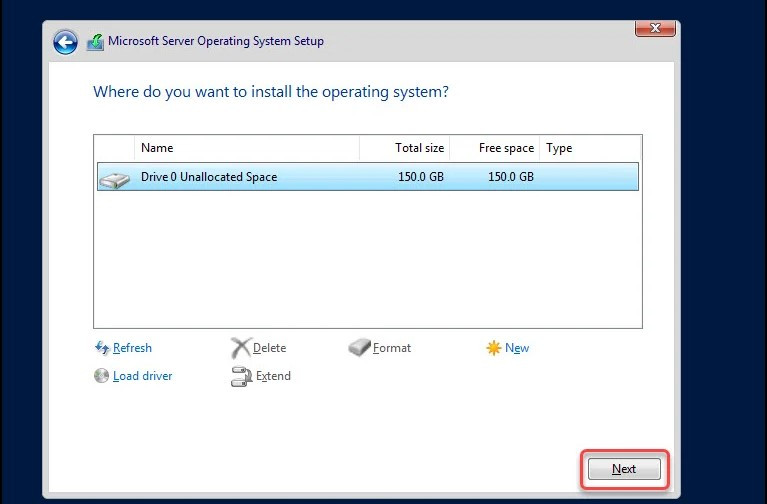
Step 4: Install: Choose the installation drive and let Windows copy the required files.
After installation completes and the system reboots, you will see a command line interface instead of a graphical desktop.
Activation After Installation
After the first login, the system prompts you to set the local Administrator password. Then, to activate Windows Server Core, use the slmgr.vbs command line tool:
slmgr.vbs –ipk <product key> (Enter product key)
slmgr.vbs -ato (Online activation)
cscript slmgr.vbs /dli (Check license status)
Windows Server Core Installation Decision Flow
To help you clearly understand what happens during each installation step and what your role is as the system administrator, the table below summarizes the process, the required actions, and the final outcome of each stage.
|
Installation Step |
Administrator Task |
Final Outcome in Core |
|
Initial Boot |
Select language and region |
Windows Setup starts |
|
Product Selection |
Choose Standard Core or Datacenter Core |
Installed without GUI shell |
|
Password Setup |
Set the local Administrator password |
Login to command line |
|
Activation |
Activate using slmgr.vbs |
License status confirmed |
|
Entering Work Environment |
Start SConfig |
Menu based PowerShell interface in 2022 and later |
Once these steps are completed and you enter SConfig or PowerShell, the system is ready for configuration and you can begin setting up networking, installing roles and features, and applying security settings.
3. Initial Configuration in Windows Server Core
After installation, your first tasks are to configure networking, set the server name, and join the domain. Most of this initial setup is handled through the SConfig tool.
SConfig – Menu-Driven Management Tool
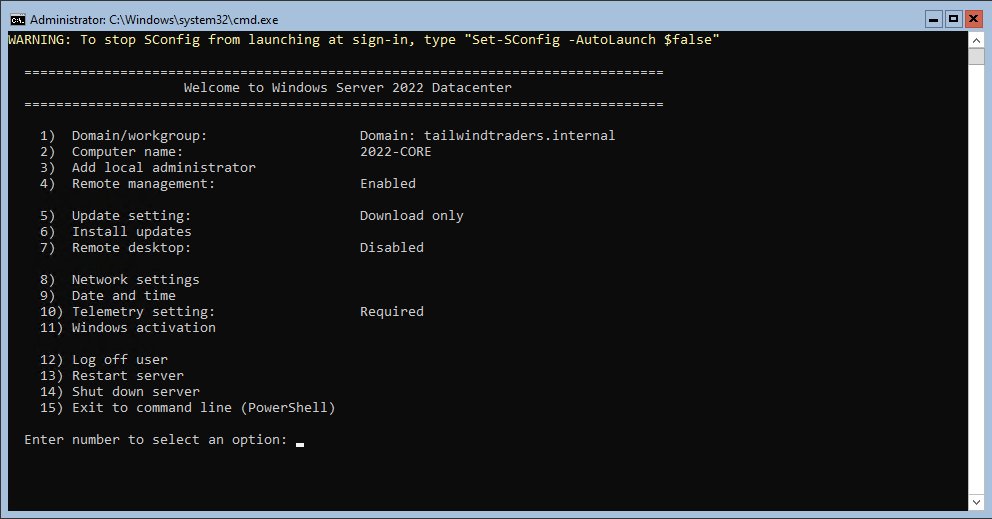
In Windows Server 2022 Core and 2025, the Server Configuration Tool (SConfig) automatically launches after you sign in. SConfig is a menu-based interface built on PowerShell that provides essential administrative functions such as setting the computer name, configuring networking, managing updates, and activating Windows. You can exit SConfig and switch to the full PowerShell environment by selecting option 15.
Networking Configuration Essentials
Networking configuration is critical in Server Core because remote management depends on it.
- Setting a static IP: You can use SConfig (option 8) or PowerShell. The recommended method is PowerShell: identify the network adapter index with Get-NetIPInterface, then configure the static IP and DNS settings using New-NetIPAddress and Set-DNSClientServerAddress.
- Enabling Ping (ICMP): By default, Windows Firewall does not respond to Ping requests. For basic troubleshooting and connectivity checks, enabling ICMP is necessary. To allow ping on Windows Server Core, run the following command in CMD or PowerShell:
netsh advfirewall firewall add rule name="ICMP Allow incoming V4 echo request" protocol=icmpv4:8,any dir=in action=allow
This command adds an inbound firewall rule that allows ICMPv4 echo requests.
Adding to Active Directory
To join the server to a domain or promote it to a Domain Controller (DC), use the following commands:
- Join Domain: You can use SConfig (option 1) or the netdom tool:
netdom join %computername% /domain:mycorp.local /userd:mycorp\administrator /passwordd:*
After joining the domain, the server must be restarted.
- Promote to Domain Controller: First install the ADDS role.
Install-WindowsFeature -Name AD-Domain-Services
Then use the promotion cmdlets such as Install-ADDSDomainController with the required parameters.
Using Windows Admin Center for GUI Management
Server Core is not designed for local graphical management. You must manage it remotely, and the best modern tool for this is Windows Admin Center (WAC).
WAC is a browser-based management portal that you install on another management machine such as Windows 10 or a gateway server. It lets you manage every aspect of your Server Core deployment, including Event Viewer, device management, networking, and more, all through a graphical interface without installing a GUI on the server itself. It fills the graphical management gap in Windows Server Core environments.
Install or Remove Programs on Server Core
To manage Windows Server roles and features, you must use PowerShell.
- View available roles:
Get-WindowsFeature
- Install roles or features: For example, to install the Hyper-V role:
Install-WindowsFeature -Name Hyper-V -IncludeManagementTools -Restart
- Remove roles: For example, to remove DNS and DHCP:
Uninstall-WindowsFeature -Name DNS,DHCP -IncludeManagementTools
You can also install or remove related management tools along with the roles when needed.
Windows Server Core App Compatibility & GUI Options

Server Core cannot run many graphical management tools (MMC) by default. To address this limitation, Microsoft introduced the Server Core App Compatibility Feature on Demand (FOD). This package does not install a full GUI, but it adds essential components such as required DLLs and tools like mmc.exe, enabling the use of the following management consoles:
- Event Viewer (eventvwr.msc)
- Device Manager (devmgmt.msc)
- Disk Management (diskmgmt.msc)
- Failover Cluster Manager (cluadmin.msc)
These tools are critical for troubleshooting and advanced configuration, and installing FOD provides a middle-ground solution that restores important local management capabilities without adding a full graphical shell.
How to Install FOD
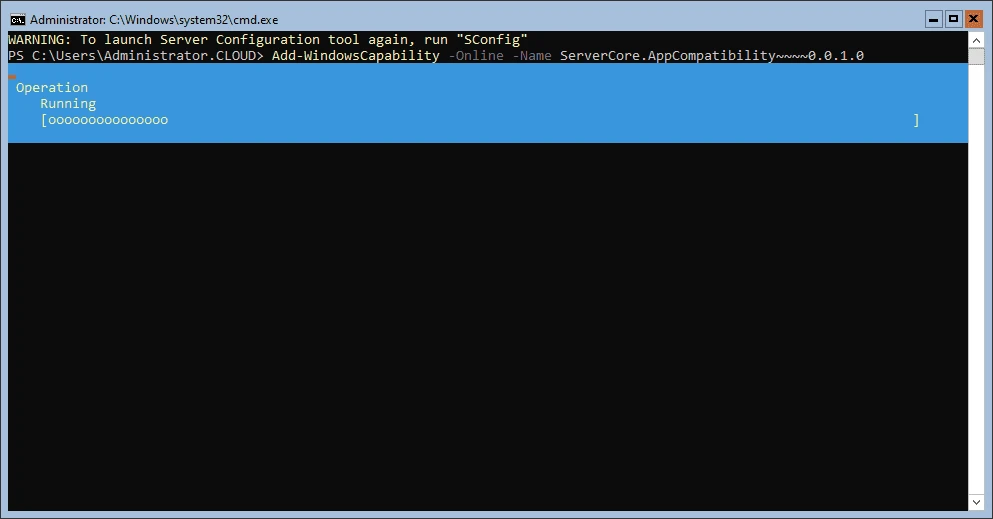
To install the Windows Server Core App Compatibility feature online, use:
Add-WindowsCapability -Online -Name "ServerCore.AppCompatibility~~~~0.0.1.0"
After the installation completes, you must restart the server.
As mentioned earlier, starting with Windows Server 2016, Microsoft removed the ability to switch between Core and Desktop Experience. Therefore, if you need a full GUI, you must install the server from the beginning using the Server with Desktop Experience option.
For a smoother transition between server versions and to ensure you’re using the right migration approach, take a look at the full guide on Windows Server Migration Tools.
Windows Server Core Commands
Mastering the command line is key to managing Server Core. While legacy tools like netsh and netdom still work, it is recommended to use modern PowerShell cmdlets for automation and scripting.
|
Administrative Task |
PowerShell / CMD Command |
|
Open the initial configuration tool |
|
|
Rename the computer |
|
|
Join a domain |
|
|
Set a static IP (using the network adapter index) |
|
|
Activate the server |
|
|
Install a role or feature |
|
|
Display the 20 most recent system events |
|
|
Enable Remote Desktop |
|
We have prepared a complete Windows Server Core CommandS Cheat-Sheet in Mono VM, which you can download from the link below.
Windows Server Core Administration Best Practices
To manage Windows Server Core effectively, keep the following points in mind:
- Regular Backups: Always back up important server data using backup tools. Windows Server Backup is a simple solution for backing up Windows servers.
- Timely Updates: Install security updates promptly. On Server Core, you can manage updates using the Windows Update CLI or Windows Admin Center.
- Logging and Monitoring: Review security events and errors, and use monitoring tools such as Event Log or System Center whenever possible.
- Security Hardening: Remove unnecessary services and roles and enforce strict security policies, such as preventing unauthorized access. Server Core is inherently more secure, but enable services like RDP only when needed.
- Access Control: Avoid adding unnecessary users to the Administrator group and use strong accounts and passwords.
Following these best practices ensures your Core server runs more securely and reliably. For more details, you can refer to the Windows Server Backup post.
Unlock Core-Level Efficiency
As you have seen, Windows Server Core, especially in 2025 release, is an efficient and powerful solution for organizations and developers who want maximum speed, security, and resource efficiency. If you want to use the full power of Windows Server Core on a fast and reliable platform, MonoVm offers the right services for you. We provide Windows VPS servers with full time support, global datacenters, and competitive pricing to help your business grow smoothly. Our infrastructure is fast and fully optimized to deliver the best possible performance for Core.

An experienced tech and developer blog writer, specializing in VPS hosting and server technologies. Fueled by a passion for innovation, I break down complex technical concepts into digestible content, simplifying tech for everyone.