![How to Make a Minecraft Server? [The Ultimate 2025 Guide]](/wp-content/uploads/2020/12/cover996-main.webp)
Setting up a Minecraft server can be challenging, but it's easier with the right advice. This article provides a simple and informative guide on setting up a Minecraft server for Windows and Linux.
As of 2025, Minecraft remains one of the most popular and successful video games of all time. With over 300 million copies sold worldwide and a consistently large active player base, Minecraft remains the best-selling video game ever. This trend is likely to stay strong for years to come.
What is a Minecraft server?
Minecraft is a brilliantly crafted sandbox game that allows players to fight, survive, explore, and build virtually anything they can imagine. One of the game's best features is the multiplayer option, which allows you to play co-op with friends and other players.
Not only can you connect to other worlds on your friends' and family's devices through LAN, but you can also purchase one of Microsoft’s Minecraft Realms, which are worlds where ten players can play simultaneously.
However, by far, the best multiplayer option on Minecraft is through servers. In theory, an infinite number of players can share the playfield with other Minecrafters. Minecraft servers are like upgraded sandboxes where modifications can be made to the game, making the playing experience much more enjoyable.
On servers, players can engage in minigames, meet new people, explore, build, and compete in challenges with other Minecrafters. Every year, thousands more Minecraft servers are created and grow rapidly.
Discover the Minecraft Hypixel IP Address: Connect to the Ultimate Gaming Experience
How does a Minecraft server work?
The Minecraft server is a computer on the internet, in the ordinary sense, serving as a means of communication and data transmission between devices. It's a massive network of computers where information is shared, and servers (usually powerful machines) process the numerous requests, delivering items such as web pages or multiplayer game worlds.
Even if there's a notion that servers are gigantic machines having lots of resources, you can easily not make use of very high-end servers in hosting your Minecraft world. A simple, reasonably fast laptop or PC can be set up as a server, allowing multiple players to connect, interact with each other, and experience real-time updates in the same Minecraft world.
Most people who want to create a Minecraft server choose a good host provider that offers dedicated computers with unique IP addresses, allowing for easy connection from anywhere. It's not unusual for many hobbyists, though, to host servers in their homes using the hardware they own and the IP address provided by their local network. Much like every device that uses the internet, with its unique identifier in the form of an IP address, a Minecraft server also requires the correct server address to join.
Cost of Creating a Minecraft Server

Now that you understand what a Minecraft server is, why people love to play on them, and how they work, you probably have the question: How much will setting up my own Minecraft server cost me?
This can be a tricky question to answer because it depends heavily on your requirements and the path you take to set one up. There are two ways you could go.
-
Purchasing a Minecraft Server:
Buying a Minecraft server from a reputable hosting provider is the easiest way to get started. You pay a monthly fee, ranging from $5 to $100 or more, depending on player count and performance needs, while the provider handles all the technical details. This option offers less control and flexibility but is quick, simple, and may even be cheaper initially.
-
Setting up Your Own Minecraft Server:
Hosting your server on a spare laptop or desktop PC gives you maximum control and the ability to upgrade your hardware as needed. While it’s more complex to set up, the cost for meeting the minimum requirements is around $90 (suitable for 1–2 players). However, an optimal setup for nine or more players could require an investment of at least $1,650 for higher-end hardware. Detailed tutorials are available if you want to try self-hosting your Minecraft multiplayer world.
Best Service Providers for Minecraft Servers
If you’ve decided to go with the purchasing option and buy a Minecraft multiplayer world service from a reputable provider, then there are many options you can pick from. It’s best to stick with the major, reputable ones because these are the companies that you can trust to provide you with a consistent, powerful, and high-quality Minecraft Server!
Depending on your requirements and budget, the business you choose will vary. Here are three of our favorite options that are well worth considering:
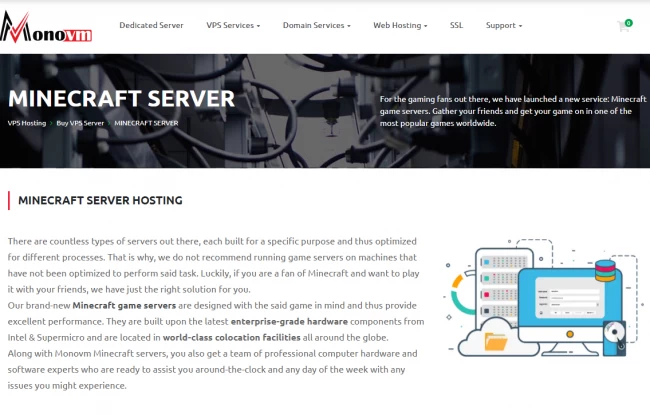
- MonoVM: Believe it or not, our own company (shameless plug for our products) offers not only Dedicated and VPS servers but also Minecraft servers, upon request. We have widened our services to include Minecraft servers and all-inclusive setups at highly affordable prices.
- 1 GBITS: Did you know that you can get your own Minecraft server on the internet up and running extremely quickly and effectively at a price of just a few dollars per month? It’s true, and 1 Gbits is the company you’ll want to get this insane service from.
How to Make a Minecraft Server on Windows?
Now, we're providing a step-by-step guide that will brief you on setting up a Minecraft server on Windows, complete with screenshots.
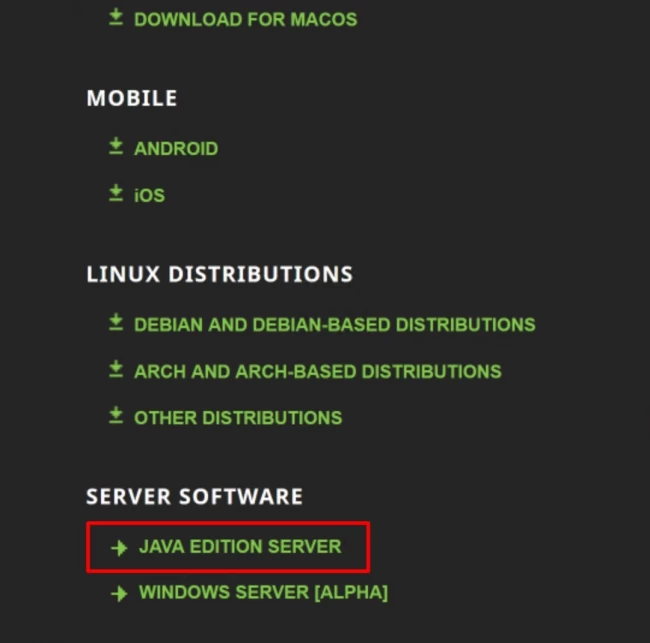
Step 1: First, log in to your Mojang account, which you should have already created to purchase Minecraft. Then head over to https://www.minecraft.net/en-us/download, scroll down to Server Software, and select Java Edition Server.
Step 2: Head over to the official Minecraft Java Edition server download page and press the download link.
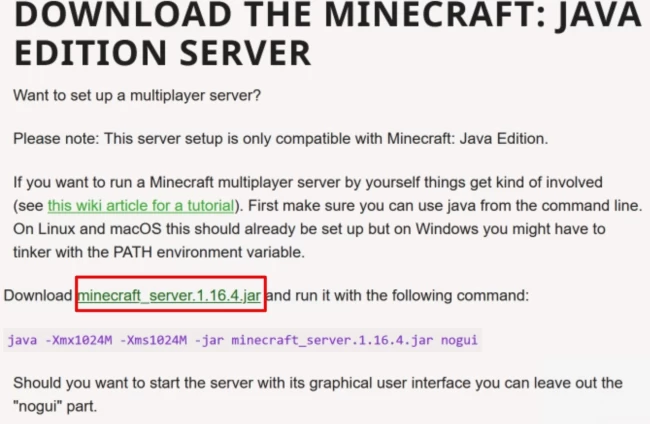
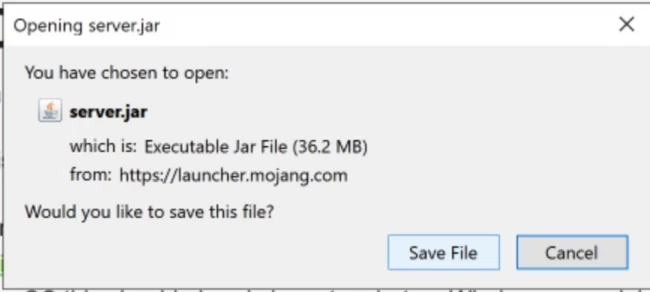
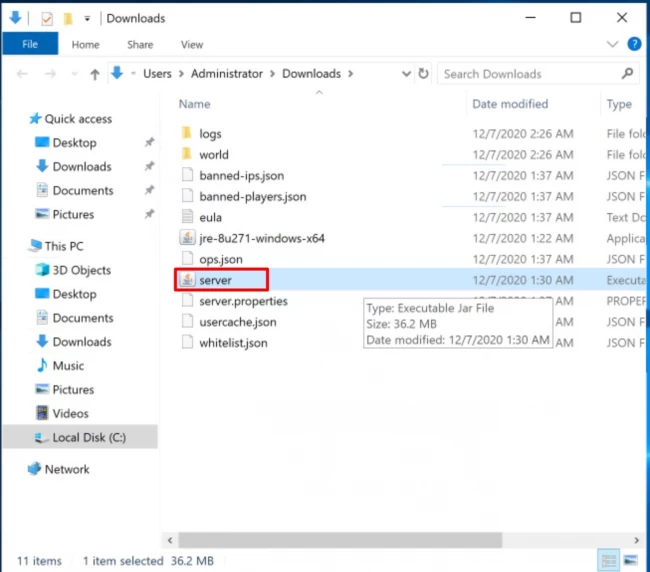
Step 3: In the pop-up window, click Save File and wait for it to download. Once the download is complete, open the server.jar file.
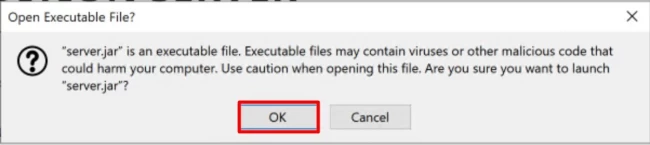
Step 4: Windows will display the “Open Executable File?” warning message. Click OK.
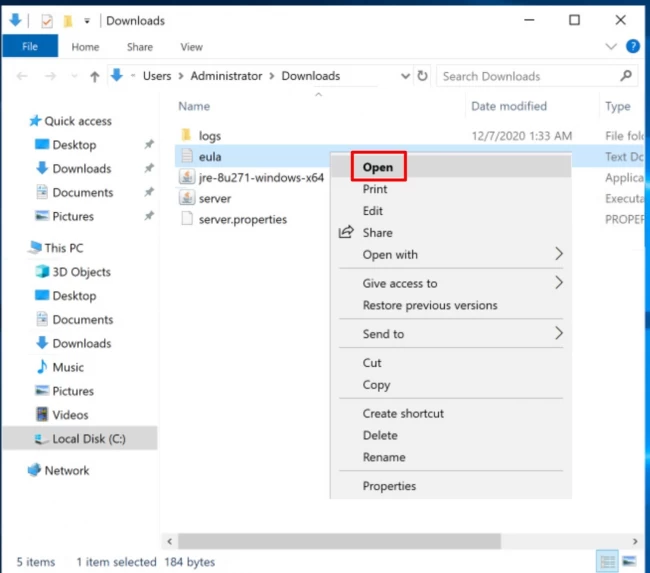
Step 5: Once the server.jar file has been run, you will see a new text file called eula.txt. Open it with notepad or any other desired text editor.
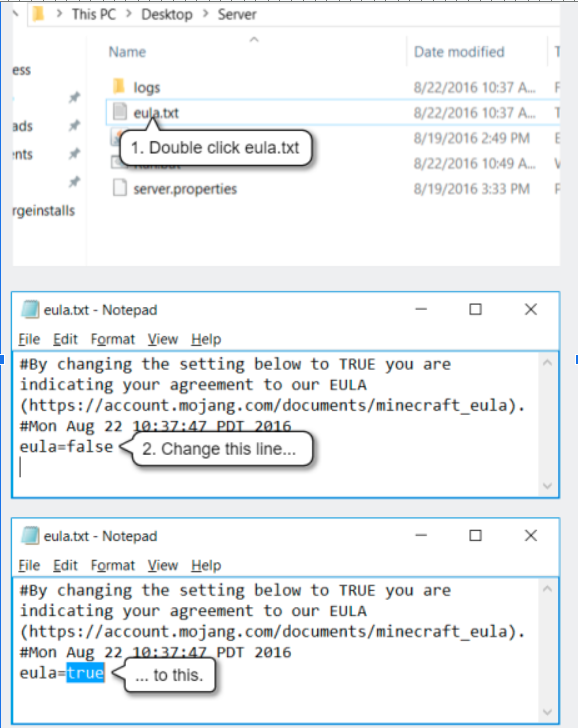
Step 6: In the opened text file, you will see a line that reads 'eula=false'. Delete it and write eula=true.
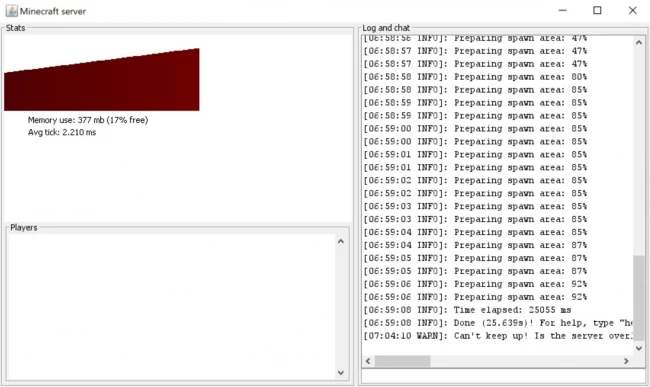
Step 7: Now, rerun the server.jar.
Step 8: The server will take a few minutes to load and become ready for use.
How to Make a Minecraft Server on Linux?
Here, you'll find a step-by-step guide on how to set up a Minecraft server on Linux.
Step 1: To run a Minecraft server on Linux, you require Java. First, check if you have it installed on the server by running this command:
java -version
If you receive an error message, proceed to step 2. If Java is already installed, skip to step 4.

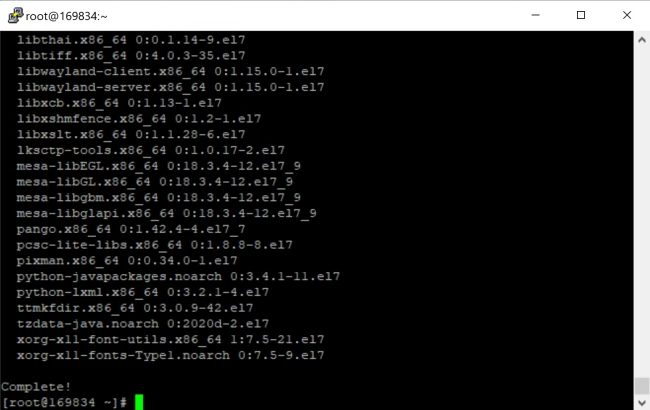
Step 2: Run the following commands to install Java:
sudo yum update
Press Y and enter:
sudo yum install java -y
You should see the following screen when it is installed.
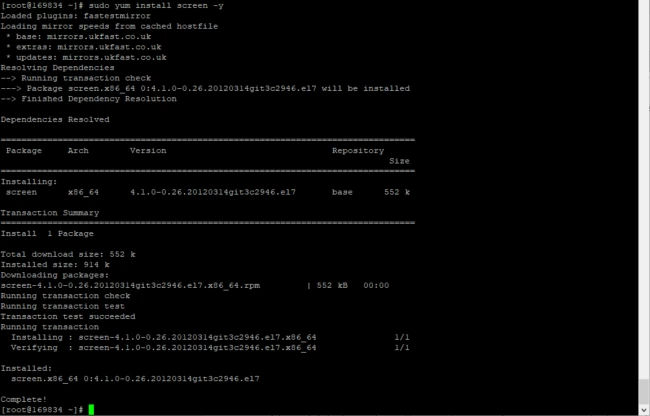
Step 3: Now, install the Screen app.
sudo yum install screen -y
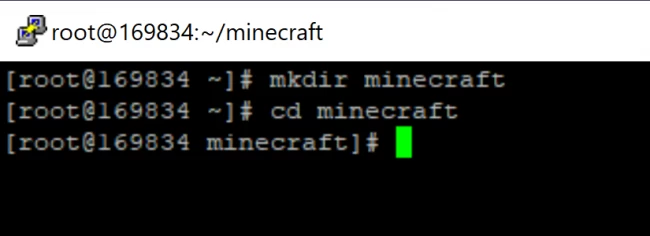
Step 4: Create a new directory to store all your Minecraft configuration files and enter it.
mkdir minecraft
cd minecraft
Step 5: Before downloading the necessary configuration files, install wget first.
sudo yum install wget -y
Step 6: Use the wget command to download Minecraft server files.
wget https://launcher.mojang.com/v1/objects/35139deedbd5182953cf1caa23835da59ca3d7cd/server.jar
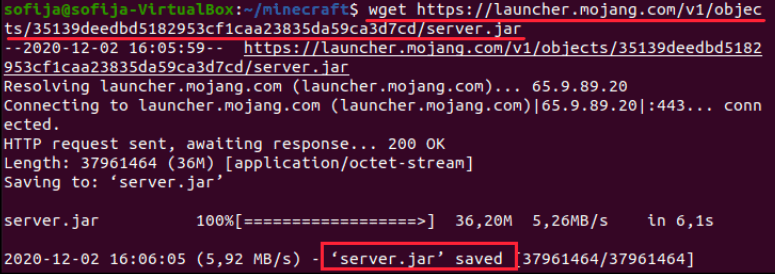
Please note that this link is compatible with Minecraft Server 1.16.4. To look for a newer version, follow this link. If there is one, replace the link in the command with the newer one.
Step 7: Once the download is finished, run the server.jar file with the following command.
java -Xmx1024M -Xms1024M -jar server.jar nogui
This should give you an error because the end-user license agreement has not been accepted.
Step 8: To accept the end-user license agreement, open eula.txt with a text editor and change 'eula=false' to 'eula=true'. Then, save and close the file.

Step 9: Once that is done, run the following command to ensure the server can run in the background.
screen -s “Minecraft server 1”
You should now have the Minecraft server successfully up and running on your Linux system.
Hardware Considerations
The hardware you'll need for a smooth-running Minecraft server depends mainly on how many players you expect to join. Here's a general guideline:
CPU (Processor):
Minecraft is single-threaded and mainly dependent, so a modern processor with high clock speeds (3.0 GHz or higher) is ideal. For small servers (2-4 players), even an older i5 or Ryzen 3 can suffice. However, for more players or heavy mods, a faster server CPU is required.
RAM (Memory):
- 1-4 players: At least 2 GB of RAM
- 5-10 players: 4-6 GB of RAM
- 10+ players or heavily modded servers: 8 GB or more
Running other applications or plugins may require additional memory.
Storage:
- SSDs are highly recommended over HDDs for faster web loading and smoother performance.
- At least 20 GB of free space for the server, world files, and backups.
Network (Internet):
- Reliable broadband with a minimum upload speed of at least 1 Mbps per 10 players.
- Wired (Ethernet) connections are generally more stable and have lower latency than Wi-Fi.
Other Considerations:
- Good cooling to prevent overheating during long play sessions.
- Backup power, such as a UPS, can help prevent data loss from sudden outages.
Scaling with Players:
As the number of players on your Minecraft server increases, so do the demands on your hardware. If you anticipate a large player count, consider:
- More CPU Cores: Additional players put more strain on the processor. Consider a CPU with more cores for larger servers.
- Even More RAM: More players mean more data to store and process. Invest in additional RAM to prevent performance bottlenecks.
- Advanced Storage Options: For extensive worlds or complex server setups, you might want to explore faster NVMe SSDs.
Optimizing Your Minecraft Server Performance
Optimizing your Minecraft server's performance is essential for delivering a smooth and enjoyable gaming experience to players. By implementing effective strategies and configurations, you can enhance server stability, reduce lag, and maximize resource utilization. Here are some tips and techniques to optimize your Minecraft server's performance:
1. Server Configuration:
Fine-tune server settings such as view distance, tick rate, and entity activation range to balance performance and gameplay experience. Adjusting these parameters can significantly impact server performance and resource consumption.
2. Plugin and Mod Management:
Regularly evaluate the resource usage of installed plugins and mods. Remove or replace resource-intensive plugins or mods with lightweight alternatives to reduce server overhead. Utilize plugin optimization tools and profiling plugins to identify performance bottlenecks and optimize resource utilization.
3. Chunk Loading and Generation:
Optimize chunk loading and generation settings to minimize server strain during world exploration and terrain generation. Limit excessive chunk loading by configuring view distance and pre-generating chunks in explored areas, which reduces server load and improves responsiveness.
4. Hardware and Resource Allocation:
Allocate sufficient hardware resources, including CPU, RAM, and storage, to meet the demands of your Minecraft server. Consider upgrading server hardware or migrating to a more powerful hosting environment to accommodate increasing player populations and resource-intensive gameplay activities.
5. Network Optimisation:
Optimize network settings and bandwidth allocation to ensure smooth communication between the server and connected clients. Implement network optimizations such as reducing latency, optimizing packet routing, and prioritizing game traffic to minimize lag and improve player connectivity.
6. Performance Monitoring and Tuning:
Monitor server performance metrics, such as CPU usage, memory usage, and tick rate, using monitoring tools and plugins. Identify performance issues and bottlenecks through performance profiling and analysis. Fine-tune server configurations based on performance data to optimize resource utilization and enhance overall server performance.
7. Regular Maintenance and Updates:
Perform regular maintenance tasks, including software updates, plugin and mod updates, and server optimizations, to keep your Minecraft server running smoothly. Stay informed about the latest updates and optimizations for server software and plugins/mods to ensure compatibility and performance improvements.
By implementing these optimization techniques and best practices, you can enhance the performance, stability, and scalability of your Minecraft server, providing players with an immersive and lag-free gaming experience. Continuously monitor and fine-tune server configurations to adapt to changing player dynamics and evolving gameplay requirements.
Common Problems and Troubleshooting
Setting up and running a Minecraft server can sometimes lead to unexpected issues. Here's a quick guide to tackle some common problems:
-
EULA Agreement Issue: If you see an error message about the End User License Agreement (EULA), follow these steps:
- Locate the eula.txt file in your Minecraft server directory.
- Open it with a text editor.
- Change eula=false to eula=true.
- Save the file and restart your server.
-
Firewall Blocking Connection: Check your firewall settings to ensure it's not blocking the connection. Ensure that the Minecraft server port (default: 25565) is allowed through the firewall on both your computer and your router. You might need to configure port forwarding on your router.
-
Java Memory Errors: If you encounter "out of memory' errors, you will need to allocate more RAM to your server.
- Edit the startup script or command for your server.
- Find parameters like -Xmx and -Xms, which control memory allocation.
- Increase these values (e.g., -Xmx2G -Xms2G) to allocate 2 GB of RAM.
-
Other Issues: For other problems, try the following:
- Consult the Minecraft Server Documentation: Check the official Minecraft server documentation for detailed help.
- Search Online Forums: Many dedicated online Minecraft communities can offer support and specific troubleshooting advice.
Important Note: Always refer to the specific error message you're encountering for more targeted solutions.
Minecraft Realms for Beginners
Mojang's Minecraft Realms is an official, easy-to-use solution for hosting servers, offering a convenient alternative to self-hosting a Minecraft server. In other words, with Realms, say goodbye to complex setups, paying for hardware, or managing server security; all of these are handled by an easy-to-use interface ideally suited for beginners.
Players can easily create a private multiplayer world, invite friends with a few clicks, and enjoy automatic backups and updates. It might be custom-configured to the same extent as traditional server hosting, but it's great for anyone who wants to cooperate and play online without the hassle.
Server Maintenance
Keeping your Minecraft server healthy and secure is crucial for its longevity and ensuring player enjoyment. Here's what you should focus on:
- Regular Backups: Create frequent backups of your Minecraft world, server configuration, and player data. This protects you from data loss due to accidents or corruption.
- Software Updates: Keep both Minecraft and any plugins or mods up to date. This ensures that you benefit from the latest features, bug fixes, and security patches.
- Security Measures:
- Use a strong password for the server admin account.
- Consider using a whitelist to control who can join your server.
- Be cautious of plugins and mods from untrusted sources.
Conclusions
Regardless of whether you use a hosting service, self-hosting from your hardware, or Minecraft Realms, setting up a Minecraft server opens up endless multiplayer possibilities for you and your friends. The whole process can get quite technical, but it rewards you many times: you gain complete control, which is at the heart of customization, and a good community vibe. When considering hardware, optimization, maintenance, and troubleshooting, best practices will ensure that the gaming atmosphere remains smooth and enjoyable for all.
