Windows Firewall is an application developed by Microsoft intended to filter harmful programs coming to your system from external sources and the internet. Through the firewall, it blocks most of the programs from communicating with the system.
When using a public network, Windows Firewall can secure your system from getting unauthorized access attempts by blocking them. Windows Firewall is a silent tool that keeps protecting you from all the threats that have been found for the past decade.
Windows Firewall was first included in Windows XP (back in 2001), and since then it has been improved in each new version of Windows.Windows Firewall can provide your computer or device with protection against attacks from your local network or the internet, while still giving you access to the network and the internet.
Because Windows Firewall filters the traffic that goes on your computer, it can also stop types of malicious software that use network traffic to spread themselves, like Trojan horse attacks and worms.
Another useful capability is that it can filter both outgoing and incoming connections to your Windows computer and block those which are unwanted.
The firewall uses a predefined set of rules for both types of network traffic, but its rules can be edited and changed both by the user and the software that the user installs.
Sometimes the firewall might block some applications that you want to run. There is a way to make it happen by simply allowing the program to run from the Windows firewall settings.
Windows Firewall is a silent ally that helps in keeping our Windows systems safe. However sometimes we need to change some of the default settings to get our work done. One of them is allowing and blocking ports.
Ports are an integral part of the Internet's communication model. They are the channel through which applications on the client computer can reach the software on the server. Services, such as web pages or FTP, require their respective ports to be "open" on the server in order to be publicly reachable.
Allowing specific ports is a security measure to keep the data safe and anonymous. However with the default settings of the Firewall, these ports can be blocked (also for security reasons). You should always take all precautions to secure your server.
Let me give you an example: when using the system for daily works not all ports are being used but only some specific ones. Windows firewall knows these ports and allows them by default. So if any malicious actions were to happen from any other ports they are blocked.
So why should we allow other ports?
There can be multiple reasons why a person wants to open a different port. But the main one is to maintain privacy ad anonymity for the data that travels through them. This article is all about that. We will show you how to allow specific ports through the Windows Firewall.
How to open ports in Windows Firewall
Note: The following tutorial will work for:
- Windows Server 2019
- Windows Server 2016
- Widnows Server 2012 R2
- Windows Server 2012
- Windows Server 2008 R2
- Windows 10
- Windows 8.1
- Windows 8
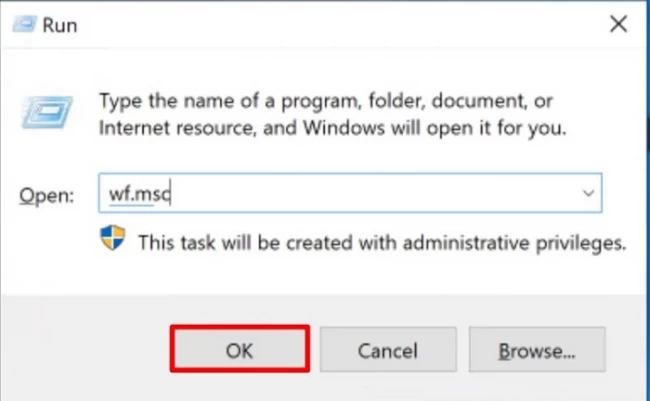
Step 1:
- Open "Run" by pressing Windows key + R (You can check this article to know all about Windows shortcut keys)
- Type "
wf.msc" and click OK
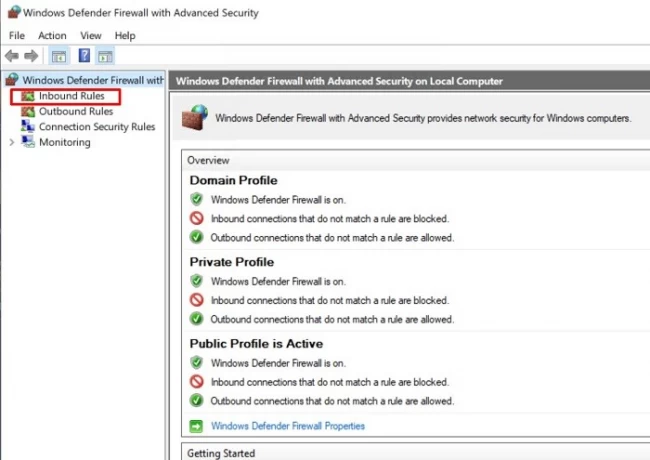
Step 2:
- On the left side menu, click on Inbound Rules
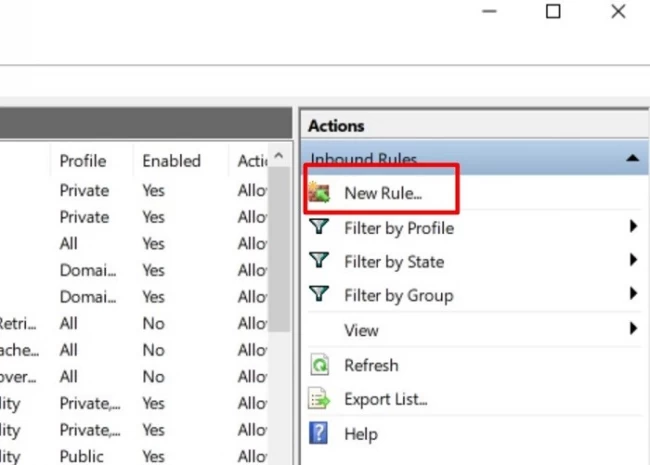
Step 3:
- On the right side of the screen, under Actions tab: Click New Rule...
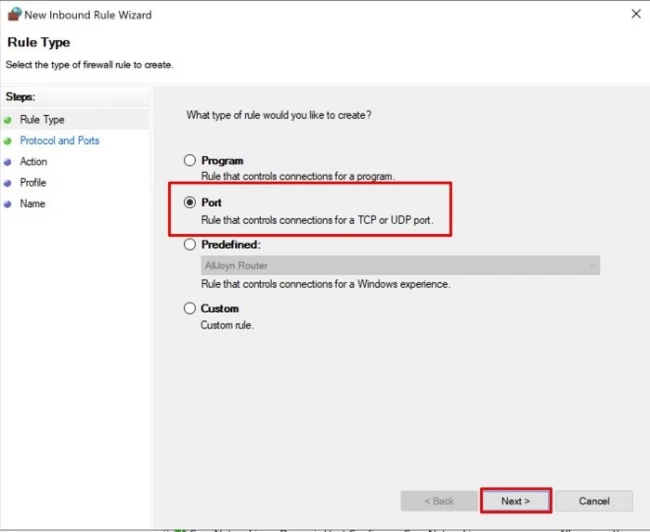
Step 4:
- Select Port and click on Next
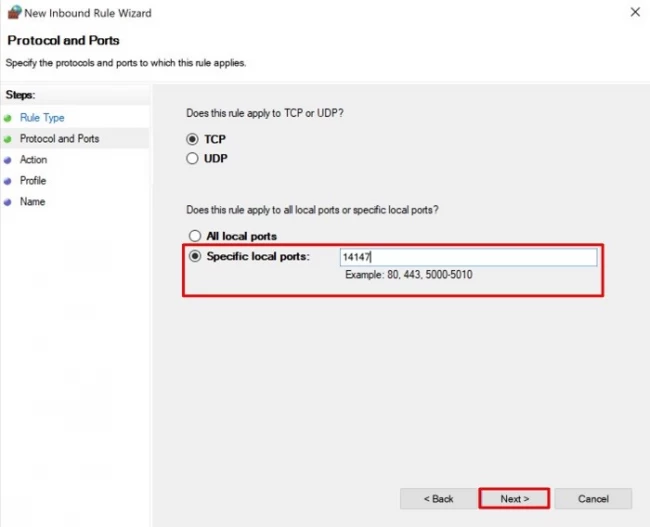
Step 5:
- Select TCP
- select Specific local ports and enter the specific port number. (from 0 to 65536)
- Click Next
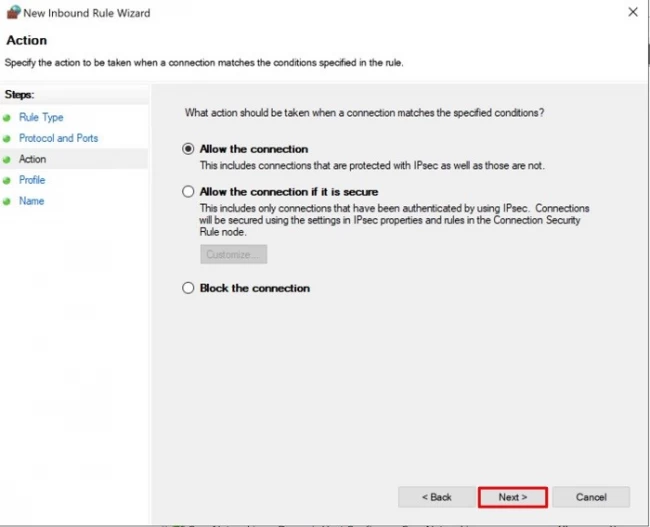
Step 6:
- Select Allow the Connection
- Click Next
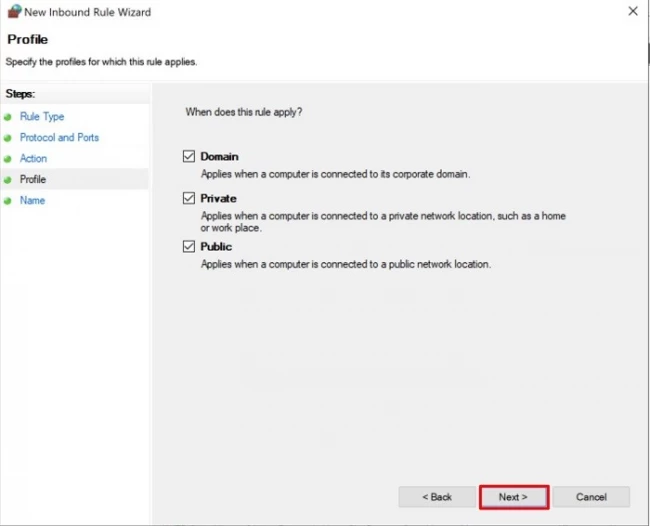
Step 7:
- Be sure to check all the checkboxes (Domain, Private, Public)
- Click Next
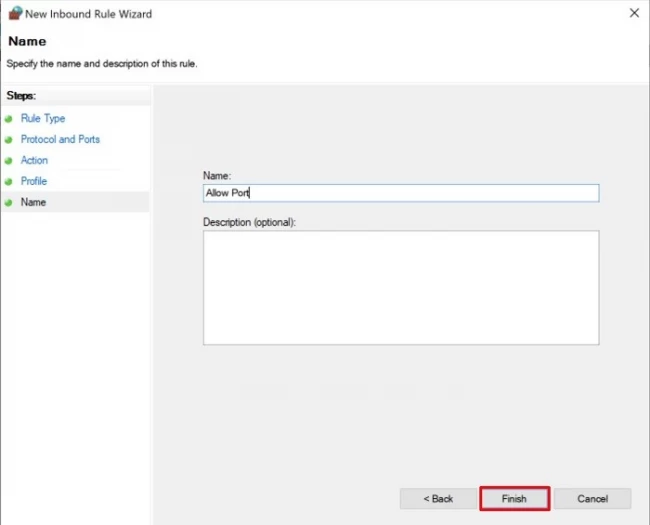
Step 8:
- Enter a Name and click Finish
Step 9:
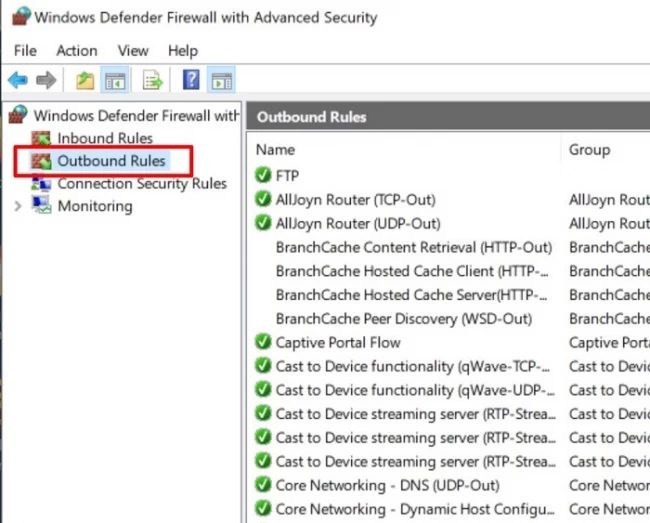
Once the inbound port is set, we should allow the outbound port from the Firewall, therefore:
- On the left side menu, click on Outbound Rules
Step 10:
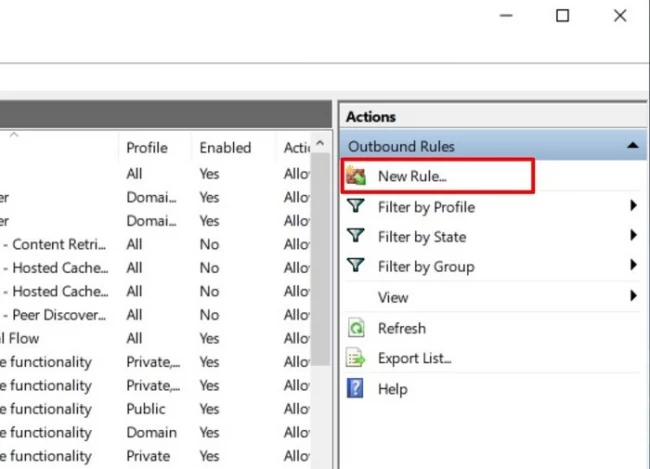
- On the right side of the screen, under Actions tab: Click New Rule...
Step 11:
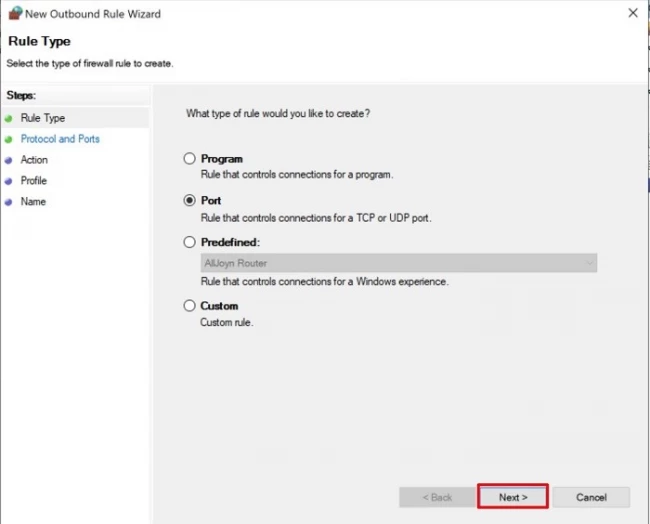
- Select Port and click on Next
Step 12:
- Select TCP
- select Specific local ports and enter the specific port number. You should put the same port number that you used for the Inbound Rule.
- Click Next

Step 13:
- Select Allow the Connection
- Click Next
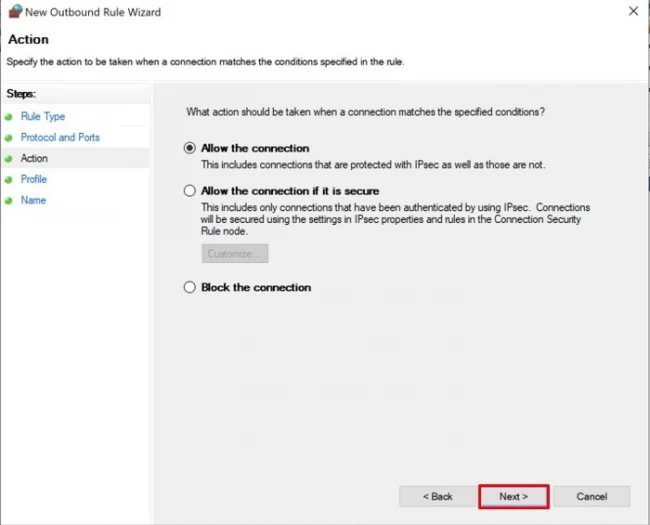
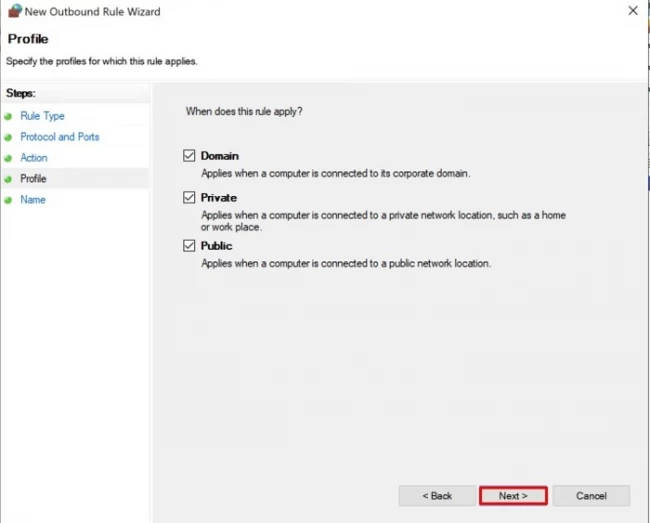
Step 14:
- Be sure to check all the checkboxes (Domain, Private, Public)
- Click Next
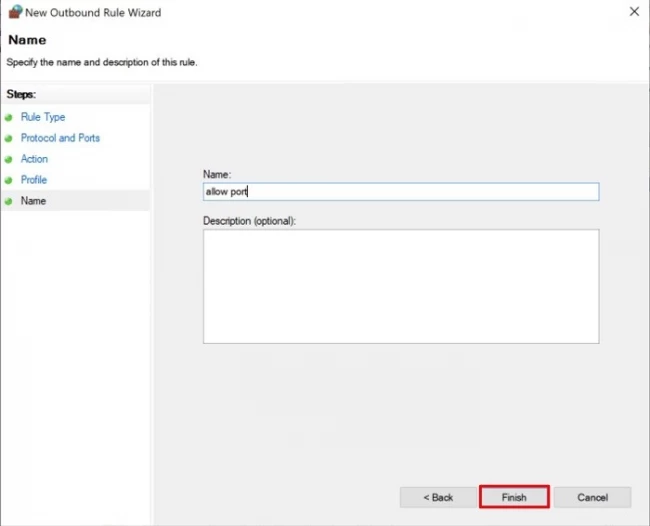
Step 15:
- Enter a Name and click Finish
Congratulations! You successfully allowed a port on Windows Firewall. This will come very handy when you are working with your Windows Server.
Let us know in the coments below how you manged to open the ports and if this article helped you, be sure to share it among your friends who would benefit from this.

I'm fascinated by the IT world and how the 1's and 0's work. While I venture into the world of Technology, I try to share what I know in the simplest way with you. Not a fan of coffee, a travel addict, and a self-accredited 'master chef'.